
B2B SaaS applications
A customer-facing application with its own frontend, backend API, business model and subscription experience.
Customer workspaces · permissions · billing · custom workflowsReact · TypeScriptYour business product. Ready to grow with your customers.
> A workspace for each customer > Workflows shaped around your business > A product you can operate and evolve
A B2B SaaS application gives businesses a place to do their work: with their people, their information and the services they buy from you.
Wildo gives your team an application source project built on its shared runtime packages. You shape the product, choose its customer model and commercial offer, and build the experience that makes it valuable.
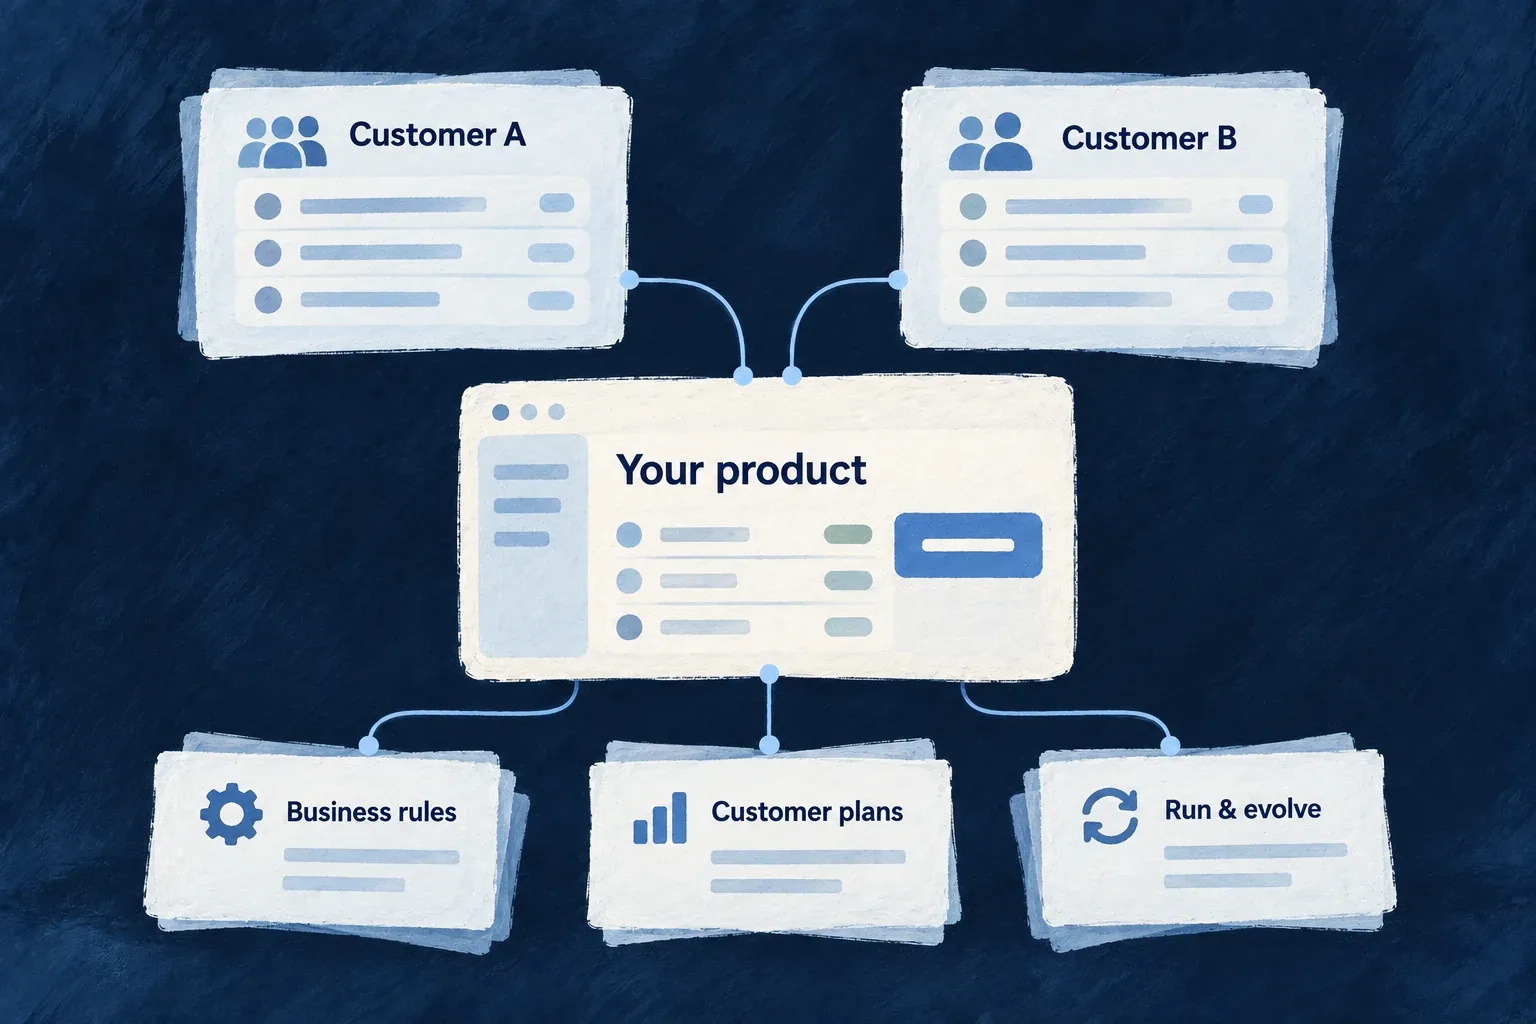
More than the screens your customers see
Give each customer a place to work
Connect people, roles and business records within customer workspaces. Shared application foundations support the product while each customer works in its own declared context.
Make your business the product
Build around your objects, actions and ways of working. Standard forms and APIs share the model; custom behavior and interfaces give the application its purpose and character.
Run a customer relationship
Connect plans and purchased access to everyday use. Administration and environment configuration give your team a way to support, deliver and keep improving the product.
Example: A purchasing service for independent companies
Each company works with its own members and purchase requests. Your application defines approval rules and the screens people use. A professional plan can grant access to a reporting feature you implement, while customer administrators manage their own teams.
For engineers
Start with the shape of the product
Decide who the customer is, which records belong to them, what their users do and how the service is sold. Those decisions become application configuration, business modules, specifications and implementations. A customer workspace, an individual user and a billing account serve different purposes; choose their relationships explicitly.
The result is a source project with a frontend, backend API, shared model and specifications. Wildo’s SaaS skeleton and composition scenarios provide the structure; the coding agent and application author supply the business-specific declarations and code.
Produce the starting project, then add the product
With the Wildo CLI installed and its development prerequisites configured, run wildo init in the intended application directory. Its normal path creates the SaaS skeleton; --config-only is a separate option that creates configuration without the full application structure.
The project then has a declared home for its frontend, API, shared library and specifications. As product modules are added, their contributions enter the corresponding registries. The coding agent can work within that structure to implement the product brief; creating the skeleton is the beginning of that work.
Initialization also attempts to deliver the application-facing knowledge from installed packages. Read its delivery result: a skipped install or unavailable package can leave assets pending. Install the dependencies and use wildo assets sync to deliver them before relying on that guidance.
| Handoff | What it establishes | What to inspect |
|---|---|---|
wildo init | Source structure and application configuration | Generated services, libraries and asset-delivery result |
wildo setup | The authored local environment and its settings | Selected backing services and environment inputs |
wildo local init | Local infrastructure/platform initialization, application registration and runtime projections | Successful initialization and readiness result |
wildo local dev | The application’s development processes | Working API, interface and development signals |
This is the fresh local-project sequence after prerequisites and configuration are in place. To register an application against an already healthy shared platform, use wildo local init --register-only instead of reinitializing that platform. Remote deployment follows the delivery part below.
Make the delivered structure explicit
This selected excerpt from Wonder CRM’s wildo.saas.config.ts shows the connection. It sits inside defineSaasConfig; imports, identity, additional settings and explanatory comments are omitted.
services: {
  backendApi: {
    path: './backend-api',
    serviceName: 'wonder-crm-backend-api',
    defaultPort: 4251,
  },
  app: {
    path: './frontend',
    serviceName: 'wonder-crm-app',
    defaultPort: 4252,
    frontendType: AppFrontendType.SAAS_APP,
  },
  ...applicationExtraServices,
},
modules: applicationModules,
libraries: {
  shared: {
    path: './shared-lib',
    type: AppLibraryType.FULLSTACK,
  },
},
specifications: {
  path: './specifications',
},
applicationModules and applicationExtraServices are application-owned values in this configuration, not global names supplied by every project. The declared shared library exposes the model to its consumers, including the companion through its designated entrypoint. Merely placing a file beside the application does not register it.
Follow a decision through its consumers
| Product decision | Application-owned definition | What is assembled around it |
|---|---|---|
| How customers work together | Organization types, membership roles and resource scopes | Registration and workspace context, with configured access checks |
| What the product does | Resource declarations, operations and custom implementations | Standard interfaces, API contracts and business execution |
| What a customer buys | Products, prices, feature grants and billing setup | Checkout, subscription records and effective entitlements |
| Who operates the service | Application roles and permitted operations | Administration surfaces and backend authorization |
| Where it runs | Services, environments and infrastructure choices | Runtime configuration and deployment files |
Keep business behavior under application ownership
Generated registries combine the selected modules for their shared, backend and frontend consumers. The frontend can use standard controls, resource-specific behavior and custom components; the backend supplies the custom actions and integration logic your product needs. A named action can reuse core behavior or add application-authored processing. A paid feature still needs the implementation and protected consumer that make the grant useful.
Specifications describe the intended behavior for the development workflow. Executable configuration and implementation determine what the running application does. Keep them aligned as the product evolves, and verify the resulting behavior through the application rather than treating generated files as acceptance evidence.
Exercise the customer journey before release
Use two customer workspaces and distinct roles to check registration, membership, record access and custom actions. Exercise both permitted and refused requests through the API as well as the interface. Then verify the configured purchase journey, provider events, entitlement changes and the target deployment environment.
These are application acceptance checks: the examples below explain the authoring contracts, not a claim that an arbitrary generated application has already passed them.
Give each customer their own working context
A customer workspace brings people, roles and business records together. It gives a company a place in your product without turning every customer into a separately developed application.
You define how workspaces are created, who belongs to them and which information and actions belong within their boundaries.
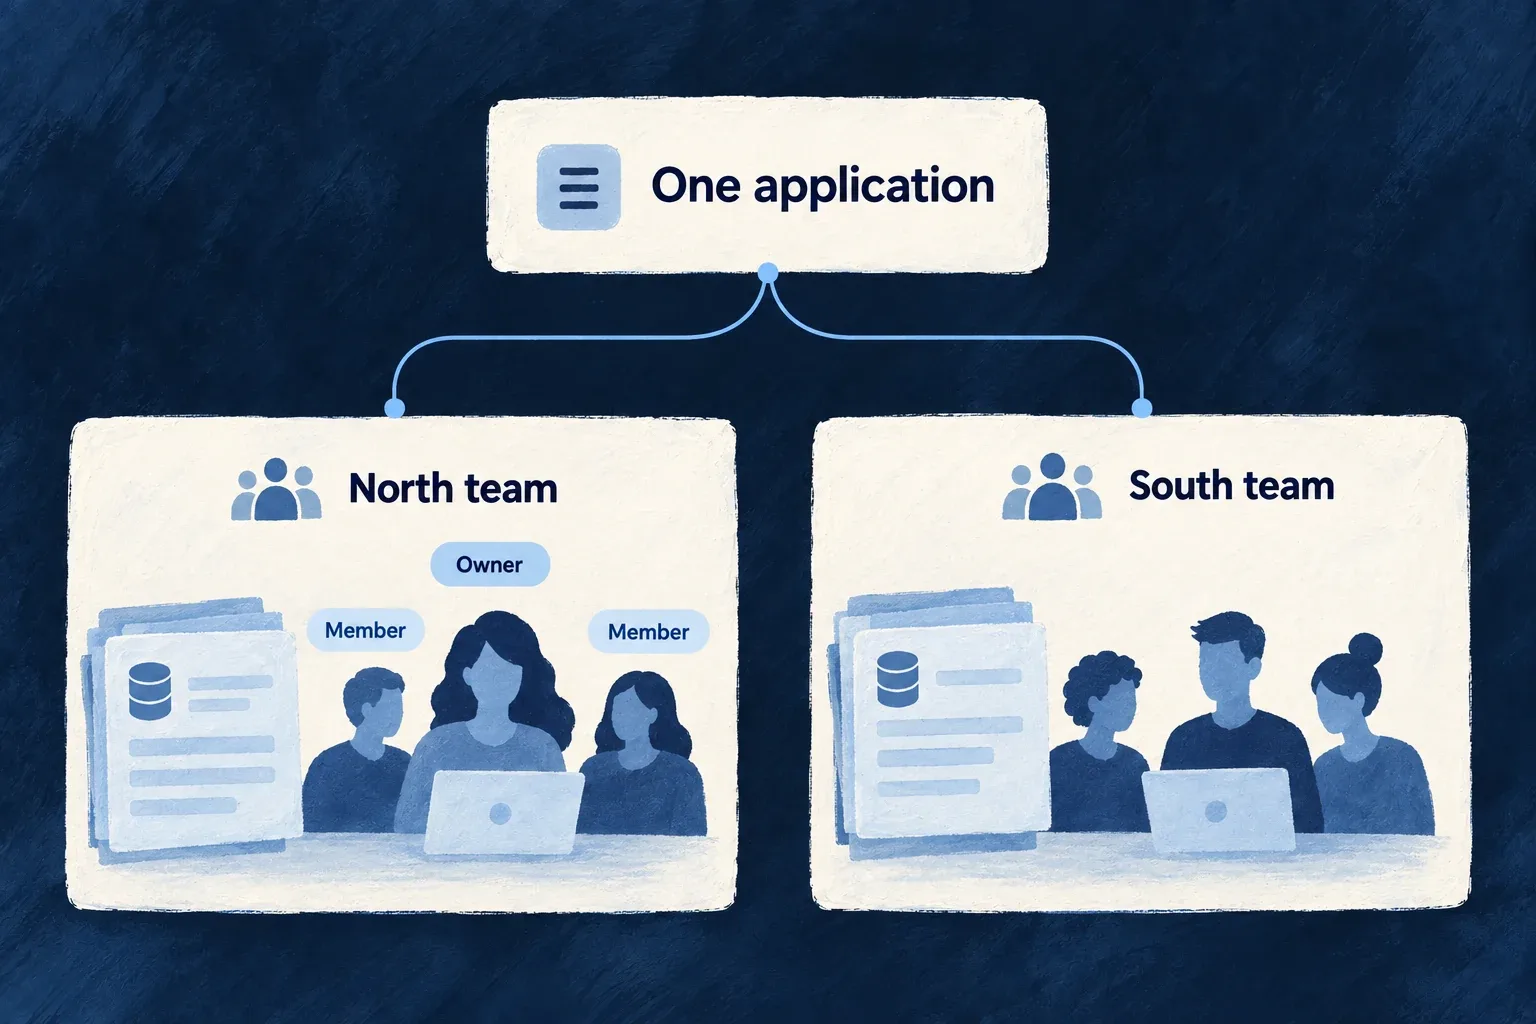
A customer relationship with a clear home
Bring the right people together
Configure membership and roles around the way customers work. A workspace owner, administrator and member can have different responsibilities within the same company.
Keep work in its context
Associate customer records and actions with the appropriate scope. Ownership and access rules make the workspace meaningful beyond the name shown in the navigation.
Choose how customers begin
Decide whether registration creates a workspace and which role its creator receives. Shape onboarding around the account model your product actually uses.
Example: Two companies use the same service
North and South each have their own team and purchase requests. A North administrator invites colleagues into North; membership in South does not give those colleagues access to North’s records. The application declares and checks those boundaries.
For engineers
Define membership and creation together
Organization configuration lives in the application’s backend configuration. This selected Wonder Todos example defines a workspace organization type. Other organization options, including directory provisioning, are omitted.
organizationTypes: {
  workspace: {
    userTypes: ['member'],
    availableOrgRoles: [
      CORE_ORG_ROLES.ORG_OWNER,
      CORE_ORG_ROLES.ORG_ADMIN,
      CORE_ORG_ROLES.ORG_MEMBER,
    ],
    defaultMemberRole: CORE_ORG_ROLES.ORG_MEMBER,
    authOverrides: undefined,
    creationPolicy: {
      createOnUserTypeRegistration: ['member'],
      orgNameSource: OrganizationNameSource.ASK,
      defaultOwnerRole: CORE_ORG_ROLES.ORG_OWNER,
    },
  },
},
The member user type is declared elsewhere in the same application. Registration for that type creates a workspace under this policy, asks for its name and gives the creator the owner role. defaultMemberRole separately describes ordinary membership; it does not make every subsequent member an owner.
This configuration belongs alongside the application’s selected organization and identity mechanisms. It describes a configured customer model, not a rule that every Wildo application must use organizations.
Carry the boundary into business resources
An organization type does not, by itself, partition every custom table or endpoint. Declare the primary scope and relationships of customer-owned resources, then configure the permitted roles and contextual access for their operations. A custom implementation must preserve the same execution context when it reads or writes data.
| Boundary | What it identifies | What to verify |
|---|---|---|
| User identity | The person signing in | Authentication and the correct active identity |
| Organization membership | The customer’s team the person belongs to | Membership, role changes and removal |
| Resource scope | Where a business record belongs | Queries and mutations use the intended customer context |
| Operation access | What this actor may do here | Both role checks and record/context restrictions |
User identity and customer membership are separate: a person can participate in different contexts without those contexts becoming interchangeable. Likewise, an application-wide resource is not automatically a customer-owned record.
Make onboarding agree with the model
Use the declared registration and invitation paths, with the relevant authentication configuration and message provider. The UI should carry the active workspace into navigation and related-record choices; the server must independently check the request context. Changing the visible workspace is not an authorization grant.
For an acceptance scenario, create two organizations with their own records. Test an owner, an ordinary member and a person outside the organization. Check list, detail, mutation and custom-action requests, then repeat after a membership is removed. This tests the customer boundary as people actually use it.
Read users, organizations and security for the mechanisms behind identity and scoped access.
Build the work your customers came to do
Your business objects and actions give the application its purpose. People need to find information, make decisions and move work forward through an experience that fits their job.
Wildo connects shared definitions to standard interfaces and APIs. You add the rules, integrations and custom screens that make this your product.
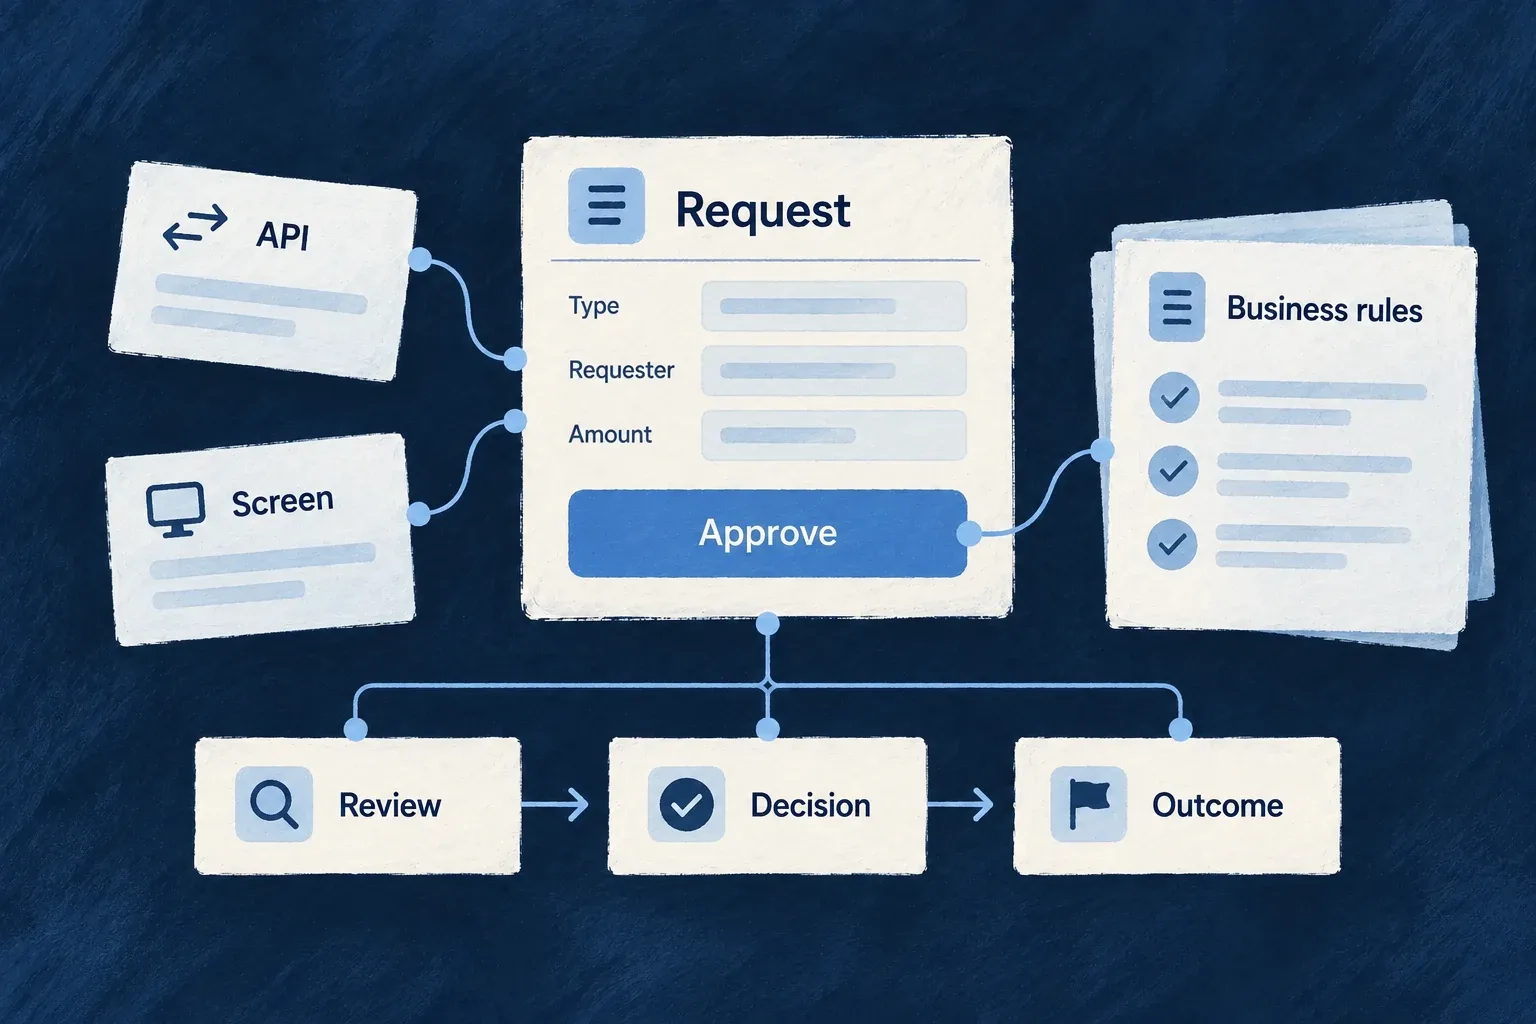
Shared foundations, a distinct product
Model the customer’s work
Describe the records, relationships and actions that matter. Use the same business model across the application instead of inventing separate meanings for each screen or integration.
Choose the right experience
Start with standard forms and views, then adapt navigation, resource behavior and components. A specialized workflow can have a specialized interface.
Give actions real behavior
Implement decisions such as approve, schedule or assign with their own rules. Connect them to the declared contracts that the interface and API can use.
Example: A request becomes a decision
A purchasing application collects a request’s amount and purpose. Its custom approval action checks the company’s rules before recording a decision. The same action can be reached from the application or an authorized integration; the approval policy is authored for this product.
For engineers
Give a business action its own contract
An action can narrow an existing operation or add new business processing. Naming it does not automatically require a new persistence implementation.
For example, Wonder Todos’ ASSIGN_LEAD action reuses an update while restricting the input and the eligible assignee. This is a selected entry from the resource’s operation map; imports and surrounding resource declarations are omitted.
[Todos_Operations.ASSIGN_LEAD]: {
  variants: [{
    variantType: ResourceOperationVariantType.API_CALL,
    isDefault: true,
    roles: [CORE_ORG_ROLES.ORG_ADMIN],
    riskLevel: ResourceOperationRiskLevel.MEDIUM,
    resourceOperationLike: CoreResourceOperation.UPDATE,
    requestDto: z.object({
      assignedToUserId: z.string().min(1),
    }),
    referenceConstraints: {
      assignedToUserId: {
        qualifyingStatuses: [OrganizationMemberStatus.ACTIVE],
        requiredRoles: {
          scope: ResourcePrimaryScope.ORGANIZATIONS,
          roles: [CORE_ORG_ROLES.ORG_ADMIN],
        },
      },
    },
  }],
},
roles controls who may invoke the action. referenceConstraints controls who may be assigned: an active organization member satisfying the required role. These are different checks. resourceOperationLike supplies the existing update behavior; the registered resource schema and relationship give assignedToUserId its meaning.
For the purchasing example above, an approval threshold or external verification needs application-authored processing. Declare its inputs, scope and access requirements, then supply the additional backend phases or implementation that performs those decisions. Standard update behavior cannot infer an approval policy from the action’s name.
Decide how the action appears
The API contract and its screen presentation have different owners. Resource UI behavior chooses an addressable page, an embedded surface or API-only use. Existing presets or a backend defaultFrontendPosture can provide that choice; every action does not need a new screen declaration. Authorization still decides whether a caller may execute it.
For example, Wonder Todos binds a custom record view within its resource UI behavior. This excerpt shows two entries in its views array:
[Op.CREATE, { surface: ResourceOperationFrontendSurface.EMBEDDED }],
[Op.READ, {
  surface: ResourceOperationFrontendSurface.ADDRESSABLE,
  customView: TodoReadCustomView,
}],
The custom host below keeps the standard record layout and adds a resource-owned workspace. The composite view is defined separately and registered with that resource; its reference is not a globally supplied name. Imports are from the public frontend package, with the application-owned view reference imported locally.
import type { ResourceReadCustomViewComponent } from '@wildo-ai/saas-frontend-lib';
import {
  EmbedResourceOwnedCompositeView,
  ResourceLayoutPreset_Read_Default,
  useReadOperationSurface,
} from '@wildo-ai/saas-frontend-lib';
import { TODO_WORKSPACE_COMPOSITE_VIEW_REF } from './TodoWorkspaceCompositeView.js';

export const TodoReadCustomView: ResourceReadCustomViewComponent = (props) => {
  const { resourceContext } = useReadOperationSurface({
    resourceContext: props.resourceContext,
    navigationZone: props.navigationZone,
    navigationInitiator: props.navigationInitiator,
  });

  return (
    <ResourceLayoutPreset_Read_Default {...props} showCharts={false}>
      <EmbedResourceOwnedCompositeView
        resourceContext={resourceContext}
        viewRef={TODO_WORKSPACE_COMPOSITE_VIEW_REF}
        navigationZone={props.navigationZone}
        navigationInitiator={props.navigationInitiator}
      />
    </ResourceLayoutPreset_Read_Default>
  );
};
The hook uses the supplied operation and navigation context. The preset retains the standard record presentation; the embedded view receives the same record context. This explicit composition lets a specialized screen participate in the application rather than becoming a separate implementation of record loading and navigation.
Connect the module, not just the file
The shared registry combines the engine module with application modules. Backend and frontend registries collect their corresponding contributions. Inside those registered modules, generated scanners deliberately discover exports such as .operation files; follow the module’s naming and export conventions rather than adding a manual registry row for every file.
Check that the resource configuration, schema and relationships reach the shared registry, that authored backend processing is discovered by its registered module, and that resource UI behavior and composite definitions reach the frontend module registry. These assembled inputs are consumed by the application’s frontend provider and backend startup.
Define what succeeds together
For a custom approval that changes related records, choose the execution boundary explicitly. The custom-operation factory supports transactionalCore; participating service calls must carry the transaction context and use compatible participants. An HTTP request to another service does not become rollback-safe because it runs beside database changes.
Keep external effects outside the transaction where the chosen workflow requires it. If the product needs retryable delivery after commit, use a persisted delivery mechanism and verify its consumer; an ordinary callback alone does not provide that guarantee. The custom-operation contract explains the phases and authoring choices.
Keep the meaning beside the behavior
| Product change | Executable contribution | Specification to maintain |
|---|---|---|
| Restrict who may be assigned | Operation role gate and reference constraints | Eligible actors, eligible assignees and refused cases |
| Add a custom record workspace | Resource UI binding and composed view | Information shown and navigation behavior |
| Add an approval decision | Input contract and backend processing | Decision rules, outcomes and failure scenarios |
Specifications describe intent for the development workflow and companion’s exported knowledge. They do not execute the rule. For the assignment example, record the distinction between the actor and the assignee in the corresponding operation specification, then check both allowed and refused assignments through the API and interface. Maintain that meaning when the configuration changes.
For the purchasing example, exercise allowed and refused approvals, invalid inputs and external-service failure. A disabled button explains availability; it does not replace server-side enforcement. The observable result must match the declared contract and specification.
Explore the resource system for business contracts and front-end composition for interface extension points.
Turn your offer into everyday access
A SaaS offer continues after checkout. What a customer buys needs to reach the product, and changes to their subscription need to follow the rules of your business.
Define plans, prices and benefits together. Connect billing to the features and allowances your application uses, while keeping each person’s permissions distinct.
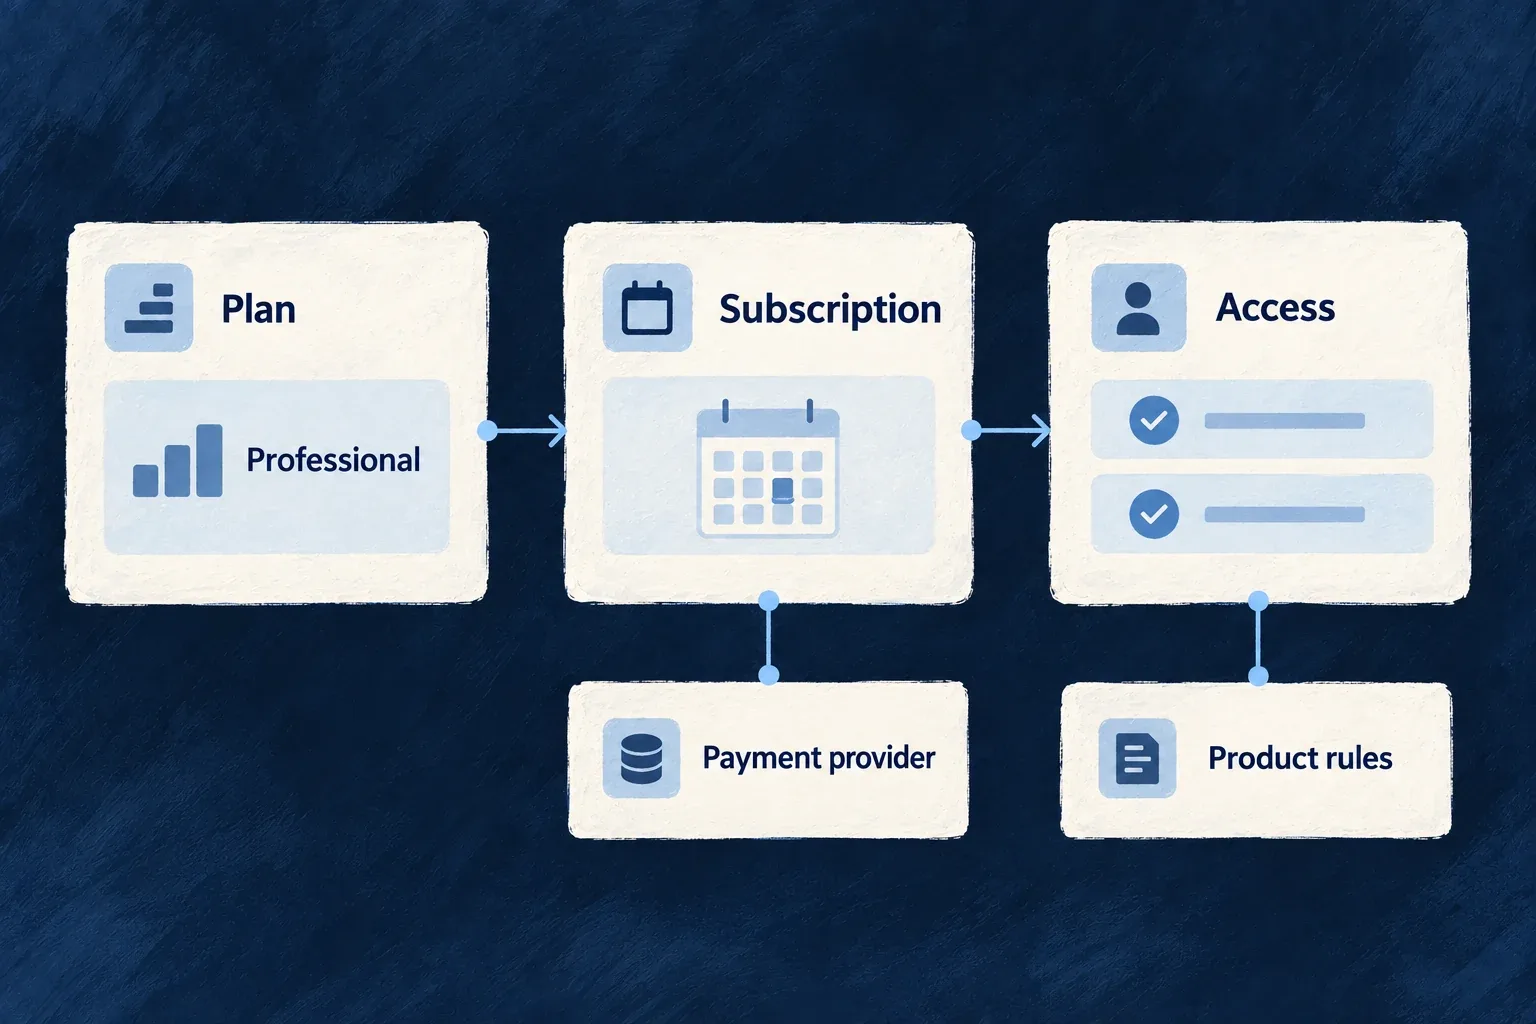
From the offer to the customer's account
Describe what customers buy
Bring the plan, its price and its benefits into one product definition. Choose whether the offer belongs to a customer organization or another supported account scope.
Carry benefits into use
Connect purchased features and allowances to the operations that require them. The same named benefit can inform the interface and the backend access decision.
Define what happens next
Choose trial, upgrade, downgrade and cancellation policies. Connect those choices to the provider flow and the access your application enforces.
Example: A company grows into a professional plan
The company buys a plan that grants reporting and a larger record allowance. Its application implements reporting and checks the corresponding feature requirement. Members still need the appropriate permission to run a report, even when their company has purchased access.
For engineers
Describe grants and lifecycle in the catalogue
This selected Wonder Todos product definition shows the organization’s plan, benefits and change policy. Its prices and presentation fields are omitted; the named features are declared in the application’s feature configuration.
const ORG_PLAN_PROFESSIONAL: ProductDefinition = {
  key: 'org-professional',
  type: ProductType.PLAN,
  targetScopes: [ResourcePrimaryScope.ORGANIZATIONS],
  planTierOrder: 1,
  grantedFeatures: [
    ApplicationFeature.BULK_EXPORT,
    ApplicationFeature.ADVANCED_REPORTS,
    ApplicationFeature.CUSTOM_WORKFLOWS,
  ],
  grantedLimits: {
    [ApplicationFeature.MAX_TODO_LISTS]: { value: 100, mode: LimitGrantMode.SET },
  },
  behaviorPolicy: {
    trial: { days: 14, requirePaymentMethod: false },
    upgrade: { proration: ProrationBehavior.CREATE_PRORATIONS, timing: BillingTiming.IMMEDIATE },
    downgrade: { proration: ProrationBehavior.NONE, timing: BillingTiming.AT_PERIOD_END },
    cancellation: { allowImmediate: false, defaultBehavior: BillingTiming.AT_PERIOD_END },
  },
};
targetScopes identifies the purchaser’s scope. grantedFeatures and grantedLimits contribute to its effective entitlements. planTierOrder determines whether a change is an upgrade or downgrade by comparison with the current plan; it is distinct from display ordering. The target plan supplies the corresponding proration policy. Feature names such as CUSTOM_WORKFLOWS name grants; they do not generate that product functionality.
In the Stripe plan-change path, the selected plan is updated immediately: proration controls how the change is billed. The timing value is carried as metadata; AT_PERIOD_END does not schedule that plan change. Period-end cancellation is a separate provider action that does defer cancellation. Check these outcomes separately when designing the customer journey.
Register the complete catalogue as productDefinitions on the shared engine module. This is how the definitions enter the assembled application, alongside the corresponding feature declarations.
Complete the provider connection
The backend selects billing and its provider. Wonder Todos configures:
billing: {
  enabled: true,
  providerRef: 'stripe',
},
Connect this selection to the application’s other configuration owners:
| Owner | Required input | Result to check |
|---|---|---|
wildo.saas.config.ts | Enable EngineCapability.BILLING; scope stripe under providers.scopes.backend.providers | The provider is reachable from the backend, not only the browser |
| Backend package | Declare and install the stripe SDK | The engine adapter can load its provider dependency |
| Environment secrets | Supply STRIPE_SECRET_KEY and STRIPE_WEBHOOK_SECRET through providerEnv | Billing calls and inbound event verification have their credentials |
| Configuration sync | Run wildo config sync for the selected environment with application registration available | The generated backend provider-runtime artifact includes stripe, and environment files are refreshed |
Discovery reads engine-shipped provider contributions from their package. Do not add a duplicate application provider-contributions.ts entry for Stripe; that authoring surface is for a provider implemented by the application itself.
Synchronize the catalogue and check the resulting provider product/price mappings before offering checkout. Configure the webhook path and its verification so provider events can update the correct local billing account.
A checkout return URL tells the browser where to go. The provider event and its processing establish the purchase state in the application. Verify that the correct organization receives the subscription and grants, including when an event is delivered again.
Keep commercial access and permission separate
| Question | Owning mechanism | Application responsibility |
|---|---|---|
| Has this customer purchased the feature? | Product grants and effective entitlements | Declare the grant and protect the consuming operation |
| May this person perform the action? | Roles, scope and operation authorization | Choose permitted actors and preserve record context |
| Has an allowance been reached? | The relevant numeric-limit check | Connect the check to the work that consumes capacity |
| What should happen at a plan change? | Subscription lifecycle policy and provider processing | Distinguish plan-change proration from cancellation timing; test the provider result |
An interface policy can explain an unavailable feature or guide someone toward an upgrade. The backend requirement protects the actual operation. Usage reporting, numeric allowances and prepaid credits have different contracts; select and wire the mechanism that matches the offer.
Verify changes, not only the first purchase
Exercise trial entry, a successful purchase, an upgrade, a downgrade and period-end cancellation in the provider’s test environment. Check the billing account, local subscription state and effective access after each transition. Include a failed or delayed payment and a repeated provider event, then verify the customer-facing messages and actions remain consistent.
Follow the connected billing flow from registered product and price through checkout, signed events and effective grants. Its engineering guide links to the complete catalogue, checkout and invoice examples.
Give customers control, and your team a way to operate
Customers need to manage their own people and work. Your team needs to operate the product and support the customer relationship. Those responsibilities belong at different levels.
Wildo provides scoped roles and operation contracts to build on. You decide which administrative actions each audience receives and how they appear in the application.
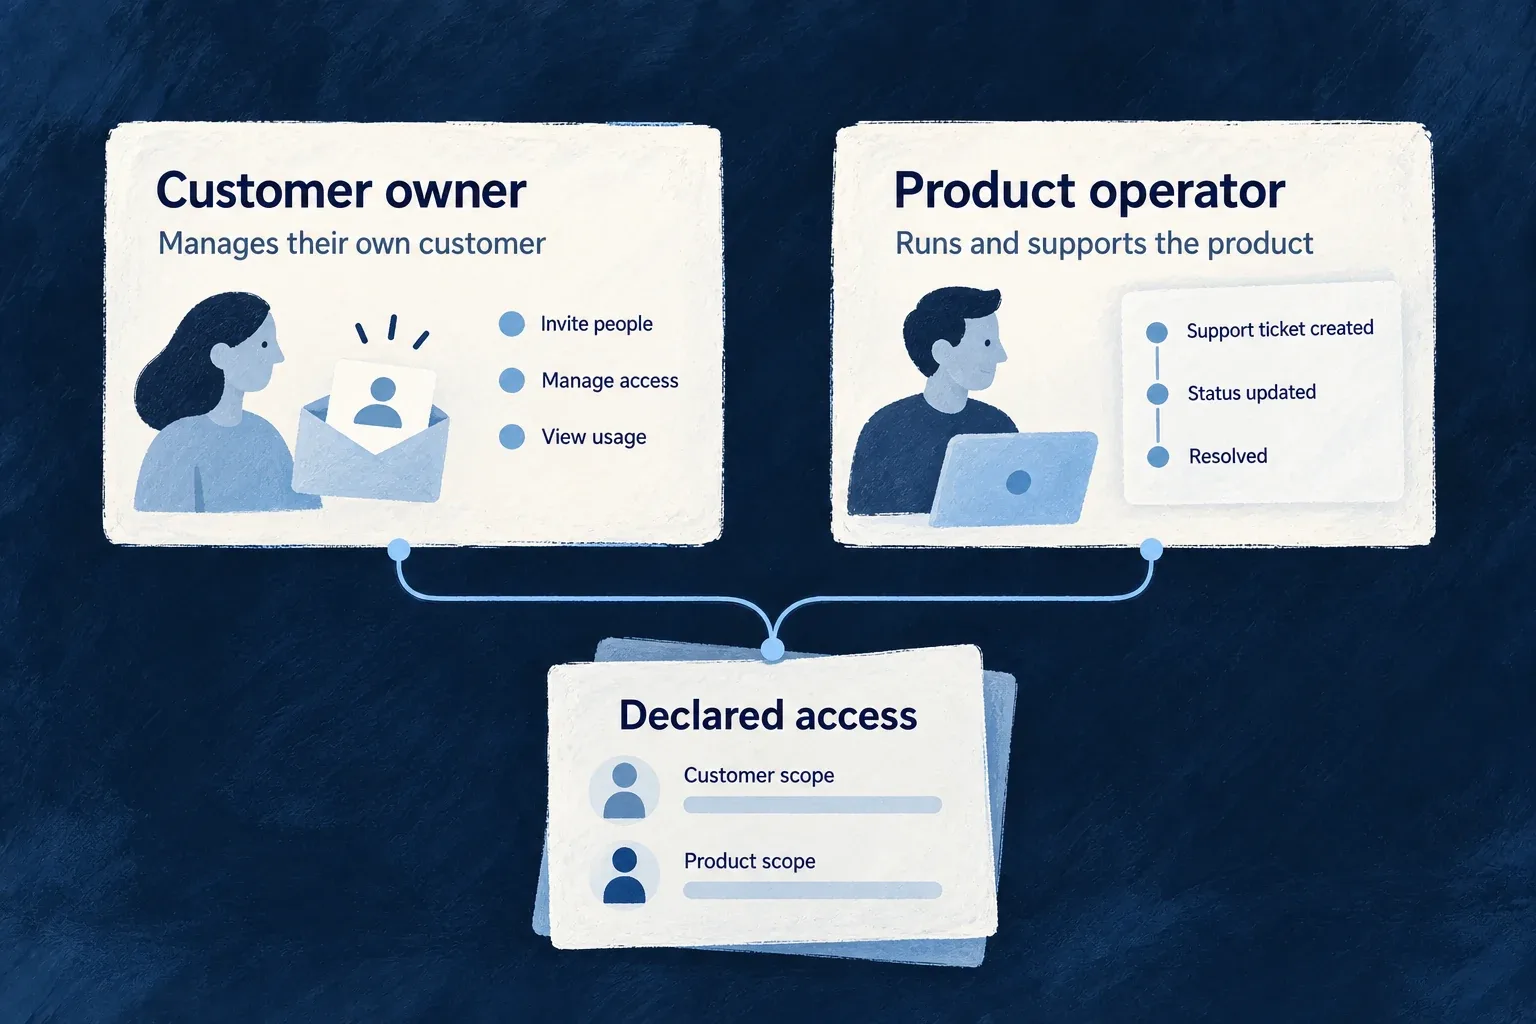
Clear responsibilities on both sides
Let customers manage their teams
Give designated members the actions they need within their organization. Ordinary participation and customer administration can carry different permissions.
Equip the product’s operators
Define application-level responsibilities separately from customer membership. Build the views and actions your team needs to run the service.
Make sensitive actions deliberate
Connect administrative operations to explicit access rules. Explain the action in the interface and preserve the relevant actor and customer context when it runs.
Example: A customer asks for help
A customer administrator manages their team’s membership. A product operator uses separately authorized operations to investigate the issue. If your product needs a support-ticket workflow, you build that workflow around these responsibilities; the role model does not create a helpdesk by itself.
For engineers
Define roles where the application assembles them
Wonder Todos declares custom roles in its shared engine configuration. This excerpt preserves the role definitions, with formatting simplified. The types and core roles are imported from @wildo-ai/saas-models.
export const CUSTOM_ROLES_CONFIGURATION: RolesConfiguration = {
  CUSTOM_APP_MANAGER: {
    role: 'CUSTOM_APP_MANAGER',
    inheritFrom: CORE_APP_ROLES.APP_USER,
    isSystemRole: false,
    relatedPrimaryScope: ResourcePrimaryScope.APPLICATION,
  },
  CUSTOM_ORG_SUPERVISOR: {
    role: 'CUSTOM_ORG_SUPERVISOR',
    inheritFrom: CORE_ORG_ROLES.ORG_MANAGER,
    isSystemRole: false,
    relatedPrimaryScope: ResourcePrimaryScope.ORGANIZATIONS,
  },
};
The first role belongs to application scope; the second belongs to organization scope. Their inheritance is explicit. In particular, the name CUSTOM_APP_MANAGER does not grant administrator authority: this example inherits APP_USER. Access follows the declared inheritance and operation rules, not an interpretation of the label.
The shared engine module registers these definitions through customRoles: CUSTOM_ROLES_CONFIGURATION. Resource operations then declare which roles may invoke them. Registering a role alone does not add it to every operation’s permitted audience.
In the application’s existing shared engine module, keep its other contributions and add the role configuration. These are the relevant lines from Wonder Todos’ shared-lib/src/engine/index.ts:
import type { SharedSaaSModule } from '@wildo-ai/saas-models';
import { CUSTOM_ROLES_CONFIGURATION } from './roles';

const engineSharedModule: SharedSaaSModule = {
  moduleId: 'engine',
  kind: 'engine',
  customRoles: CUSTOM_ROLES_CONFIGURATION,
  // Keep the application's other shared contributions here.
};

export default engineSharedModule;
Give each audience an intentional surface
| Audience | Typical responsibility | Boundary to preserve |
|---|---|---|
| Organization member | Work with the customer’s business records | Membership, customer context and operation permissions |
| Organization administrator | Manage permitted aspects of their team | Authority within that organization, not every customer |
| Application operator | Carry out declared product-wide administration | Explicit application-level access and operation rules |
| Custom support role | Perform a narrowly defined support action | The action’s authorized scope and intended data access |
Use resource UI behavior, navigation and custom views to present the relevant actions. Keep backend authorization independent of their visibility. A menu hidden from members does not protect the endpoint, and an application-level role should not be treated as an implicit bypass for every customer-owned operation.
Design support around actions, not blanket access
Name the operation your team needs: inspect an account status, change an allowed setting or resolve a specific business issue. Declare its inputs, permitted roles and scope, and implement the intended effect. Preserve actor attribution and use the relevant audit mechanisms for sensitive administrative changes.
Do not infer impersonation, unrestricted customer-record access or a complete support workflow from the existence of an operator role. Those are separate product decisions with their own operations and interfaces.
Change authority through its dedicated operations
For example, granting a product operator the application’s CUSTOM_APP_MANAGER role uses the user resource’s Users_Operations.ASSIGN_ROLES contract. The targeted user’s identity belongs in the operation address; the request body names the requested roles:
Use the application’s API base URL (including its API prefix), an existing target user’s ID and the signed-in application super-administrator’s access token. The following commands are two separate lifecycle steps: first grant responsibility, then revoke it when that responsibility ends. Check the subject’s access between them.
Grant the declared application role without replacing the other roles:
curl --fail-with-body --request PUT "$API_BASE/users/$SUBJECT_USER_ID/assign-roles" \
  --header "Authorization: Bearer $ADMIN_ACCESS_TOKEN" \
  --header 'Content-Type: application/json' \
  --data '{"roles":["CUSTOM_APP_MANAGER"],"reason":"Assign product operations responsibility"}'
Later, remove that role while preserving unrelated roles:
curl --fail-with-body --request PUT "$API_BASE/users/$SUBJECT_USER_ID/revoke-roles" \
  --header "Authorization: Bearer $ADMIN_ACCESS_TOKEN" \
  --header 'Content-Type: application/json' \
  --data '{"roles":["CUSTOM_APP_MANAGER"],"reason":"Product operations responsibility ended"}'
The HTTP segments are assign-roles and revoke-roles; the operation identifiers are assign_roles and revoke_roles. Use the global user ID, not an organization-membership ID. If the application’s step-up policy challenges this high-risk operation, obtain fresh proof for the same caller through reauthentication and include its x-reauth-token header on that request.
The caller must satisfy the operation’s application-super-administrator role requirement. This payload grants the role defined above; its name does not add permissions beyond its declared inheritance. The engine applies an additive union against persisted appRoles. Users_Operations.REVOKE_ROLES accepts the corresponding role list and removes those roles; ordinary array replacement is a different operation.
These operations enforce the caller’s role ceiling, preserve the last-super-administrator floor and record the authority change. Test the resulting permissions on the subject’s next request as well as the operation response. For customer membership roles, use the organization-scoped contract rather than substituting this application-role operation.
Temporary platform access is another, conditional governance flow: the operation must explicitly admit it, the caller needs qualifying application-scoped administrator authority, and access requires a usable grant for the target organization. This example’s CUSTOM_APP_MANAGER does not meet that authority requirement. Use the identity engineering guidance when that support model belongs in the product.
Test changes in authority
Verify permitted and refused requests for a member, customer administrator and application operator. Repeat after a role is removed. Check cross-customer attempts, direct API calls and the recorded actor for sensitive operations. Ensure the interface communicates the new state without relying on stale visibility as the access control.
See users, organizations and security and compliance and audit for the underlying controls and evidence mechanisms.
Keep building after the first version
The application is a project your team can develop, deploy and change. Its services, shared definitions and specifications remain part of the work as the product grows.
Wildo connects that structure to environment configuration and deployment generation. Your team chooses the infrastructure, supplies the environment’s settings and verifies each release.
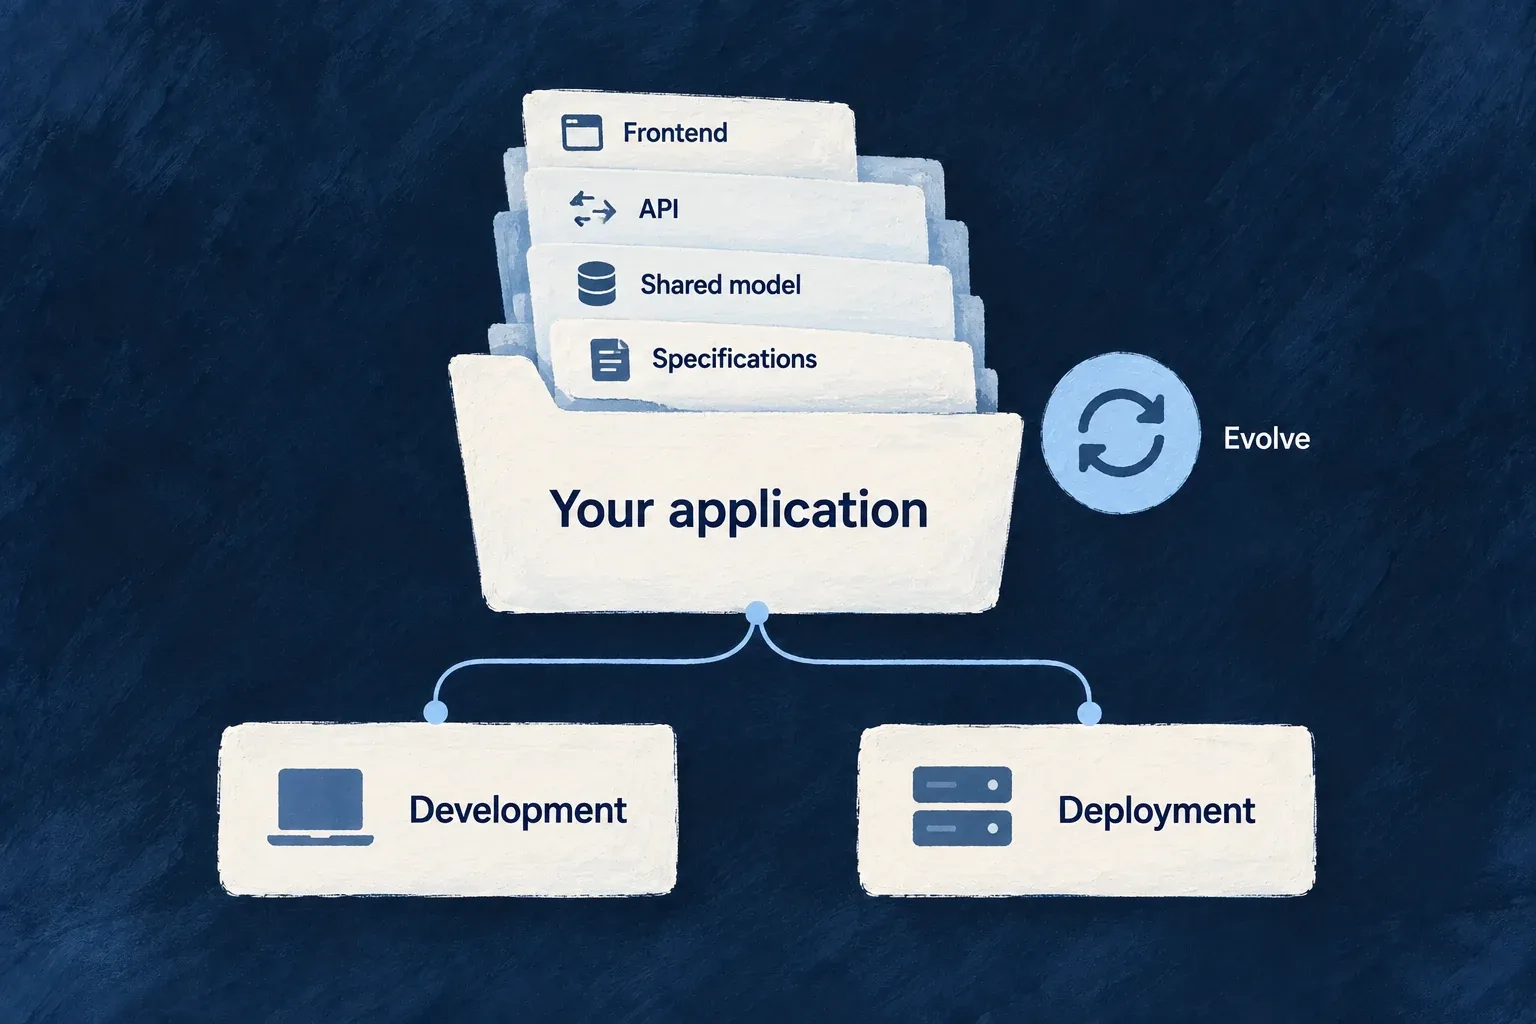
A product with a life beyond its launch
Keep the project understandable
Separate frontend, backend, shared model and specifications while connecting their contributions through the application configuration and registries.
Describe where it runs
Give environments their own domains, service hosts and infrastructure choices. Generate deployment material from those declarations for the selected runtime.
Evolve the working application
Add modules and change behavior within the existing project. Review generated changes alongside application code and verify the affected customer journeys.
Example: Add reporting to an established product
Your team adds reporting definitions, backend execution and an interface to the existing application. It connects the appropriate paid-feature requirement, checks the behavior in development and staging, then deploys through the project’s configured release path.
For engineers
Declare the target environment
The application configuration describes its services; environment configuration describes where and how they run. This selected excerpt from Wonder Todos’ staging configuration sits inside defineInfraEnvConfig. Imports, backing-service declarations and comments are omitted.
environment: WildoEnvironment.STAGING,
locationType: WildoLocationType.REMOTE,
runtime: WildoDeploymentRuntime.DOCKER_COMPOSE,
runtimeEnvironment: RuntimeEnvironment.STAGING,
publicDomain: 'staging.wonder-todos.com',
serviceHosts: {
  app: 'app',
  docs: 'docs',
  website: '',
},
remoteProvider: {
  provider: 'scaleway',
  registryEndpoint: 'rg.fr-par.scw.cloud/wonder-todos',
  region: 'fr-par',
},
deployment: {
  branch: 'staging',
  runtime: WildoDeploymentRuntime.DOCKER_COMPOSE,
},
The host map places the application at the app subdomain, documentation at docs and the configured website at the environment’s apex domain. Those additional frontends are services selected for this application; the map does not create their content. Provider identifiers and domains here belong to the example, not settings to copy unchanged.
Generate delivery files from the selected runtime
The CLI’s deployment generators consume the application and environment configuration to produce Docker Compose or Kubernetes material and the corresponding deployment workflow. Configure backing services, provider access, environment credentials and public routing for the selected target. Generated files describe delivery; running the target and checking it establish that delivery worked.
For example, from a configured and registered application workspace, install the production workflow and generate its environment material with:
wildo config sync --env=production --domain cicd
wildo config sync --env=production --domain config
Use the environment name declared by your application. Inside CI, the generated workflow adds --ci to the second command and supplies the required secret values as environment variables; that mode reconstructs secrets from the CI environment rather than reading the local secrets file. Workflow installation and deployment generation need access to the registered application’s service descriptors and the appropriate credentials. Confirm that sync produced .wildo-saas/deploy/<env>/ material: a classified platform-access or credential failure can report a skipped deployment output while retaining local output.
The Kubernetes workflow contains cluster apply steps. The Compose workflow generates the configuration and builds and publishes images; the operator supplies the remote transfer and apply procedure for the chosen host. Neither a generated file nor a published image proves that users can reach the new release.
Existing workflow files are preserved unless replacement is explicitly requested. After changing services or infrastructure, review the workflow as well as regenerated runtime material; preservation protects edits, not continued agreement with new configuration.
| Source of configuration | Purpose | Review before deployment |
|---|---|---|
| Application services and libraries | Project paths, service identities and shared inputs | Every selected service and module is registered |
| Environment and service hosts | Runtime target and public addresses | DNS, routing and browser/API endpoints agree |
| Provider and backing services | Hosting, registry and service choices | Required infrastructure and credentials are available |
| Generated deployment material | Containers, runtime resources and release workflow | Configuration matches the intended environment |
Apply change to the existing project deliberately
Composition scenarios materialize declared project structure and registrations. Their apply path supports a dry run; identical output can be skipped, while conflicting authored output requires reconciliation instead of silent replacement. Version control remains the place to review and merge changes.
For a new business module, inspect its shared, backend and frontend contributions and the registry updates that expose them. Implement the behavior, update its specifications and check the affected consumers. A generated module scaffold is a starting structure, not a completed business feature.
Ship data changes with the release
For PostgreSQL-backed resources, carry a reviewed migration with the schema change and maintain the accepted schema baseline. Application startup applies shipped migrations before checking the physical schema; a changed TypeScript declaration alone is not the migration deliverable.
Review the generated plan and SQL against the existing database, including how existing rows satisfy new requirements. Exercise the upgrade with representative data before release. The data-storage guidance explains the storage contract; the application’s application-database-migrations knowledge gives the authoring and baseline workflow.
Adopt a framework release deliberately
Changing your product and adopting a new framework release are separate decisions. After choosing the new @wildo-ai/* versions in the application’s overrides, install them before deriving their dependency requirements:
pnpm install
wildo align-deps --write
pnpm install
wildo assets sync
align-deps reads the installed framework and writes dependency manifests; the second install updates the resolved dependencies and lockfile. assets sync refreshes the delivered development knowledge. Neither command rewrites your business logic or establishes compatibility: review the diff, follow the release’s migration requirements and run the affected application checks.
Verify the deployed customer experience
Check startup and readiness for the selected services, then exercise login, workspace access, a representative custom action and any configured external provider flow through the target’s public addresses. Review operational signals and the release’s data changes as well as its screens. A successful file-generation step is not a successful deployment.
Read Docker or Kubernetes for deployment choices and the development companion and CLI for the development workflow.
One product, from customer work to continued delivery.
The value of a SaaS application lies in how its parts work together: the customer’s workspace, the work they came to do, the service they purchase and the way your team operates it.
Wildo provides shared foundations and an application structure that can evolve. Your business decisions give that structure its purpose.
Building a B2B product or an internal tool?
Wildo is not self-service yet. Tell us what you have in mind and we will say plainly whether it fits, and what happens next.