Wildo.ai Coming soon

CLI & development companion

Create application parts, synchronize configuration and inspect the project from your development environment.

Composition scenarios · configuration sync · context queries · local development

> Add connected project structure > Keep configuration aligned > Inspect the application you are changing

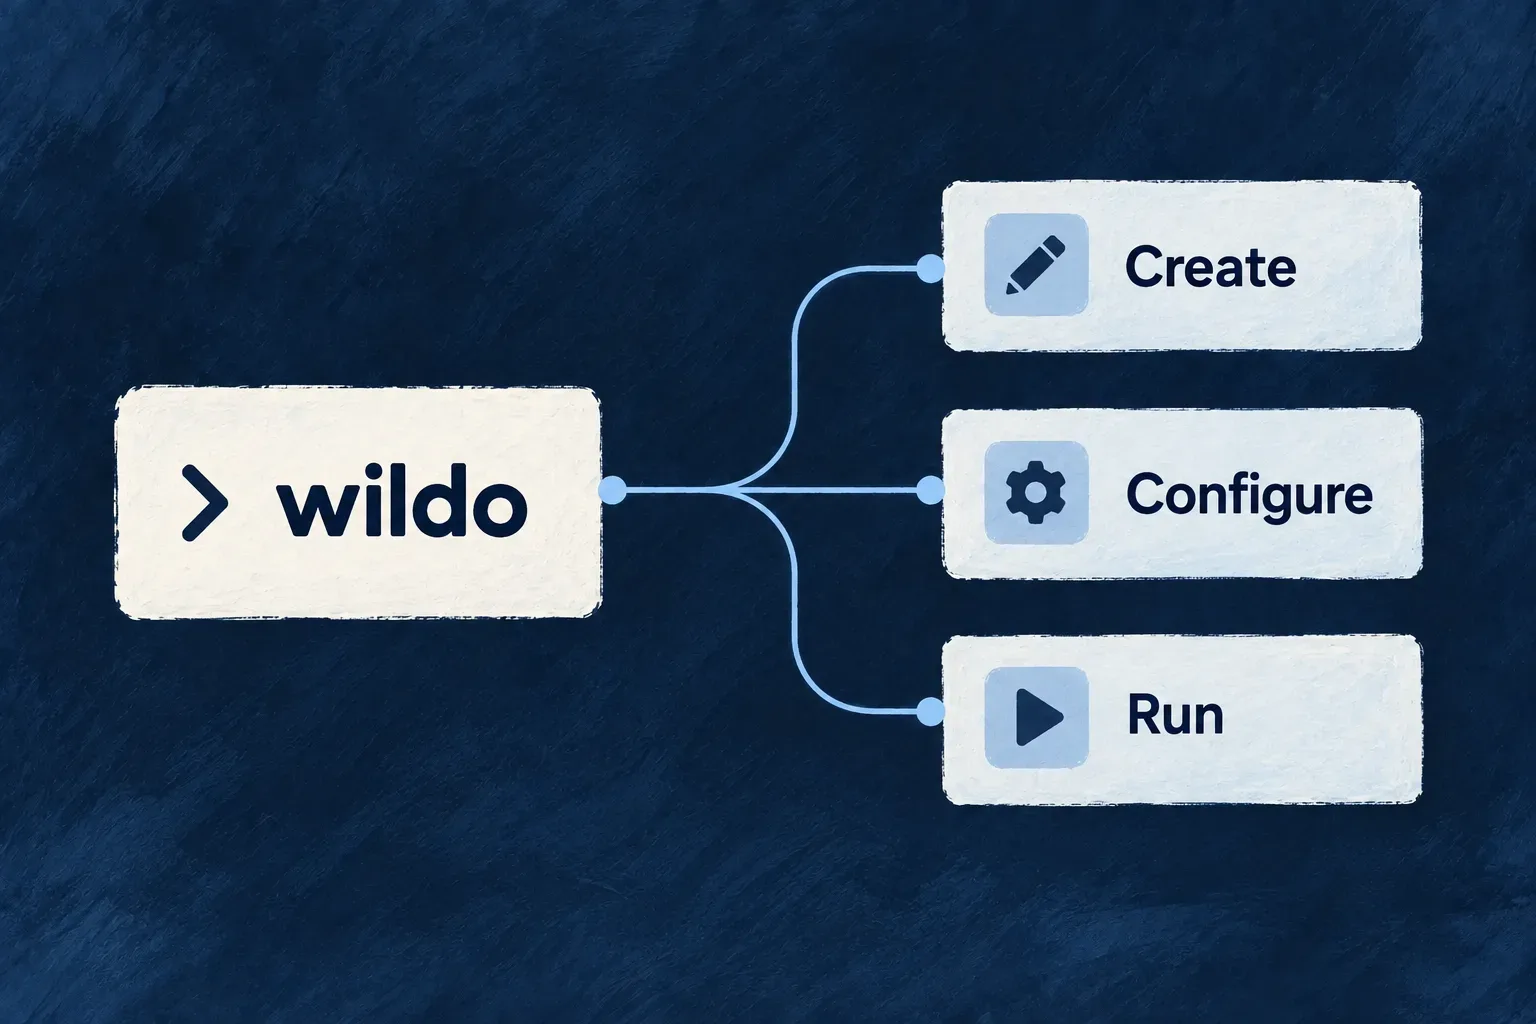
The Wildo CLI is the command line for creating, extending and running your application.

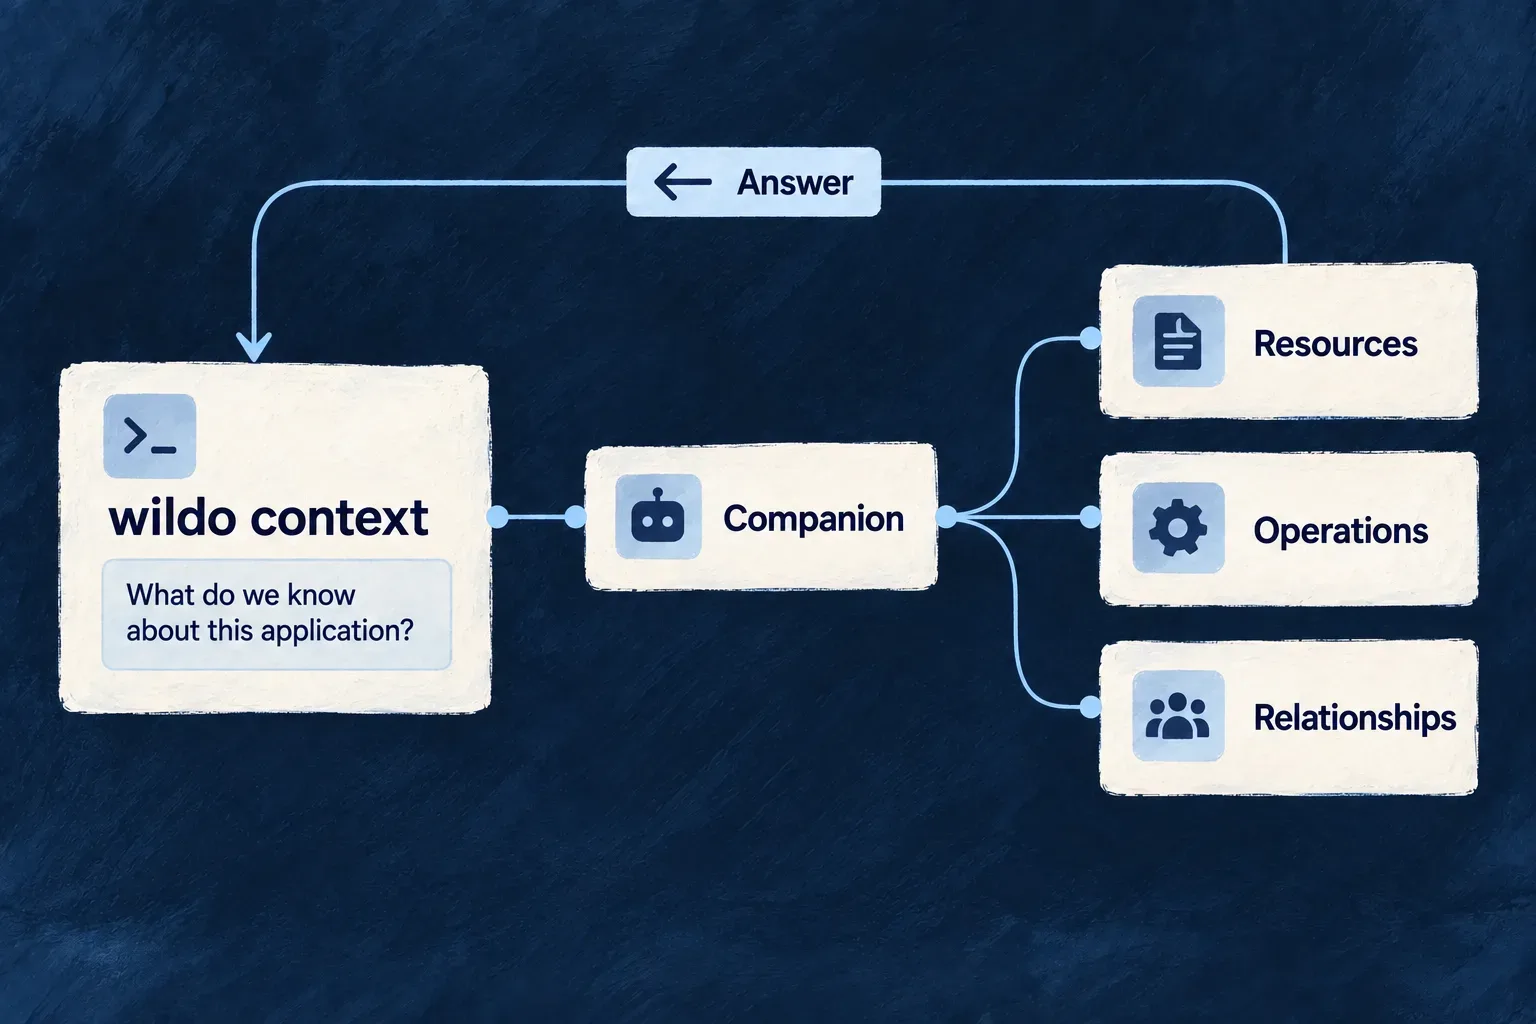
The development companion is a local service that keeps application context available to your tools, coding agents and workbench.

Together, they connect everyday development work to the project’s own declarations. You choose the changes; Wildo handles the recurring setup, generation and inspection around them.

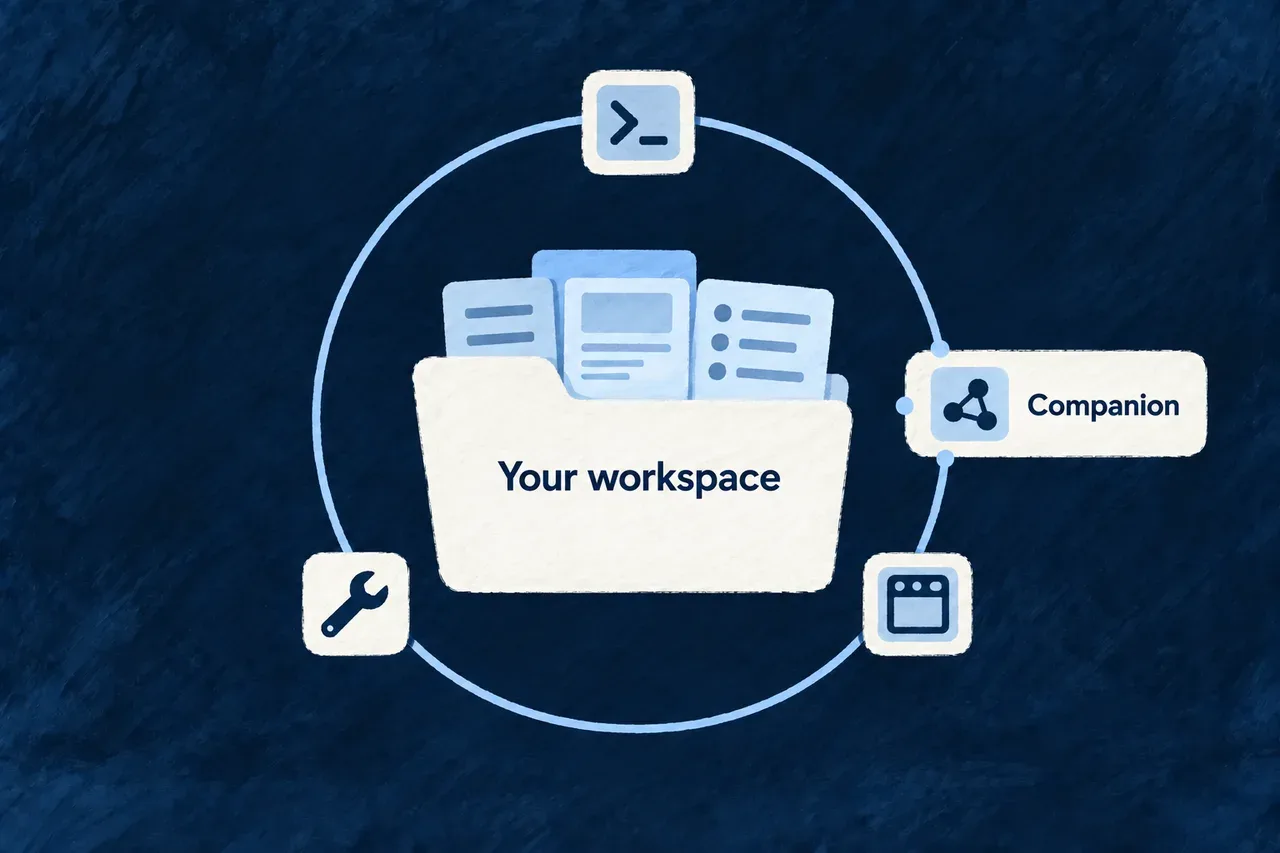
The CLI and persistent companion work with the same application workspace.

One project, connected ways to work

Create with the connections in place

Add a workspace or extend an existing one through composition scenarios that handle files and the registrations connecting them.

Carry configuration into development

Derive selected configuration outputs from the application’s declarations, then run its local services through the development tooling.

Inspect before you change

Ask the companion about the application’s exposed resources and specifications. Developers and agents can work from the same resolved model.

Example: Add a new business area

A team introduces a support module. It reviews the proposed files and registrations, refreshes the affected configuration and lets development compile the change. It then inspects the resource model before testing the new screens and operations.

For engineers

Two tools with different lifetimes

The CLI resolves the application and selected environment for a command. Some commands create or update files; others manage development or query the companion. The companion is the persistent application-aware process behind inspection and assisted-development services.

WorkMain surfaceWhat the result tells you
Create the workspace or add a configured piecewildo init, wildo composeWhich project files and registrations are created or changed
Refresh derived configurationwildo config syncWhich selected outputs were regenerated
Start the daily development environmentwildo local devInfrastructure preparation and supervised process startup
Inspect the companionwildo contextWhat the serving application model exposes
Inspect work visuallywildo workbenchThe local workbench’s status or browser destination

A useful first inspection

This example assumes an existing application configured for local Docker Compose, with its prerequisites available. Run the commands from its root. The first terminal remains occupied by development:

# Terminal 1: prepare and supervise local development.
wildo local dev

# Terminal 2: inspect the companion for the same application.
# First check reachability, then discover and query its model.
wildo context health
wildo context list
wildo context info resources-registry
wildo context info resource-specifications

health checks companion reachability. list asks that companion for its available queries. info retrieves a selected view; it does not query arbitrary production business records.

The served model comes from compiled application packages. Let the application’s compilation and publication complete before inspecting a source change. A reachable companion is not, by itself, proof that the latest edit has reached that model.

Keep the development roles clear

The companion supplies application context and hosts development services. A coding agent performs coding work; playbooks describe methods; the workbench provides a visual way to inspect and steer work. The companion is not the deployed application backend.

Follow coding agents, playbooks and choreography, or the creation workbench for those responsibilities.

Add a connected piece, not just more files

An application grows through modules, resources, services and public surfaces. Each addition needs a place in the workspace and connections to the parts already there.

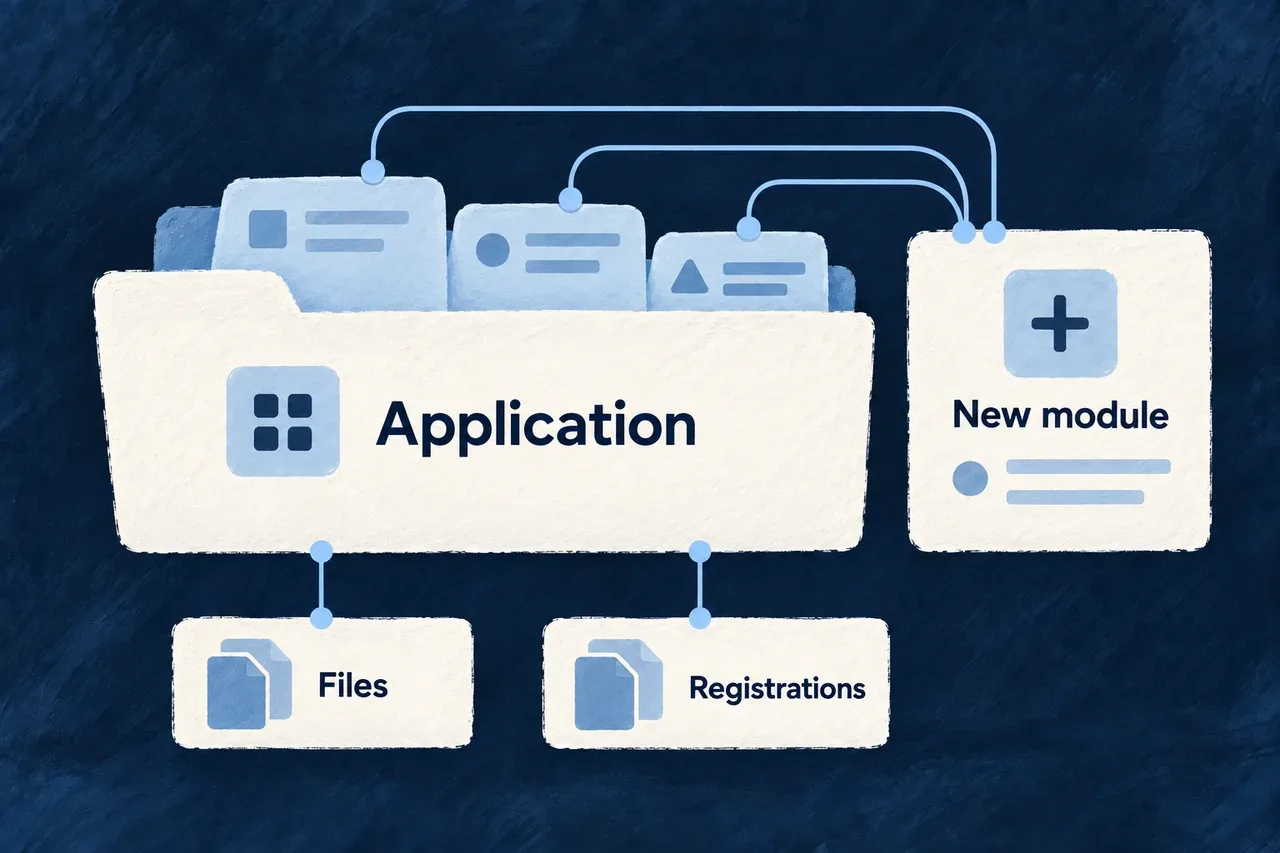
Wildo’s composition scenarios describe those additions together: new files and structured edits to the declarations that register them. You can inspect the proposed change before applying it.

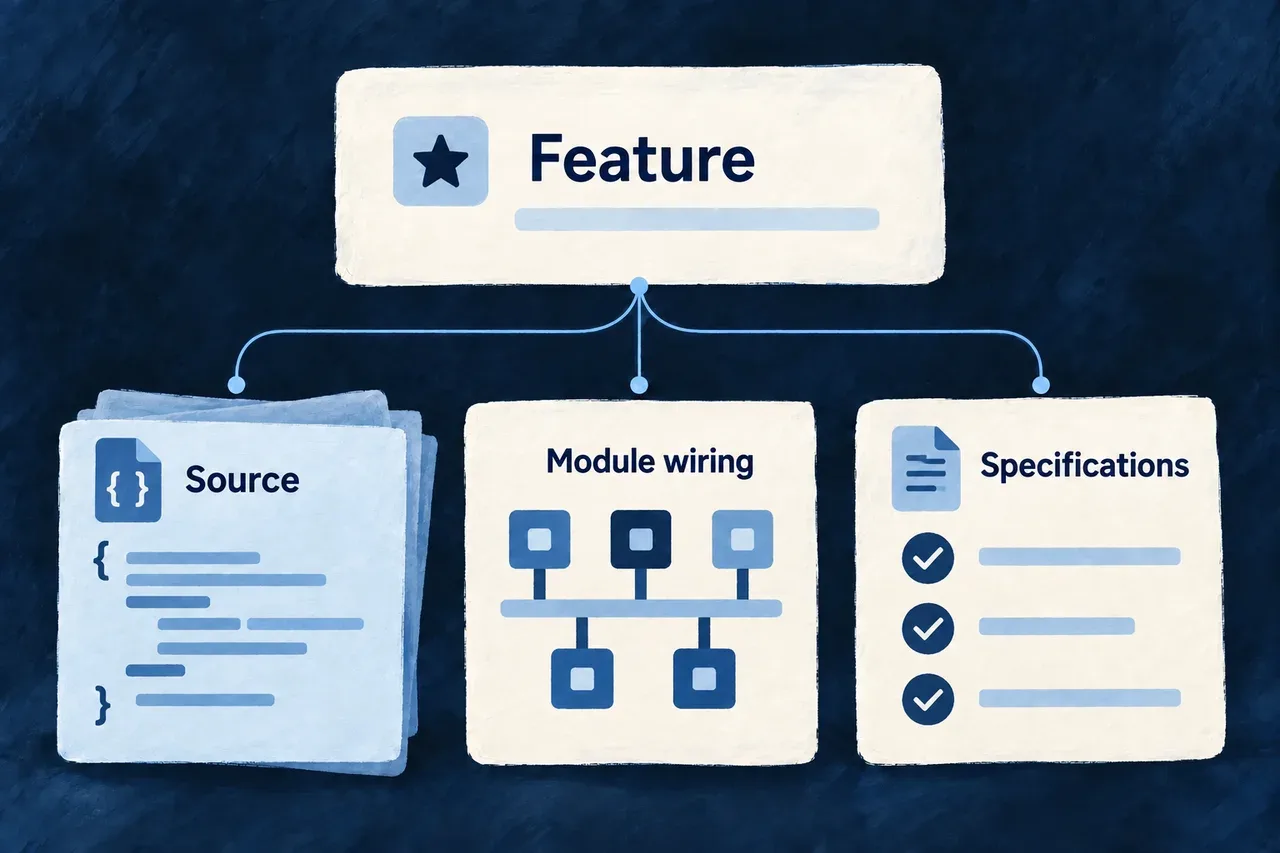
A new module joins application files and registrations as connected project structure.

Make project structure part of the change

Begin with a working foundation

Application initialization creates the workspace and its starting declarations, using your runtime and database choices.

Extend through a named scenario

Choose the kind of addition you need. The scenario supplies its placement and integration work; your implementation supplies its business behavior.

Review the proposed changes

A dry run shows planned files, edits and collisions. Review that proposal, then inspect the resulting diff when you apply it.

Example: Prepare a staging environment

A team adds a staging environment with its own public domain and registry settings. The composition scenario places the authored environment declaration in the application. Configuration generation can then derive the outputs needed for that environment.

For engineers

Initialize in the intended directory

Run initialization from the directory that should become the application root. The preflight checks the host; the initialization command creates the full skeleton in that directory. It can ask for administrator information, so this is an interactive starting sequence rather than an unattended installation script.

# Check host prerequisites before creating the application.
wildo init --check

# In the intended empty application directory:
wildo init --name "Support Desk" \
  --runtime docker-compose \
  --database postgresql

The name describes the application; it is not an instruction to create a nested directory with that name. Runtime and database are deliberate project choices.

Inspect a composition proposal

Inside an existing application, wildo compose lists available scenarios. A named scenario can also receive explicit variables. The following example previews a staging environment; the domains and registry are illustrative values to replace with your own:

# Discover the available composition scenarios.
wildo compose

# Preview a specific addition without applying its file changes.
wildo compose add-environment --dry-run \
  --var envName=staging \
  --var publicDomain=staging.support.example \
  --var registryEndpoint=registry.example/support \
  --var deployBranch=staging

The preview reports new files, structured edits, identical entries and collisions. Read that output: a successful dry-run exit is not a guarantee that applying the proposal will succeed. Apply the same named command without --dry-run after reviewing the proposal and resolving conflicts.

Know which layer owns the result

LayerWhat it providesWhat you review
InitializationApplication workspace and starting declarationsIdentity, runtime, database and initial structure
CompositionA scenario’s files and integration editsDestination, variables, registrations and collisions
Configuration generationDerived outputs for a selected environmentConsistency with the authored environment and required services
Application implementationThe actual product behaviorBusiness rules, permissions, interactions and executed checks

The environment scenario creates authored configuration; it does not itself deploy the environment. Likewise, a generated module or service is a connected starting point, not proof that its business implementation is complete.

Use the Artifacts category’s application example to see how these pieces contribute to the product people use.

Carry your declarations into the environment you run

Application configuration connects services, providers and environments. Maintaining each derived file separately makes a project harder to change consistently.

The CLI regenerates selected outputs from your declarations and helps run the local development environment. You keep the source decisions explicit while the recurring preparation follows them.

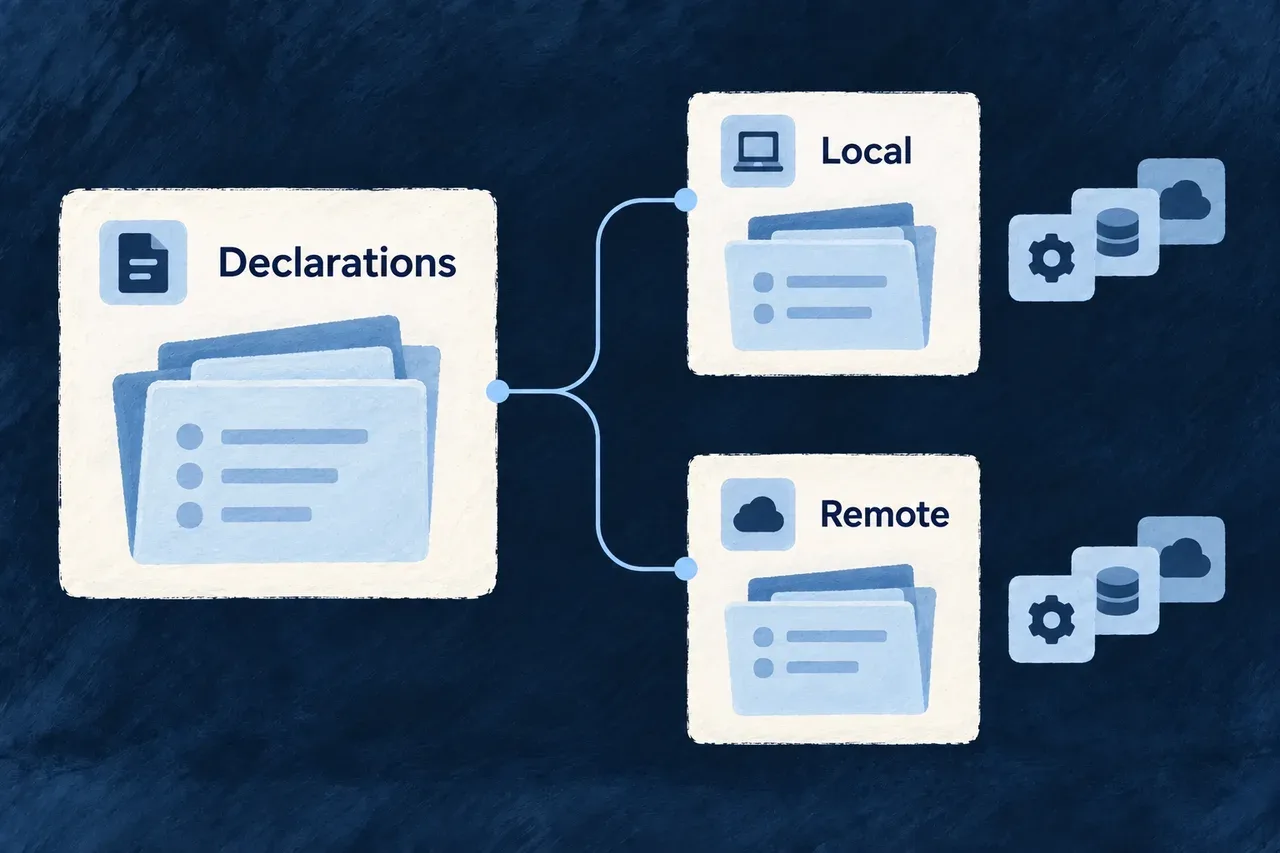
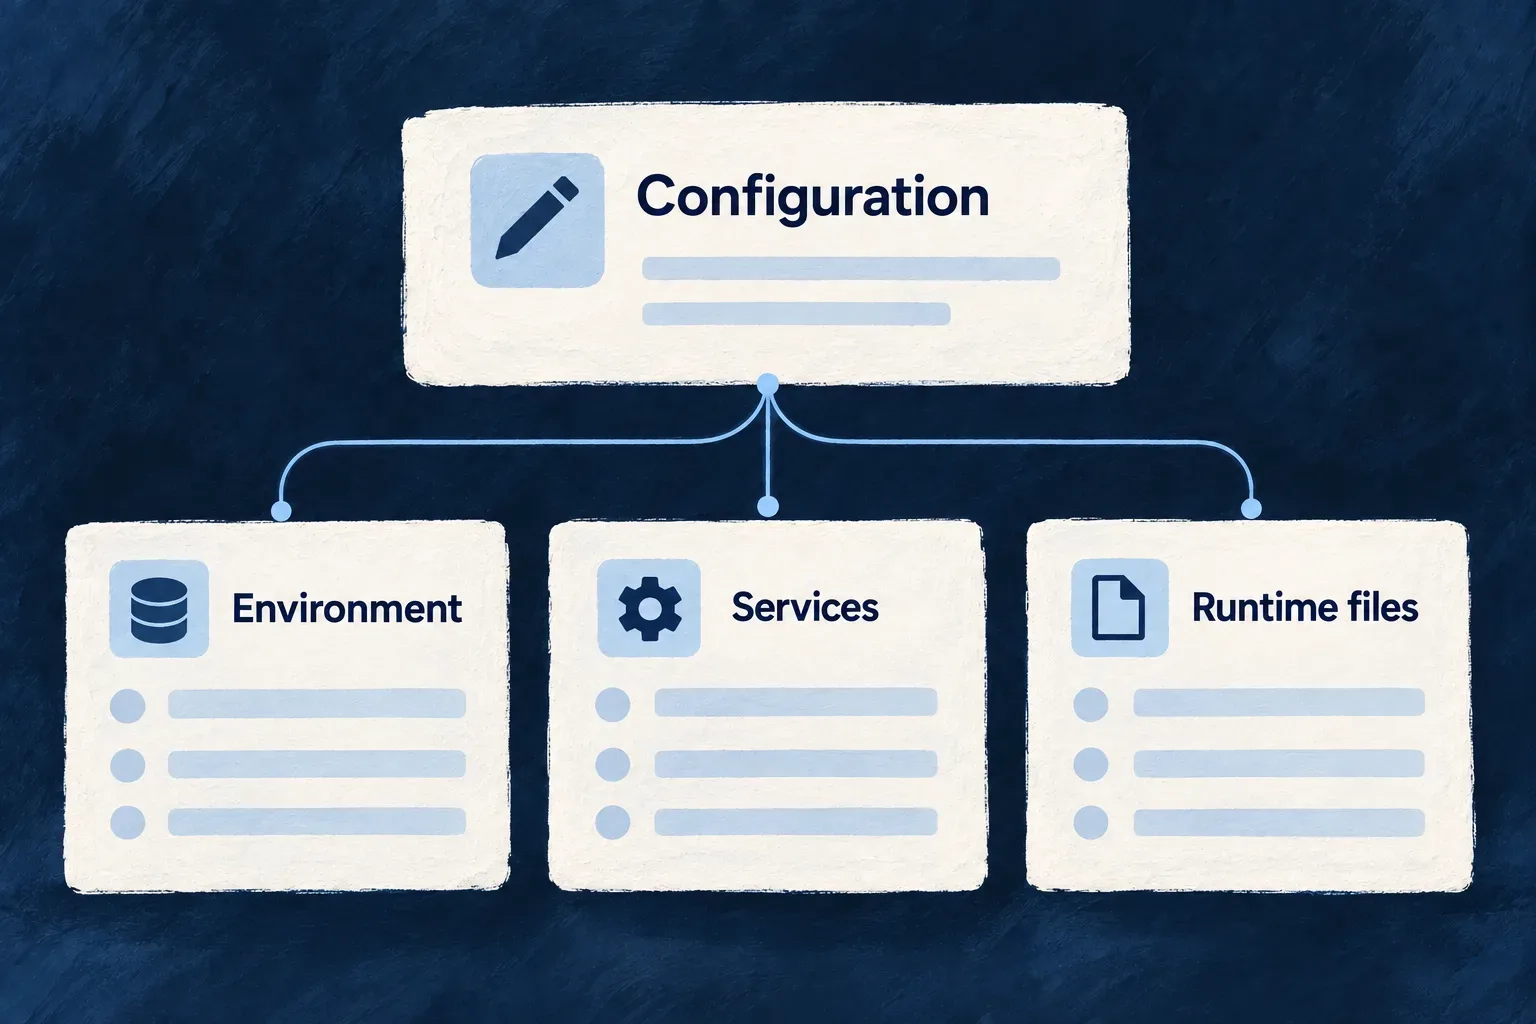
Authored declarations supply separate local and remote configuration outputs.

Keep authored choices and generated outputs connected

Choose the environment

Local and remote environments share the application model while carrying their own settings. Select the environment the command should work on.

Generate the outputs you need

Refresh configuration or environment files deliberately. Review generated changes against the declarations that produced them.

Start the daily development loop

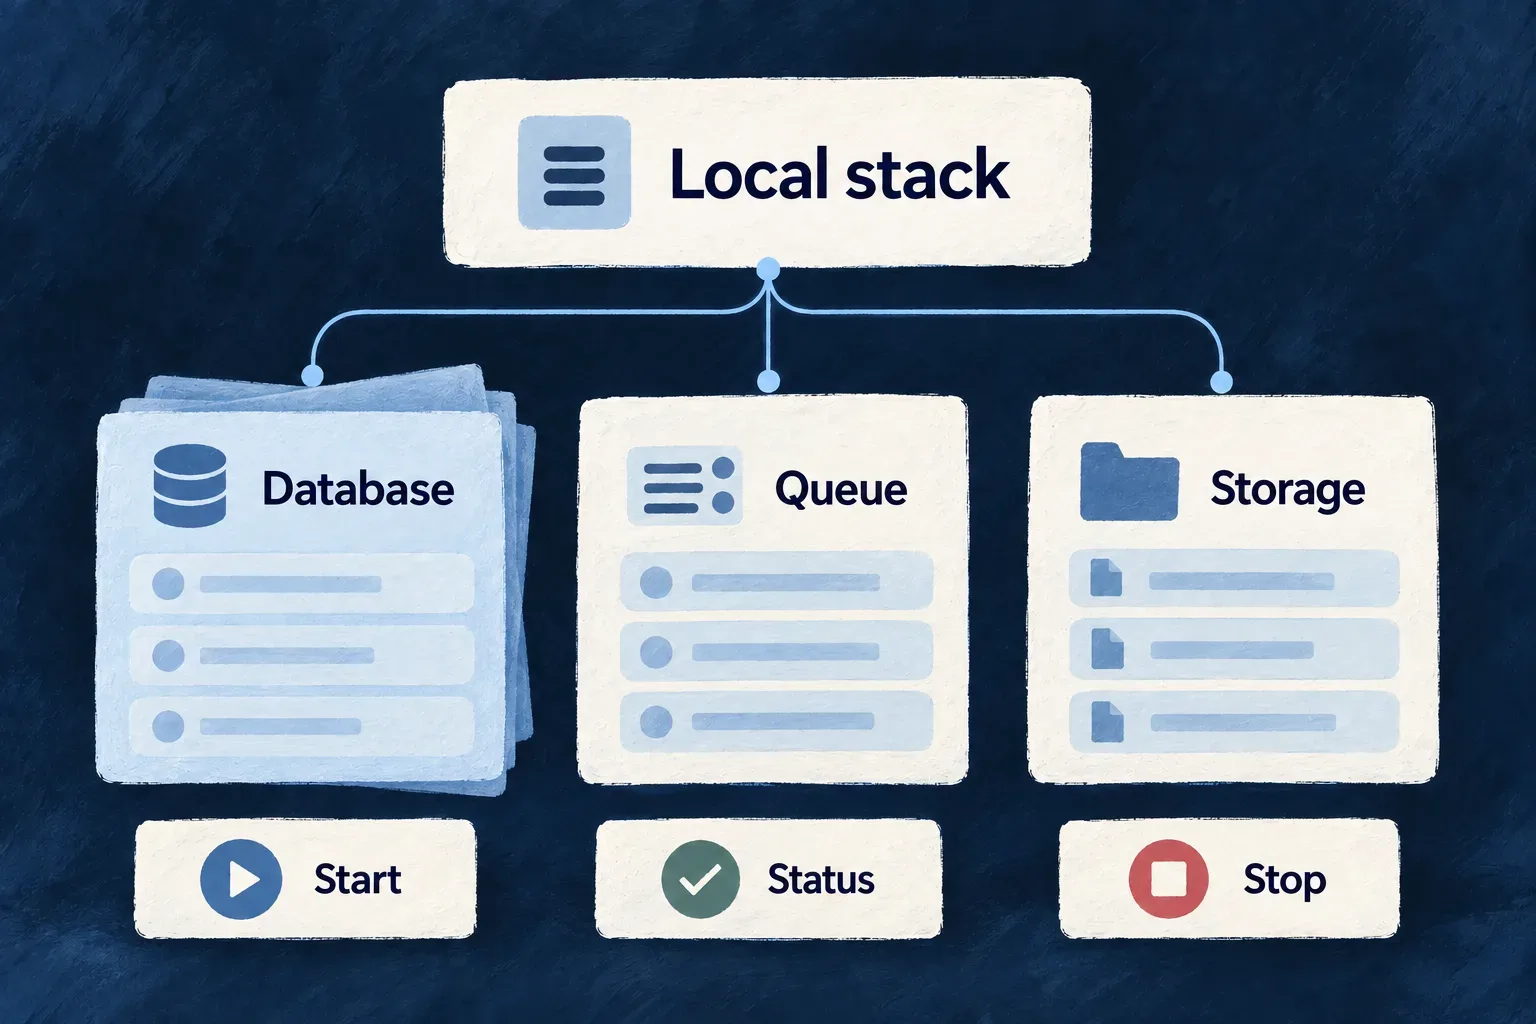
Local development brings together prerequisite checks, backing services and supervised application processes, with their output available while you work.

Example: Change a service connection

A developer updates the application’s provider configuration. They regenerate the local outputs, run the available configuration checks and start the application. The final check is the feature using that connection, not just the generation command completing.

For engineers

Select outputs explicitly

Run these commands from an existing application root after establishing the environment’s required configuration and credentials. Synchronization writes outputs. The configuration validation used below checks generated storage and ClamAV configuration consistency; test the actual provider interaction separately.

# Regenerate the local configuration and environment-file outputs.
wildo config sync --env local --domain config
wildo config sync --env local --domain env-files

# Check the configuration after reviewing the generated changes.
wildo config validate --env local --domain config

Edit the authored declarations when changing the intended configuration. Treat generated files as outputs of that decision, so the next synchronization does not silently replace a hand-edited value with the old source value.

Understand the available output domains

DomainPurposePractical distinction
configConfiguration and deployment outputsCarries authored application/environment decisions into generated outputs
env-filesEnvironment-file generationPrepares process inputs for the selected environment
manifestLocal infrastructure manifest regenerationUses the active local environment; remote environments are skipped
cicdContinuous integration and delivery configurationSupplies the project automation’s generated configuration
secretsSecret-related synchronizationHandle deliberately; secret rotation is a separate explicit action

Do not use force or rotation options as routine repair steps. In particular, forcing synchronization and rotating secrets are different operations.

Run development in its own terminal

Use this supervised sequence with a local Docker Compose environment.

# Terminal 1: this is a long-running foreground development command.
wildo local dev

# Terminal 2: inspect the companion after startup.
wildo context health
wildo context list

local dev covers preparation of local supporting services and supervised development processes. dev start is the narrower delegation to the application’s development script. Choose the command for the work you need, rather than starting competing process supervisors.

Keep three checks separate

Configuration validation checks the supported configuration invariants. Compilation determines whether source changes can be emitted and made available to consumers. A feature check exercises the application’s behavior. None of those checks replaces the other two.

After a TypeScript change, wait for the relevant compile/publication to finish before using companion inspection as evidence of the new model. Inspect the process output if the application still exposes the previous declaration.

Ask the application what it exposes

Before changing a resource or operation, developers and coding agents need to understand how it fits the application.

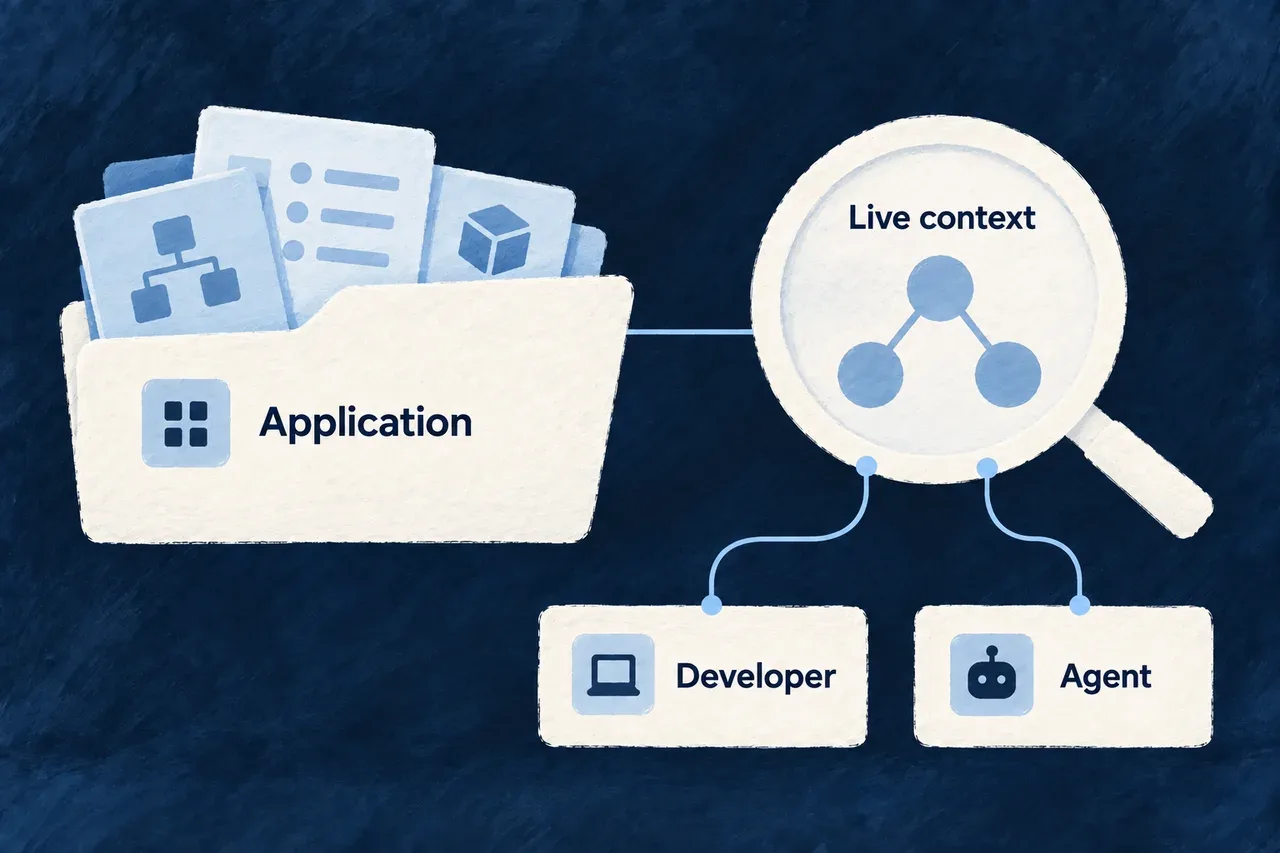
The companion exposes inspectable views of the application’s resolved model. The CLI discovers those views from the serving companion, so the questions available reflect that application’s development services.

A developer and a coding agent inspect the same application model through live context.

Share context across the tools doing the work

Discover before querying

Ask which views the companion provides, then inspect the resource registry, specifications or another available subject.

Connect declarations to their consumers

Inspect the resolved application model when tracing resources, relationships and operations. Use it to orient the change before testing its behavior.

Read freshness honestly

The companion works from compiled application packages. Complete compilation before checking a source edit, and use the response’s freshness information to interpret what you see.

Example: Investigate a resource that is missing from a screen

A developer checks whether the resource appears in the companion’s resolved registry and specifications. If the latest declaration has not reached the compiled model, they investigate development output first. If it is present, they continue into routing, display configuration and permissions.

For engineers

Inspect the available model views

Start from the same application workspace used to run development. This sequence is for a second terminal while the companion is serving:

# Can this application's companion answer?
wildo context health

# Which query keys and services does it currently expose?
wildo context list

# Inspect two declared model views.
wildo context info resources-registry
wildo context info resource-specifications

context list fetches available behaviors and service keys from the companion. context info resolves its default service from that live menu. For a behavior that accepts input, the command supports --input with a JSON value; select an explicit service with --service when the query requires one. Use the listed behavior’s contract rather than guessing input fields.

Distinguish model inspection from business data access

The resource registry describes exposed resource configuration. Resource specifications describe the declared contracts. These queries support development understanding; they are not a general-purpose endpoint for reading customer records.

QuestionEvidence to inspectWhat it does not establish
Is the companion reachable?context healthReadiness of every application service
What can I ask this application?context listAvailability of a query absent from its menu
What resources and contracts are exposed?The relevant context info viewThat an uncompiled source edit has loaded
Does the feature work for its users?An executed application interaction or testThis cannot be concluded from model inspection alone

Interpret the freshness report

The CLI reports whether the companion reused a held derivation from compiled application packages, or whether reuse was not reported. Unemitted source edits are not represented. A successful response therefore establishes that a model was served, not that the application’s latest source finished compiling.

This distinction makes inspection useful for diagnosis: compare the model returned with the expected declaration, then follow the compilation and serving process if they differ. Avoid repeatedly rewriting a correct declaration when an older compiled result is still being served.

Use the visual surface for the wider development picture

The creation workbench provides a browser view of development work and results. Its frontend runs at a separate local origin and connects to companion services. Keep it distinct from the business application’s administrator interface.

Templates and composition

Every piece of a Wildo application starts from a template, and every template knows where its output belongs. A new application is rendered from a skeleton; a new module, resource, website, documentation site or background worker is added by applying a named scenario; the screens, emails, documents and marketing pages of the application are rendered from layout, email, PDF and section templates that the framework holds to a contract. The leverage is not that files are copied for you. It is that an artifact’s location and its registration follow from what it is, so neither a person nor a coding agent has to decide where something goes, and the framework can check that everything it expects to find is there.

The idea

The word “template” names several things in Wildo, and they share one rule, recorded in .claude/rules/application-creation-directive.md: placement is determined, never improvised. An artifact’s location is computed from its kind (a family maps to a directory; a module task maps to that module’s paths), so the author is told where things go rather than asked. What you declare once is small: an application’s identity and ports, a module’s identifier, a resource’s name, the label keys a website section expects, the template id a generated document carries. What is derived is large: whole file trees, registry entries located by syntax tree, dependency declarations, translation keys, manifest bindings, and the checks that refuse drift between them. Where a template writes into an existing file it does so idempotently and never over content you changed: git is the merge and the undo, and the framework keeps no ledger of what it wrote.

What you get for free

  • A bootable application from one command, with ports allocated so two applications coexist.
  • Registration for everything a scenario creates: module registries, service entries, provider scopes, workspace members, dependency and peer declarations, override entries.
  • Dry-run plans that are the exact bytes the apply will write.
  • Idempotent re-runs, and a refusal rather than a merge over anything you edited.
  • A working form, detail and summary screen for every resource before any layout is written.
  • Translation keys for every section, wizard step, group, email slot and website slot you name.
  • A locale fallback chain for emails and a startup warning for any missing system email.
  • A regenerate operation, a specification entry and a startup identity check for every generated document field.
  • Build-time refusal of a marketing site whose label packs are incomplete, and of a documentation portal whose publication does not exist.

Where you plug in

  • wildo init <name> and wildo compose <scenario> --var name=value [--dry-run].
  • A new scenario: a scenario.json with files/ and edits.
  • The exported anchors in wildo.saas.config.ts a scenario appends to.
  • layout.refs, layout.edit, layout.display and layout.summary in a *.ui-behavior.tsx.
  • A template.tsx and labels.<locale>.ts pair under backend-api/src/engine/email/system/<name>/ or a module’s emails/resources/<resource>/<operation>/.
  • z_file({ generation }) on the schema, a PdfTemplateDefinition, and definePdfTemplateBindings on the module’s backend descriptor.
  • defineWebsiteSection and the locale packs under website/src/i18n/.
  • wildo.infra.<env>.config.ts for each deployment target.
  • wildo generate labels and wildo generate translate after naming a new slot.
For engineers

How it is built

One rule, eight families

FamilySourceRendered byLands in
Application skeletonskeletonwildo initthe application root
Composition scenarios<ref>wildo compose, foundation executora module, service or package
Infrastructure**the deployment services.wildo-saas/infrastructure/, manifests, CI workflows
Screen layoutsZod schema, *.ui-behavior.tsxthe automated layout generatorforms, detail and summary views
Emailtemplate.tsx + labels.<locale>.tsthe email template registrysent mail
PDFPdfTemplateDefinition bound per fieldthe PDF generation orchestratora generated file on the record
Website sections, documentation unitsdefineWebsiteSection, documentation unit schemathe website and documentation renderersthe marketing site, the documentation portal
Labelsplanned labelling unitsthe companion’s labelling pipelinebackend-api/src/engine/i18n/<bucket>/<slug>.<locale>.ts

The first three are Handlebars templates rendered to files once. The others are code and data the running application renders on every request or at build time. Both kinds obey the placement rule.

The application skeleton

wildo init materialises skeleton through SaasSkeletonService in saas-skeleton.service.ts. The tree carries three classes of file: plain files copied verbatim, *.hbs files rendered through the shared Handlebars TemplateProcessor with the application identity and a block of allocated ports (two applications beside one framework checkout must not collide), and a gitignore written out as .gitignore, because a real dotfile inside the template tree would make git ignore the template’s own files. A .init.hbs suffix marks the initial variant of a file whose later evolution belongs to a service or a scenario: wildo.saas.config.ts.init.hbs is rendered once, and afterwards the configuration service and the scenarios own it.

The rendered configuration exports empty objects on purpose (applicationWorkers, applicationMinions, applicationExtraServices, frontendServiceProviderScopes and their scope twins). They are insertion anchors located by syntax tree, so that a later scenario appends a worker bucket and its provider scope in one apply and the pair can never drift. Two files are derived rather than templated: the root package.json, whose pnpm.overrides are computed from the framework’s current override set, and the development stack script, whose package list is the set of scaffolded workspace members. Every generated package declares the engine’s peer closure, read from the delivered engine-peer-closure.json, so a later version pin can reach it. The service refuses a non-empty directory, and runs in two modes: SkeletonMode.FRAMEWORK_DEV links the framework checkout, SkeletonMode.APP_CREATOR pins published @wildo-ai/* versions.

Composition scenarios

A scenario is a directory under scenarios whose name is its ref, holding a scenario.json manifest and an optional files/ tree. The manifest, validated by CompositionScenarioManifestSchema, declares ref, version, title, description, typed variables (string, number or boolean; required or defaulted; optionally pattern-constrained), edits over existing files, and postNotes printed after a successful apply for the steps the scenario cannot automate. Inside files/, a .hbs file is rendered through createCompositionTemplateRenderer (an isolated Handlebars environment with nine helpers, so both hosts render identical bytes), any other file is copied as raw bytes, and __variable__ path segments interpolate from the same values, which is how __moduleId__/index.ts.hbs becomes crm-core/index.ts.

Edits over existing files are the part that makes a scenario more than a copy. The engine offers eleven kinds, named in CompositionScenarioEditKind, and every one is anchored by syntax tree or by structure rather than by regular expression: ts-array-append, ts-import-add, append-line, ts-enum-member-append, ts-object-append, append-block, json-object-append, pnpm-override-append, package-dependency-add and config-property-add, the last reaching a nested path inside wildo.saas.config.ts through the configuration walker. Each kind is idempotent, and each refuses when the key it would write already exists with a different value: authored content is never silently overwritten. This is drawn from scenario.json:

{ "kind": "ts-import-add", "file": "shared-lib/src/modules-registry.shared.ts",
  "statement": "import {{moduleCamel}}Module from './modules/{{moduleId}}';" },
{ "kind": "ts-array-append", "file": "shared-lib/src/modules-registry.shared.ts",
  "exportedArray": "applicationSharedModules", "element": "{{moduleCamel}}Module" },
{ "kind": "append-line", "file": "shared-lib/src/index.ts",
  "line": "export * from './modules/{{moduleId}}';" }

The apply engine in composition-scenario-apply.application-creation.service.ts is split into planCompositionScenario, which computes every byte without touching the tree, and applyCompositionScenarioPlan, which writes an already approved plan; --dry-run falls out of the split. Three invariants hold. Unknown, missing or malformed variables refuse before any file is read. A target that exists with different bytes puts the whole apply into refusal and nothing is written, while a byte-identical target is skipped, so re-running a scenario is idempotent. And a written file belongs to the application from that moment: the engine records nothing, and a later run against edited output refuses rather than merges. Dependency declarations are part of the plan, not a pass after it. While planCompositionScenario renders a package.json the scenario creates, it expands the engine peers that manifest inherits, read from the delivered engine-peer closure under .wildo-saas/templates/, so the preview shows the derived peerDependencies and a collision on that file is judged against the bytes that will actually land. wildo compose then folds provider package links into the same plan before it prints anything: the root manifest’s derived pnpm.overrides are computed against the prospective files, without a temporary tree, and an existing root that differs refuses like any other target. That provider step is CLI-owned; the companion’s foundation executor applies the same core plan and does not run it.

Scenarios resolve from two roots: the application’s delivered copy under .wildo-saas/templates/scenarios/ first, the framework checkout second, and per ref the delivered copy wins, because it is what the application’s framework version shipped. Fifteen scenarios ship today: add-module, add-resource and add-custom-operation grow the domain; add-website, add-website-section, add-marketing-page and add-locale grow the marketing site; add-technical-doc adds the documentation portal; add-minion, add-worker-node and add-worker-rust add background processes; add-environment adds a deployment target; add-backend-provider, add-file-picker-provider and add-provider declare providers. The operator surface is wildo compose <scenario> --var name=value [--dry-run] in compose.command.ts.

The creation journey uses the same engine. deriveFoundationCompositionPlan in foundation-composition-plan.application-creation.service.ts is a pure function from an approved domain plan to an ordered list of add-module and add-resource invocations, plus the engine capability change the chosen tenancy implies; it refuses any name it cannot derive into the scenario’s declared variable patterns. The companion’s foundation executor supplies the host facts and applies each invocation through the same renderer wildo compose uses, so identical scenario bytes produce identical files whichever door applied them.

Modules: how an application is organised

A module is the unit of organisation, and it is a directory of the same name in each package: shared-lib/src/modules/<id>/ (the Zod schemas, resource configurations, relationships and field identifiers), specifications/src/modules/<id>/ (the module’s business semantics and its resource specifications), backend-api/src/modules/<id>/ (operations, addons, emails, PDF templates) and frontend/src/modules/<id>/ (the UI behaviour and views). Three registries are static and are appended by syntax tree: applicationSharedModules in shared-lib/src/modules-registry.shared.ts, applicationModuleBusinessSemantics in specifications/src/module-registry.specification.ts, and applicationFrontendModules in frontend/src/modules/index.ts, and a fourth entry declares the module to the application itself: add-module appends the module key, with its explicit services list, to the applicationModules object wildo.saas.config.ts consumes, because a module registered in source but absent from that declaration is missing from the bootstrap and provider-runtime descriptors. The backend registry alone needs no edit: its modules/index.ts discovers the default export of every module directory’s EMITTED index through scanSubdirDefaultExports, so a source folder becomes a runtime module only once the compiler has published it, and a custom operation is likewise found by a recursive scan for .operation files, which is why add-custom-operation performs zero edits. Discovery supplies a service’s contributions; it does not decide which services a module belongs to. That is the declaration’s job, and a worker is a separate service binding rather than another name for the backend.

Wonder Todos shows the three sibling registries the framework then assembles: modules-registry.shared.ts, modules-registry.frontend.ts and modules-registry.backend.ts, each prepending the engine’s own module to the application’s. The backend descriptor a module exports (BackendOwnedModule) is the busiest insertion point: later scenarios and workflows append seeds, flowsActors, pdfTemplateBindings, chartDefinitions and emailTemplateDefinitions beside backendModule. add-resource lands a starter schema, a resource configuration factory and a resource specification inside the module, then appends the resource to the module’s typed registries, including an enum member located by syntax tree.

Infrastructure templates

*.hbs, the forty-one manifests under ** and the workflow templates under ci are rendered by the deployment services with the same TemplateProcessor the skeleton uses. renderDockerComposeTemplate in docker-compose-generator.service.ts renders the platform stack and the per-application file; K8sManifestGenerator.renderAllManifests, invoked from k8s-bootstrap.service.ts, renders namespace, ingress, certificates, storage, the internal backing services and the per-application deployments, with every template variable typed in k8s-manifest.schemas.ts; k8s-secrets-generator.service.ts renders secrets; ci-workflow-generator.service.ts renders one deployment workflow per environment. All of them read the same environment descriptor, wildo.infra.<env>.config.ts, which add-environment creates and wildo config sync discovers by directory scan. The Compose lane runs the dogfood stacks; the Kubernetes lane is implemented and authored by a dogfood environment but has no recorded cluster deployment, which is the maturity environments-and-services records.

Layout templates for generated screens

A resource’s create, edit, detail and summary screens are rendered from a layout template. When you declare none, generateDefaultFormTemplate, generateDefaultDisplayTemplate and generateDefaultSummaryTemplate in default-layout-generator.frontend.utils.tsx derive one from the Zod schema: a flat list of <FormField> inside <FormLayout>, conditional fields from .showWhen() decorators, a <DiscriminatorSwitch> for discriminated unions and an <ObjectScope> for nested objects. When you want sections, wizard steps or groups, you write the template in the resource’s *.ui-behavior.tsx through resourceUIBehavior, with the skeleton components <Section>, <WizardStep> and <Group>. This is the shape in tasks.ui-behavior.tsx:

layout: {
  refs: { sections: ['content', 'workflow', 'effort', 'assignment'] },
  edit: () => (
    <FormLayout>
      <Section name="content" appearance={SectionMode.CARD}>
        <FormField name="title" />
        <FormField name="description" />
      </Section>
      <Section name="workflow">
        <FormField name="status" />
        <FormField name="priority" />
      </Section>
    </FormLayout>
  ),
},

layout.refs is the LayoutRefManifest: a static list of the section, wizard-step and group names the JSX uses, readable by tooling without parsing JSX. It produces the label keys resources.{type}.sections.{ref}.title and .description, and their wizard-step and group twins, which the labelling pipeline plans and useResourceLabels resolves. The resource specification documents the same slots, and validateStructuralSlotDescriptions in resource-specification.schemas.ts refuses at load time a documented slot the layout does not declare, or a declared slot the specification does not document.

Email templates

An email is a directory: template.tsx exporting an EmailTemplateDefinition<L> with subject(props) and body(props) (a React Email tree composed from the shared primitives in email-components.ts), beside one labels.<locale>.ts per locale typed by the template’s label generic. Placement is the key: a system email lives at backend-api/src/engine/email/system/<name>/ and is keyed system.<name_underscored>; a resource email lives under the module at emails/resources/<resource>/<operation>/ and is keyed email.<resource>.<operation>. The skeleton’s email-template-definitions.ts walks both trees at startup with scanEmailTemplateDirectory, and EmailTemplateRegistryBackendService.resolve() picks the exact locale, then the base language, then the configured fallback. The twelve system emails an application needs are the closed vocabulary SystemEmailTemplateRef; startup warns when one is missing in the default locale. Each system template also carries an authored specification overlay (system-email-template-specification.schemas.ts) stating its purpose and translatable slots, so a coding agent or the companion can draft a body without inventing wording. Wonder Todos carries the full system set and its module emails under the same two conventions.

PDF templates

A generated document is a file field the application renders itself. The shared schema says only z_file({ nature: FileNature.PDF, generation: { source: FileGenerationSource.PDF_TEMPLATE, templateId } }), and zod-file.ts refuses every option that would contradict generation: multiple files, a non-overridable field, a MIME type other than PDF, retrieval ingestion or upload scanning. The template itself is backend-only: PdfTemplateDefinition in pdf-template-definition.ts carries id, optional locale-keyed labels, a buildContext() hook that is the only place allowed to read data, and a body() returning a React-PDF document. It is bound to its field at startup by resource type and field name, as in pdf-template-bindings.ts:

export const tasksManagerPdfTemplateBindings = definePdfTemplateBindings({
  [TasksManager_ResourceType.TODOS]: {
    generatedSummaryPdf: {
      template: todoListSummaryTemplate,
    },
  },
});

Startup validation checks template.id against the schema’s templateId, so the schema, the specification (ResourcePdfTemplateSpecification), the derived regenerate operation and the backend import all name one template. PdfGenerationOrchestratorBackendService renders on create; an ordinary update never re-renders; the derived GENERATED_FILE_REGENERATE operation replaces the file explicitly and soft-deletes the one it replaced.

Website sections and documentation units

A marketing page is an ordered array of sections, and a section is declared with defineWebsiteSection from define-website-section.ts. From landing.sections.tsx:

export const LANDING_HERO_SECTION = defineWebsiteSection<Record<string, never>>({
  sectionRef: 'landing-hero',
  category: WebsiteSectionCategory.HERO,
  expectedLabelKeys: [
    landingKey('landing-hero', 'eyebrow'),
    landingKey('landing-hero', 'headline'),
    landingKey('landing-hero', 'subheadline'),
  ],
  Component: LandingHeroSection,
});

expectedLabelKeys are the fully composed keys website.<page>.<section>.<slot>, and one flat JSON pack per locale under website/src/i18n/ must carry every one of them: label-pack.validator.ts checks the packs against the page manifests, and the loader in label-pack-loader.ts throws on a missing or malformed pack at build and server-render time. add-website-section writes a section block before the page’s <PAGE>_SECTIONS array, appends the constant to that array and the two starter keys to en.json, and leaves the other locales to you; the build names every gap. add-marketing-page creates a page vertical, add-locale a website locale, add-website the site.

Documentation is data before it is pages. A unit is validated by TechnicalDocumentationUnitV1Schema in technical-documentation-units.schemas.ts: a kind (orientation, quickstart, concept, how-to, reference, runbook, troubleshooting, change), reader audiences, ordered sections, links, provenance, applicability requirements, an access class and an editorial status, each list unique and sorted. The engine ships an authored bundle of units for what it provides; the companion derives the application’s own facts and publishes the rendered result into technical-doc/src/generated/consumer-documentation/, which the portal scaffolded by add-technical-doc mounts and refuses to build without.

Label files generated per unit

Every label an application shows is looked up, and the files that hold them are generated per unit. wildo generate labels and wildo generate translate drive the companion: planAllUnits() in labelling-planner.companion.service.ts derives a LabellingUnit for each resource, component, theme, billing catalogue, role set, lifecycle, guidance flow and engine page, with a filePathHint of bucket and slug, and the orchestrator writes backend-api/src/engine/i18n/<bucket>/<slug>.<locale>.ts, pruning keys no longer planned. The backend never generates: scanCustomLabelsDirectory walks that tree at startup and serves it. The same planner reads a resource’s layout.refs, the label keys a website section expects, and the per-template email labels, so a slot you name in a template becomes a key that is planned, drafted and translated without a second declaration.

Boundaries and known limits

  • A scenario never merges. A target that differs refuses the whole apply; reconcile in git first.
  • add-provider writes a provider scope with empty capability and protocol lists on purpose, and the runtime sync rejects it until you fill them from the provider package’s own declaration.
  • The default layout generator stops at flat lists: array-of-object fields and conditions on nested fields need an explicit template.
  • Generated documents are rendered for MongoDB-backed resources only; the PostgreSQL adapter refuses create-time generation and regeneration because file metadata is stored in MongoDB and cannot be committed with the parent row. Only single-file fields can be generated.
  • A template may declare type: EmailTemplateType.MARKETING to route through a marketing-capable vendor, but no engine service orchestrates campaigns and no dogfood application enables it.
  • Label generation is development-time only, and the frontend has no cross-locale key fallback: a key the pipeline never generated shows as its raw path.
  • add-locale adds a locale to the marketing site, not to the application’s own labels.
  • The Kubernetes templates are rendered and tested, not yet proven by a recorded cluster deployment.
  • Brand propagation to a generated site exists as a command and is not exercised by a dogfood site.

Understand the application. Follow the work.

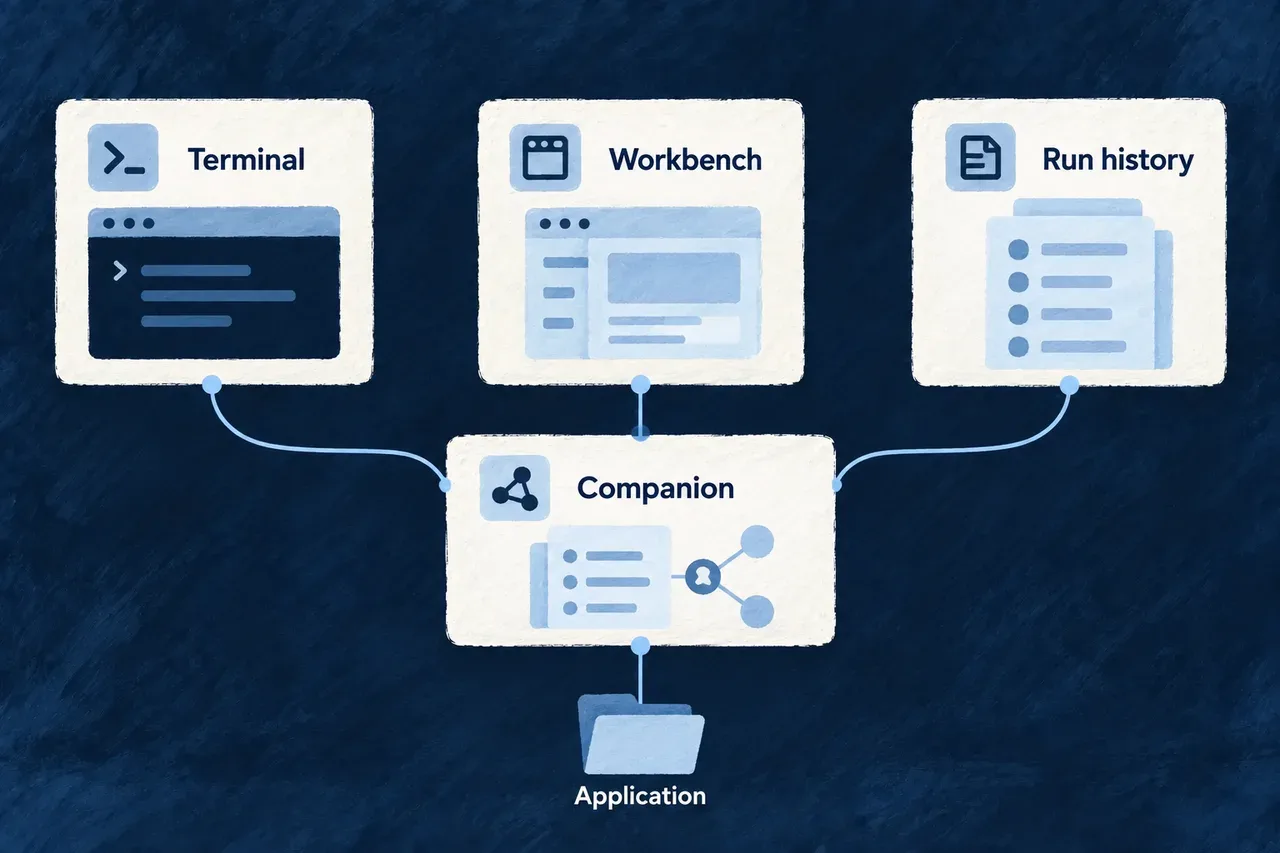
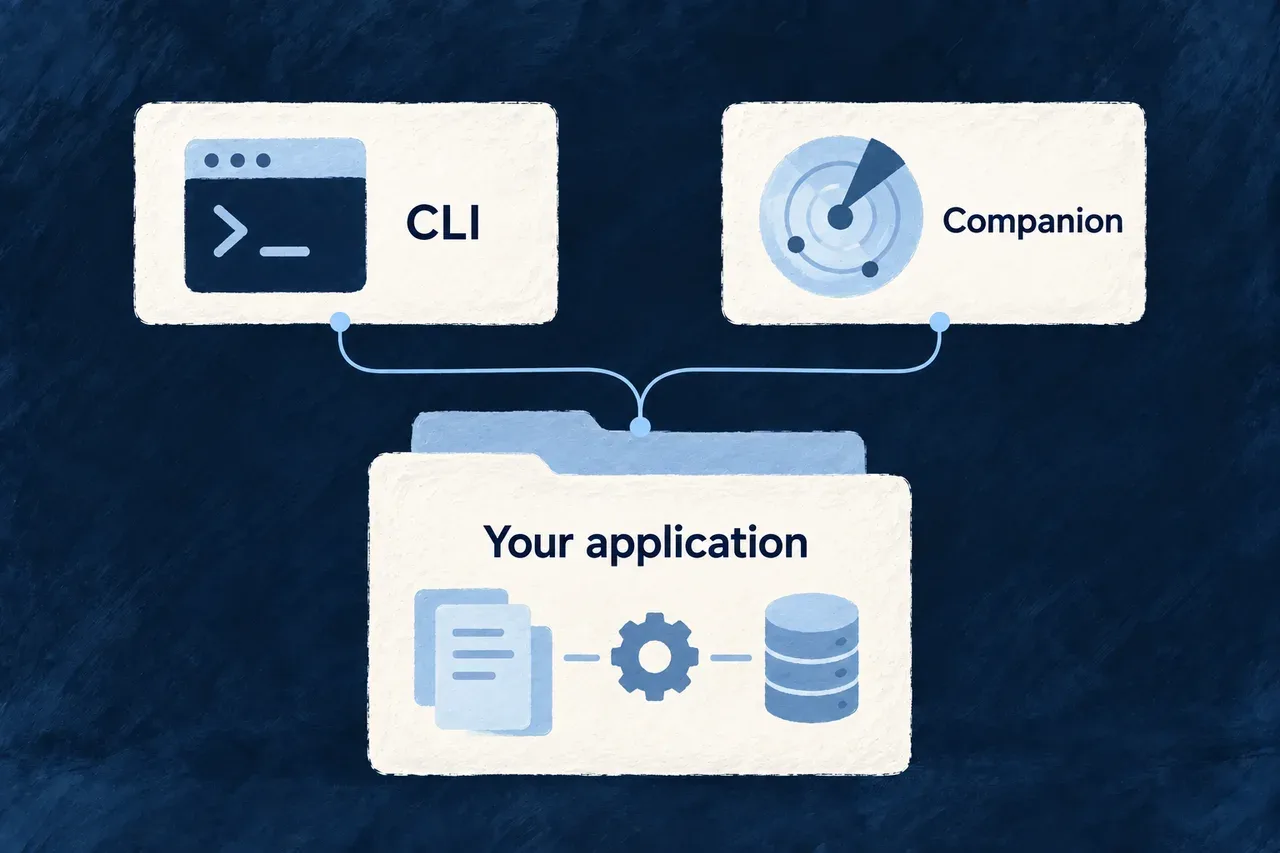
The companion gives development tools a shared view of the application. The terminal lets you ask focused questions; the workbench brings development state and results into a browser.

When assisted work runs, execution traces help explain what happened and what information was used. You can move from inspecting the application to investigating a result without rebuilding the context from scratch.

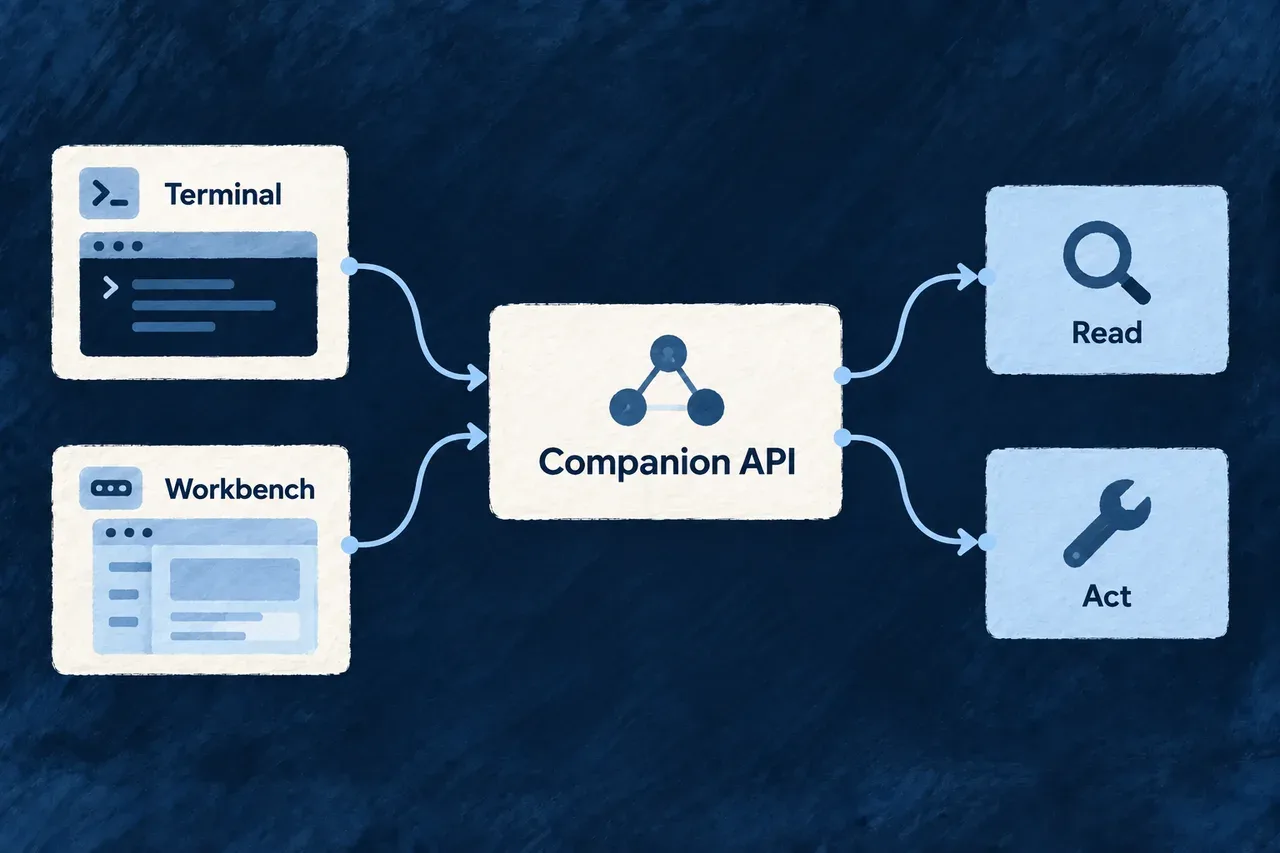
Terminal queries, the workbench and run history connect to an application-aware companion.

Different views, connected to the same project

Inspect the resolved model

Discover resources and specifications through the companion. Developers and coding agents can query the same application views before changing its behavior.

See work in context

Use the workbench to inspect development state and available actions. It connects to the companion while keeping the development interface separate from your product’s screens.

Understand a result

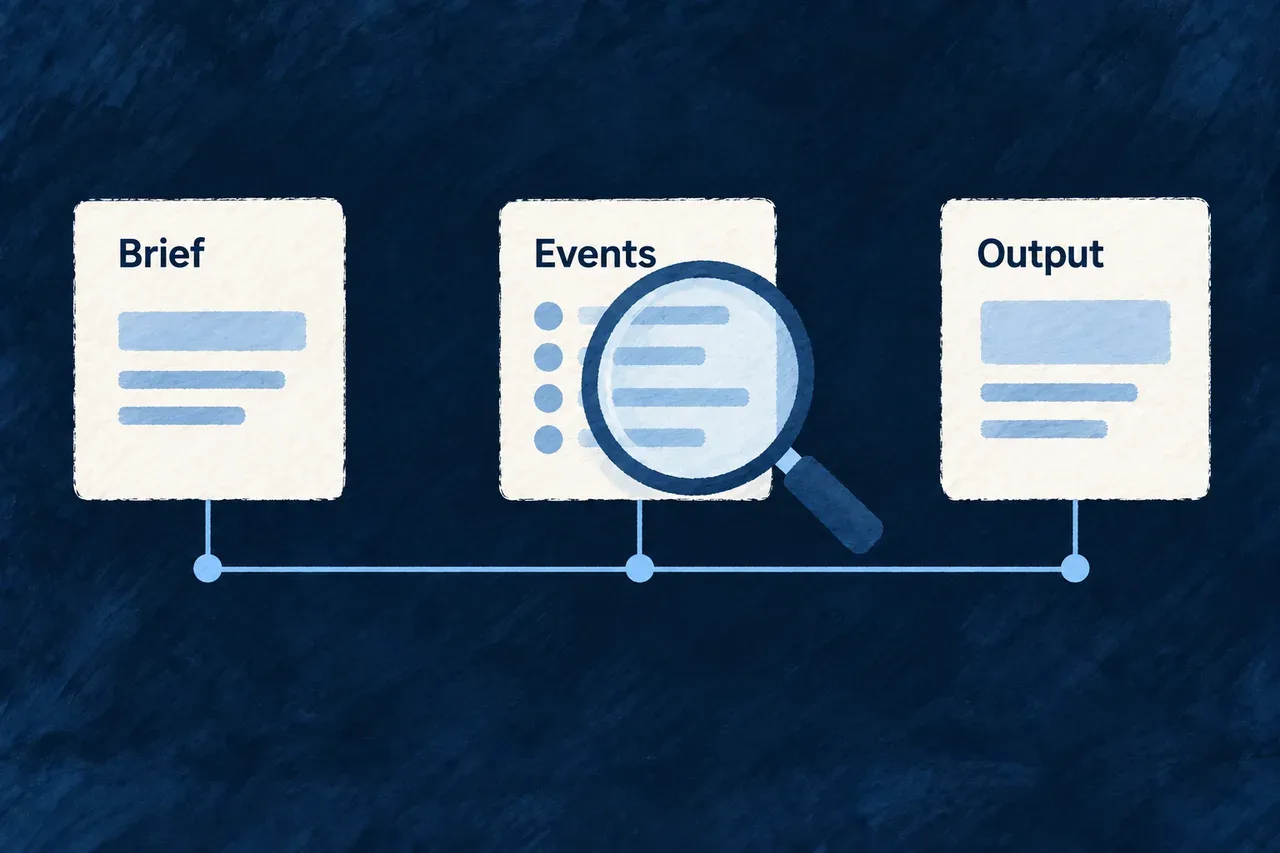
Read a run’s recorded events, briefs and outputs when investigating its behavior. Traces explain the work; the resulting application files remain the product.

Example: Find why a generated change needs revision

A developer inspects the application’s resource model, then looks at the work and results in the workbench. Where a run recorded a trace, its input brief and output help distinguish missing context from an implementation mistake. The developer can make the next change with a clearer understanding of the cause.

For engineers

Know which surface you are using

SurfaceResponsibilityWhat to inspect
CompanionApplication-aware local services and model derivationThe application and service targeted by a query
Context commandsRead-only discovery and inspectionQuery keys, payloads and provenance/freshness information
WorkbenchBrowser interface for development state and actionsCompanion reachability, semantic readiness and the workbench’s own server
Companion APIInterface consumed by development toolsThe contract of the particular read or action
Execution tracesRecorded events and larger input/output artifactsThe session and step associated with the result under investigation

The workbench has a separate local frontend origin. The companion supplies its application-aware services; it is not a browser bundle served at a companion /workbench/ path. Neither process is the business application’s administrator interface.

Start development, then inspect its surfaces

Use the configured application’s root with a local Docker Compose environment. Local development runs in the foreground, so the inspection commands belong in another terminal:

# Terminal 1: start the application's local development environment.
wildo local dev

# Terminal 2: check and discover the serving companion.
wildo context health
wildo context list

# Inspect the exposed resource model and contracts.
wildo context info resources-registry
wildo context info resource-specifications

# Inspect the local UI's readiness, then open its browser destination.
wildo workbench status
wildo workbench open

workbench status reports companion reachability, semantic readiness and the workbench server separately. Read those fields: a status command returning successfully does not mean every reported surface is ready. workbench open opens the resolved browser destination; it does not replace starting development.

Match each answer to its source

Resource introspection derives views from compiled application packages. Changes that have not been emitted are not represented. The companion can reuse a held derivation and track changes to emitted output; use the query’s provenance and freshness information when interpreting its answer.

Other questions have their own source. For example, the coherence report examines relationships between product-definition artifacts in the working tree. Do not interpret every companion response as a fresh compilation of every source file.

# Inspect the creation state and currently eligible work.
wildo context journey

# Inspect cross-family consistency in the product definition.
wildo context coherence

Model inspection helps establish what the application exposes. Coherence checks help locate inconsistencies between declarations. Neither substitutes for executing the affected feature with its real inputs and permissions.

Trace a run without confusing its history with its outcome

A playbook trace records events and larger artifacts such as an input brief or model response. Its reader exposes sessions, a selected session and step artifacts. Follow those records to understand the inputs and decisions associated with the result you are reviewing.

Tracing is best effort. The absence of a trace is not proof that no work ran, and a recorded answer is not proof that the generated behavior works. Inspect the resulting files and relevant verification alongside the trace.

Keep inspection and actions distinct

The context commands shown here are read-only. The companion also hosts development actions that can generate or modify application material. Select those through their intended CLI or workbench action rather than treating the whole local API as an inspection endpoint.

Explore the mechanisms below for the specific contracts. The workbench page focuses on the creator’s visual interface; this section explains how it connects to the companion and the other development views.

Keep application context available

Keep development tools connected to your application Tool

Development involves many short actions: inspect a resource, refresh derived content, run assisted work or review its result. Each needs to know which application it belongs to.

The companion provides that application-aware service alongside the development environment. Commands and the workbench can use its context and services while the business application keeps its own runtime.

Example: Return to a project after an interrupted coding run

A developer restarts local development and checks the companion and workbench status. If a previous coding task was interrupted, the companion reconciles its recorded state for review rather than silently undoing its edits. The developer inspects the changes before deciding how to continue.

The companion stays alongside a local workspace and its development tools.
For engineers
Check the application and its development surface separately

Run these commands inside the intended application. Keep the foreground development process in its own terminal:

For this supervised startup sequence, select a local Docker Compose environment.

# Terminal 1: prepare and supervise local application development.
wildo local dev

# Terminal 2: inspect the companion serving that application.
wildo context health
wildo context list

# Separate companion readiness from frontend availability.
wildo workbench status

# Open the local workbench destination after startup.
wildo workbench open

dev start is the narrower delegation to the application’s development script. local dev owns broader local preparation and supervision. Follow the workspace’s existing process ownership rather than launching competing supervisors to repair a missing response.

Keep its responsibilities explicit
ResponsibilityWhat the companion supplies
IntrospectionDerived views of compiled application models and their freshness handling
Authoring and generationApplication-aware services for supported derived content and creation work
Workbench supportExplicitly exposed resources, identity/frontend support and development operations
DiagnosticsReachability, state and recorded execution information

The observed application registry does not mean that every business resource API is exposed on the companion. Startup uses explicit controller/resource exposure. Inspect those contracts when integrating a new development surface.

Recover interrupted work without hiding the changes

This selected startup excerpt from start-companion-application.service.ts shows reconciliation before the HTTP server starts. Logging is retained; surrounding startup stages are omitted:

try {
  const { reconciledTaskIds } =
    await this.codingAgentDispatchService.reconcileInterruptedApplicationCodingTasks();
  this.logDebug('Startup coding-task reconciliation completed', { interrupted: reconciledTaskIds.length });
  if (reconciledTaskIds.length > 0) {
    this.logger.warn(
      'Startup reconciliation terminalized interrupted application-coding task(s) as '
        + 'INTERRUPTED_REQUIRES_REVIEW — a previous companion process left them PROCESSING. '
        + 'Review their captured change sets before retrying.',
      { reconciledTaskIds },
    );
  }
} catch (error) {
  this.logger.warn('Startup coding-task reconciliation failed; continuing (non-fatal by design).', {
    error: describeCaughtError(error),
  });
}
await this.initializePlatformHttpServer(config.customControllers);

Reconciliation makes the interrupted task reviewable and captures the worktree state. It does not revert the files or assert that the unfinished work succeeded. It is best effort so a reconciliation problem does not prevent the companion from starting and making diagnosis possible.

Keep locality and identity separate

The companion refuses a non-loopback HTTP host. Its protected custom routes use a machine-local token stored under the application state directory with restrictive permissions. Reading that token is not the same as a person’s approval or an application role.

The workbench’s platform-operator identity and resource authorization are separate again. The same email address in the business application’s user store does not make the two identities equivalent.

Check compiled publication when the model looks old

The companion observes compiled application surfaces. Let an edited declaration reach those surfaces before expecting inspection to reflect it. Health checks establish reachability, not that the latest source was successfully compiled or the feature was verified.

The model-refresh mechanism explains that boundary; the development interfaces explain how commands and the browser reach the companion.

Keep the application model ready to inspect Tool

An application’s resources and relationships are assembled by code. Looking for names in source files does not tell you everything the resolved application exposes.

The companion derives inspectable views from compiled application packages and keeps those answers available. It tracks changes to emitted output so development tools can reuse the model without importing the whole application for every question.

Example: Inspect a relationship after changing it

A developer updates a resource relationship and lets the application finish compiling. The companion detects the changed emitted model and refreshes the affected view. The developer checks that view before testing how the relationship behaves in the application.

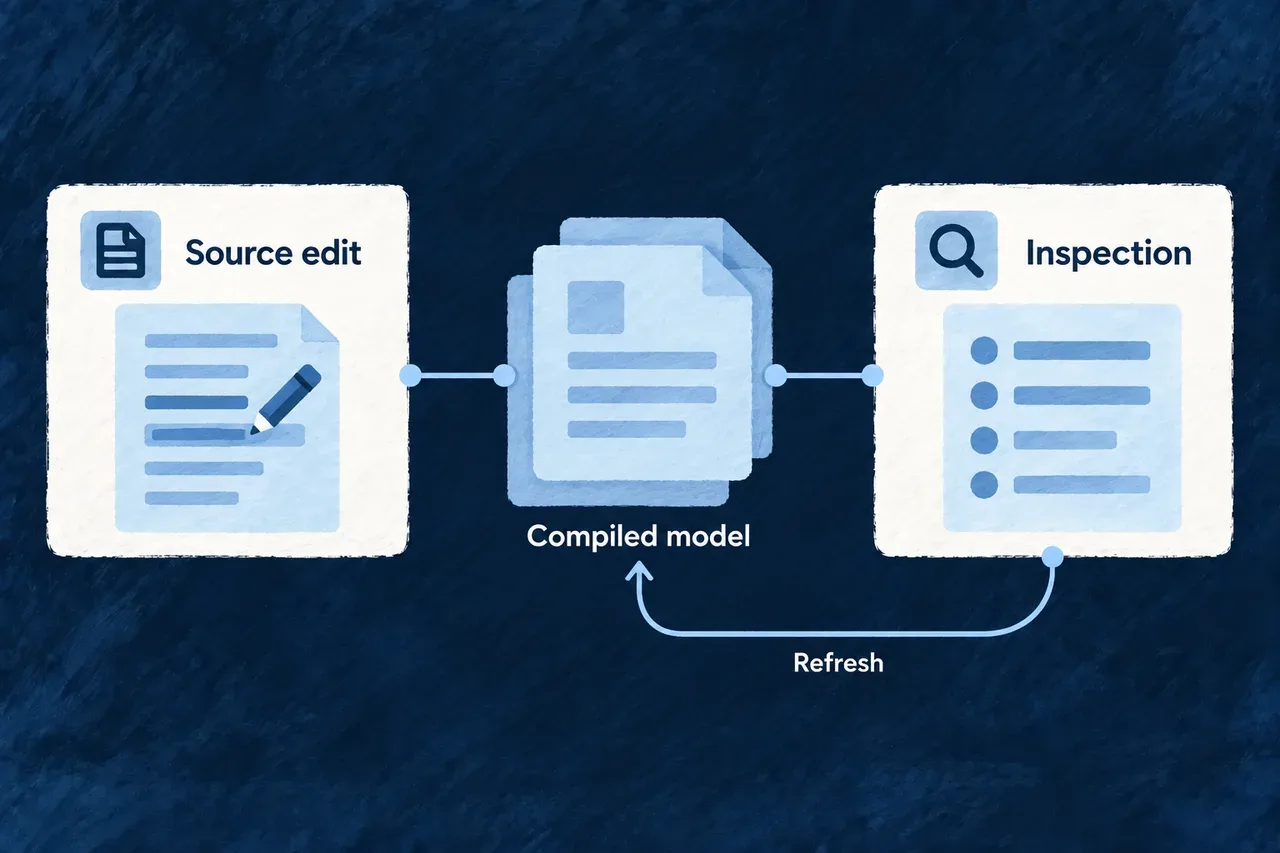
Source changes pass through the compiled model before refreshed inspection.
For engineers
Understand what is observed

The observed input is the application’s compiled companion-facing surfaces. Unsaved edits and source changes that have not been emitted are outside that view. A successful query says an answer was served; it does not certify completion of the latest build.

SituationHow freshness is handled
First derivationThe application packages are loaded to produce an inspectable result
Active watcher authorityReads can reuse the held derivation while watcher events and reconciliation observe emitted output
Changed observed outputThe affected derivation is refreshed and compared with its previous result
No active watcher authorityReads observe output freshness themselves rather than assuming push updates will arrive
First projection without a previous baselineThere is no earlier row set to publish as a change wave

Watcher registration follows successful attachment. Periodic reconciliation provides a check alongside filesystem events; losing the watcher authority returns the service to observation on reads. Warm reuse is conditional, not a promise that every read is only a lookup.

Publish changes at the resource boundary

This selected excerpt from introspection-resource-notifier.companion.service.ts follows the guard requiring a previous result. Formatting is expanded to make the before/after comparison visible:

const resourceTypes =
  this.resourceSource.resolveResourceTypesByBehavior().get(outcome.behavior) ?? [];

for (const resourceType of resourceTypes) {
  const identityField = this.resourceSource.resolveRowIdentityField(resourceType);
  const before = this.resourceSource.projectRowsForResource(
    resourceType,
    outcome.previous.result.data,
  );
  const after = this.resourceSource.projectRowsForResource(
    resourceType,
    outcome.next.result.data,
  );
  if (!after || !before) continue;

  const diff = diffProjectedRows(before, after, identityField);
  this.publishDiff(
    resourceType,
    identityField,
    diff,
    outcome.next.generation,
  );
}

The projections turn a behavior’s derived answer into the relevant resource rows. The identity field lets the comparison distinguish created, changed and removed rows. Publication supplies row-level updates and a collection refresh for their respective consumers.

This is framework implementation, not extra subscription code an application author must write. It explains why changing one projected row need not be represented as a replacement of every row.

Diagnose an old-looking answer in the right order
# Confirm that the intended companion is reachable.
wildo context health

# After the application's compile/publication has completed:
# discover the available views and inspect the resolved resource model.
wildo context list
wildo context info resources-registry

# Compare its declared specification view when investigating a change.
wildo context info resource-specifications

Read the response’s provenance and freshness information. Explicit cache reuse is useful evidence about the answer; an absent cache flag is not proof of a fresh subprocess import. If the expected model is absent, investigate the compiled publication and serving process before repeatedly editing a declaration that may already be correct.

Finally, exercise the consumer you care about. A server-side change notification and a browser applying that change are different observations; model inspection alone does not establish the latter.

Ground an agent’s change in the existing application Tool

A coding agent can ask the running companion about this application’s declared resources and specifications before choosing what to edit. That gives it application-specific contracts alongside the framework guidance it already reads.

The useful result is a better-grounded change: reuse an existing name, extend the operation already declared, and check the relationships the change must respect.

Example: Extend an existing action instead of creating a second one

A team asks an agent to add approval behavior. If the returned resource model already declares an approval action, the agent can inspect that action’s specification and implementation before deciding to extend it. If the action is absent from the selected model, it investigates the source and service context before introducing a new contract.

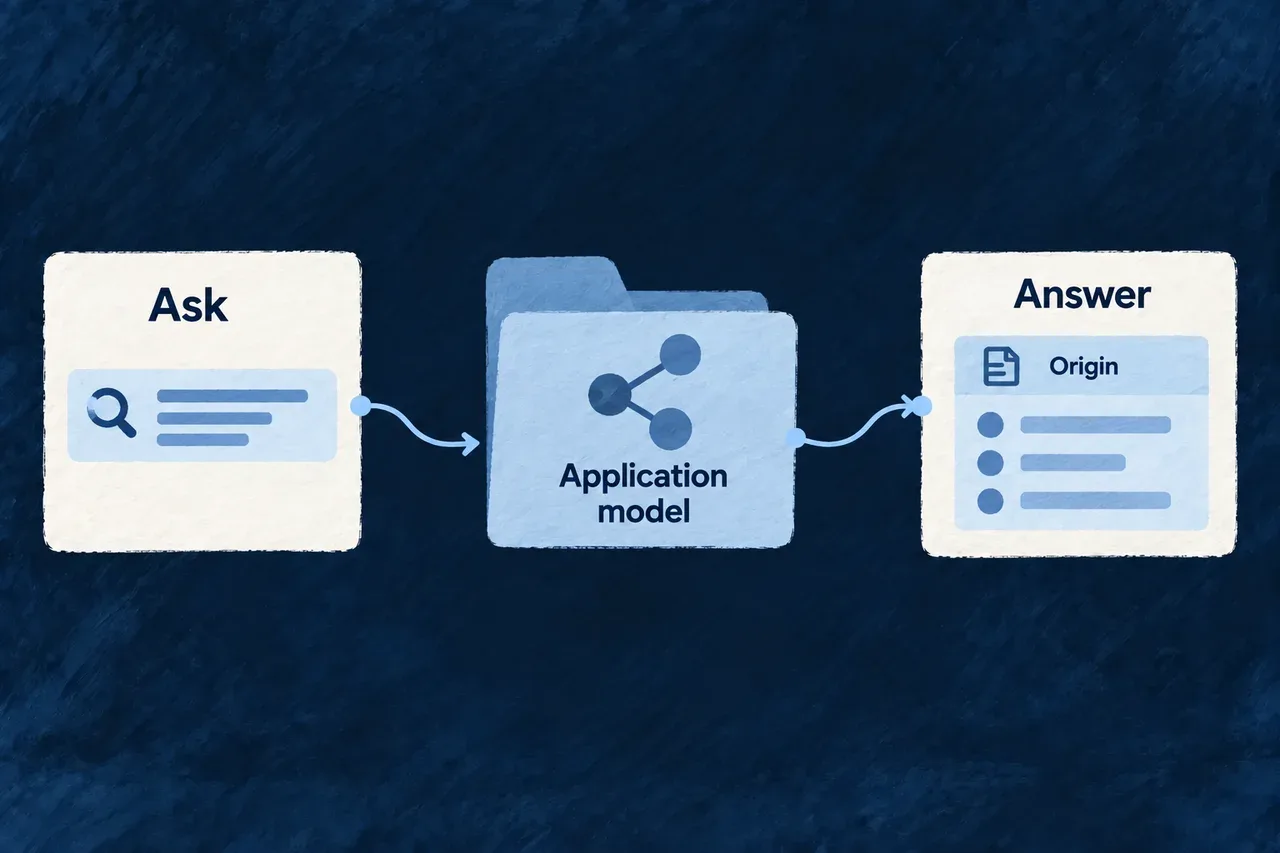
A tool asks the application model a question and receives an answer with its origin.
For engineers
Query from the application workspace

The following inspection sequence assumes that this application’s companion is running. These behavior identifiers exist in the companion catalogue; the live menu remains the source for service keys and available views:

# Check that this application's companion answers.
wildo context health

# Discover behaviors and their available service keys.
wildo context list

# Inspect resolved resources and their specifications.
wildo context info resources-registry

# Read the declared contracts alongside the registry.
wildo context info resource-specifications

# Inspect the exposed specification artifacts.
wildo context info specification-artifacts

# Read creation state and cross-family coherence.
wildo context journey
wildo context coherence

The sequence is a set of read-only questions, not a generation or acceptance workflow. Its results help select the next action; they do not execute that action.

Turn retrieved context into an editing decision

The following is an illustrative reasoning record, not a captured response or an automatic decision made by the companion:

Information returnedWhat the agent should establish nextEffect on the change
The resource already declares an approval actionRead its specification and locate its implementationExtend that contract rather than create a competing action
A relationship connects the record to an owning projectInspect how the action receives and checks that contextKeep the change consistent with the declared ownership
The requested resource is absent from the queried modelCheck the selected service, source registration and emitted outputResolve the discrepancy before assuming the feature is missing

The companion supplies context; the agent makes the coding decision. Carry the relevant returned names, contracts and provenance into the editing task. Compare them with source files rather than treating either a partial file search or one model response as the entire application.

For selecting a service, supplying behavior input and reading the output format, follow terminal inspection. For creation-state and cross-family checks, use the dedicated journey and coherence queries described in the application context workflow.

Preserve the provenance when using an answer

The human/tool output includes a provenance line followed by a formatted payload. It is not a pure JSON stdout contract to feed blindly into a JSON parser.

For compiled-model queries, the CLI explains that unemitted source edits are absent. A response reporting servedFromCache: true establishes reuse of a held derivation; missing reuse information does not establish that a fresh subprocess ran. Journey and coherence answers have different source semantics, so keep the provenance attached when passing information into a coding task.

Read-only does not mean every HTTP request is GET

The introspection call used by context info is a read-only POST. The CLI supplies the machine-local token that the custom companion router requires for that request. This access contract is separate from production API permissions or human approval of a code change.

The wider context command family also contains other tools, including assurance-related commands. The companion-backed sequence above is not an exhaustive claim about every subcommand or about all of them requiring a running companion.

Turn the answer into a checked change

Use the returned names and contracts to ground the edit, then compile and test the relevant application behavior. Re-querying a registry can show that the expected declaration is exposed; it cannot show that the full operation works for a particular user’s role and data.

Inspect work and investigate results

See and guide application development Tool

A command can answer a focused question. Following a developing application also means seeing its structure, the work available and the results together.

The workbench brings those views into a local browser interface. It presents application artifacts and creation activity through Wildo’s own resource and display mechanisms, with actions connected to the companion’s development services.

Example: Review a result before choosing the next action

A developer opens the workbench to inspect a produced domain plan, checks the related creation activity and reads the resulting files. That context helps them decide whether to revise the product definition or continue implementation.

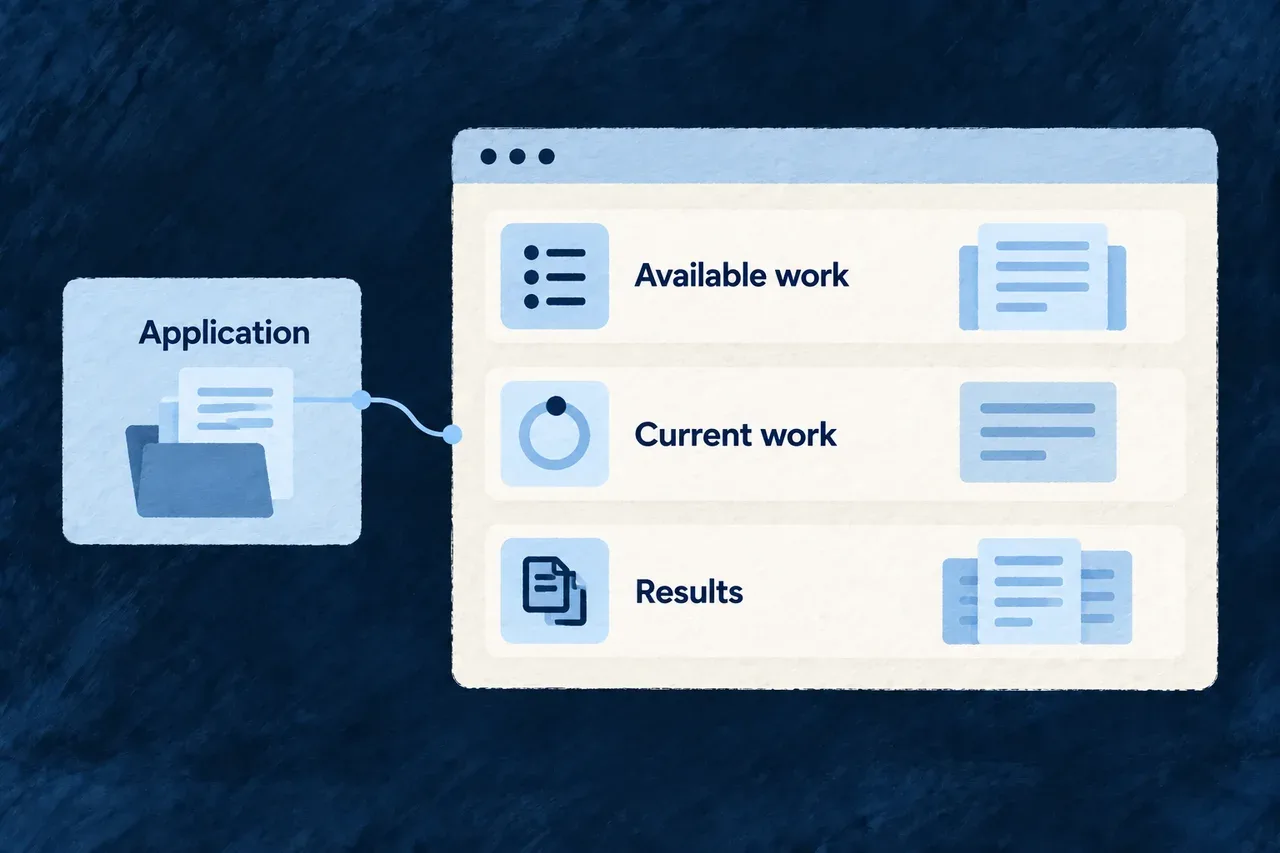
A workbench brings available work, current work and results together around the application.
For engineers
Open the workbench for the intended application

Run these commands from a configured application root using a local Docker Compose environment. The development command stays in its own terminal:

# Terminal 1: start the supervised local development environment.
wildo local dev

# Terminal 2: check the companion and discover its inspection views.
wildo context health
wildo context list

# Read the separate companion, semantic and frontend readiness fields.
wildo workbench status

# Open the application-specific local browser destination.
wildo workbench open

A successful status command means the status was read, not that every field says ready. Opening the URL does not start a missing frontend process. The workbench has its own local origin; its development server proxies /api and /health to the companion.

Reuse application contracts in the development interface

The workbench is an ordinary Wildo frontend. Its bootstrap supplies resource configurations, relationships and UI behavior to ApplicationMainProvider. This selected excerpt from the workbench’s main.tsx shows that connection; surrounding environment setup and the provider’s remaining options are omitted:

ReactDOM.createRoot(rootElement).render(
  <React.StrictMode>
    <ApplicationMainProvider
      options={{
        env: workbenchEnvironment,
        customShared_ResourcesConfigurationsFactoryMap: workbenchComposedResourcesConfigurationsFactoryMap,
        customShared_ResourceFieldIdentifier: workbenchComposedResourceFieldIdentifier,
        customShared_ResourcesRelationships: workbenchComposedResourcesRelationships,
        excludedResourceTypes: WORKBENCH_EXCLUDED_RESOURCE_TYPES,
        baseFrontendConfig: APP_STANDARD,
        resourceUIBehavior: workbenchModuleRegistry.resourceUIBehavior,
        // Additional shell options omitted from this reduced excerpt.
      }}
    />
  </React.StrictMode>,
);

The highlighted resource contracts define what the workbench can represent and connect. The UI behavior controls how those resources are presented. This is framework implementation evidence, not a new bootstrap the application author must copy.

Separate identity, resource actions and local commands
ConcernCurrent responsibility
Operator identityThe workbench authenticates against the platform identity store
Application usersBelong to a separate identity store; an application administrator role does not itself grant platform access
Creation actionsRegistered resource operations on the companion’s /api/v1 plane handle actions such as dispatch and reviewable changes
Remaining custom callsUse the companion router’s separate method/path policy
Product administrationRemains the business application’s own interface

Authentication establishes the operator’s identity; inspect each resource operation’s authorization and application context when evaluating access. Do not infer universal cross-application isolation from the login screen alone.

Read the result as well as its status

The workbench provides representations of specification artifacts and development activity. A completed activity is useful navigation into its output; it does not prove that the resulting application satisfies its requirements. Inspect the artifact or diff and the verification relevant to that change.

The execution trace explains recorded inputs and events. The companion interface explains how development surfaces reach their services.

Understand what happened inside a creation step Tool

When generated work surprises you, the output alone rarely explains why. You need to know what the step was asked, which context it received and what happened during the attempt.

Execution traces connect recorded events with larger artifacts such as input briefs and structured answers. They help you investigate a result without recreating the run from memory.

Example: Find the context behind an unexpected answer

A generated product definition omits an important constraint. The developer reads the recorded brief to check whether the constraint reached that attempt, then compares its answer and validation findings. Missing input and ignored input call for different corrections.

A creation attempt connects its brief, events and output in an inspectable sequence.
For engineers
See where tracing enters generation

This excerpt is from the generation loop in playbook-generation-run.application-creation.service.ts, with formatting expanded and commentary omitted. It shows an attempt’s event and saved brief; model invocation and validation follow it:

while (attempts < maximumAttempts) {
  attempts += 1;
  const prompt = attempts === 1
    ? output.brief
    : `${output.brief}\n\n# YOUR PREVIOUS ANSWER WAS REJECTED\n${rejectedFindings.at(-1) ?? ""}\n`
      + "Correct exactly those points. Everything else about the contract is unchanged.";

  await trace.event({
    type: PlaybookExecutionTraceEvent.GENERATION_REQUESTED,
    summary: `Ask the model for "${output.family}" (attempt ${attempts} of ${maximumAttempts})`,
    payload: {
      playbookRef: input.playbookRef,
      family: output.family,
      schemaRef: output.schemaRef,
      attempt: attempts,
    },
  });
  await trace.artifact({
    fileName: `${output.family}.attempt-${attempts}.brief.md`,
    content: prompt,
    format: PlaybookExecutionTraceArtifactFormat.TEXT,
  });
  // Model invocation and answer validation follow.

The retry brief includes the preceding rejection findings. The event’s family, schema and attempt identify the work being requested; the artifact stores the prompt that attempt receives. Those are related diagnostic records, not an extra acceptance state.

Read sessions and their artifacts
Read interfaceInformation returned
GET /api/companion/traces?limit=10A bounded list of recorded sessions
GET /api/companion/traces/:sessionIdThe selected session’s trace information
GET /api/companion/traces/:sessionId/steps/:stepDirName/artifacts/:fileNameA selected step artifact as text

The colon-prefixed segments are identifiers obtained from the preceding reads. The reader restricts their characters rather than accepting arbitrary filesystem paths. The session-list limit accepts integers from 1 to 200; omission uses its default.

Briefs are saved as Markdown; structured answers can be JSON. Do not assume every artifact is raw model prose, or parse the artifact route as a JSON response solely because its filename ends in .json.

Distinguish evidence of a run from correctness of its output
RecordWhat it helps establishFollow-up
BriefWhat was recorded as input to the attemptCheck the intended facts and constraints reached it
Events and findingsWhich stages and validation outcomes were recordedFollow the associated attempt and result
Answer artifactThe recorded generated contentCompare it with the landed files and requirements
Application verificationWhether the relevant behavior workedExercise the real operation or test

Tracing is optional and best effort. The default trace port discards events; companion integration supplies file-backed tracing for a request session. A missing trace does not prove that no work happened. A present trace is not an application audit log, a guarantee of successful publication or a replacement for verification.

Reach the same development services from your tools Tool

The terminal and browser need access to application inspection, creation work and its results. Those services belong to the companion, so each interface does not have to reconstruct the application’s development state independently.

Wildo exposes custom development endpoints alongside standard resource operations. The interfaces serve different callers while connecting them to the underlying development services.

Example: Start work, then inspect it visually

A developer requests creation work through the CLI and inspects its state in the workbench. The browser uses resource operations for its supported actions; it does not need to reproduce the CLI’s exact HTTP request to reach the related service.

Terminal and workbench tools reach companion services to read information and request actions.
For engineers
Choose the route by its contract
InterfaceTypical roleAccess policy to inspect
/api/companionBespoke development commands, authoring and diagnostic endpointsLoopback binding and the custom router’s local-token predicate
/api/v1Workbench resources, creation operations and frontend supportStandard engine controllers, identity and resource authorization

The companion’s custom controller is not its entire HTTP surface. Startup also mounts the resource and support controllers needed by the workbench. CLI and browser calls can use different routes to reach related services.

Understand the custom router’s local-token check

The following selected functions come from companion-token-floor.policy.ts. They show the decision at this router only; the constants and token validator are defined elsewhere:

export function companionRequestRequiresLocalToken(method: string, path: string): boolean {
  if (COMPANION_TOKEN_FLOOR_UNGATED_METHODS.has(method.toUpperCase())) return false;
  return !COMPANION_TOKEN_FLOOR_BROWSER_EXEMPT_PATHS.includes(path);
}

export function companionRequestIsAdmittedByTokenFloor(
  request: { readonly method: string; readonly path: string; readonly presentedToken: string | string[] | undefined },
  isValidToken: (presented: string | undefined) => boolean,
): boolean {
  if (!companionRequestRequiresLocalToken(request.method, request.path)) return true;
  return isValidToken(typeof request.presentedToken === 'string' ? request.presentedToken : undefined);
}

The first decision selects whether the request requires the token. The second validates one string header value when it does. Repeated header values are not searched for a matching token.

GET, HEAD and OPTIONS bypass this particular token check. Other methods require it unless the mount-relative path is one of the explicit browser exceptions: /playbooks/refresh-board, /compliance/governance-facts or /coding-agent/cancel. These are exceptions to this floor, not a claim that every browser action has the same authorization contract.

Let the CLI handle its local credential

The CLI reads the application’s machine-local companion token and attaches it to requests that need it. A read-only introspection operation can use POST and therefore require that token: HTTP method and business side effect are different questions.

Token possession establishes access to a local file, not a human approval or an application role. The resource-operation plane has its own identity and authorization checks. Keep these boundaries separate when adding an integration or diagnosing a refused request.

Discover an inspection contract before using it
# Is the companion serving this application?
wildo context health

# Which behaviors and service keys are available?
wildo context list

# Read one supported model view through the CLI client.
wildo context info resources-registry

Use the documented command or workbench operation for normal development. If implementing a client, inspect the exact endpoint’s request, response and error contract; there is no universal “every route is an unauthenticated read” or “every route is a resource operation” rule.

Build, run and inspect from one command line

The command line turns a development intention into a concrete project action: create a workspace, add a connected module, regenerate configuration or supervise local processes.

Each command works within its own scope. You can review a composition plan before writing files, choose which configuration outputs to refresh, and inspect the resulting application from the same terminal.

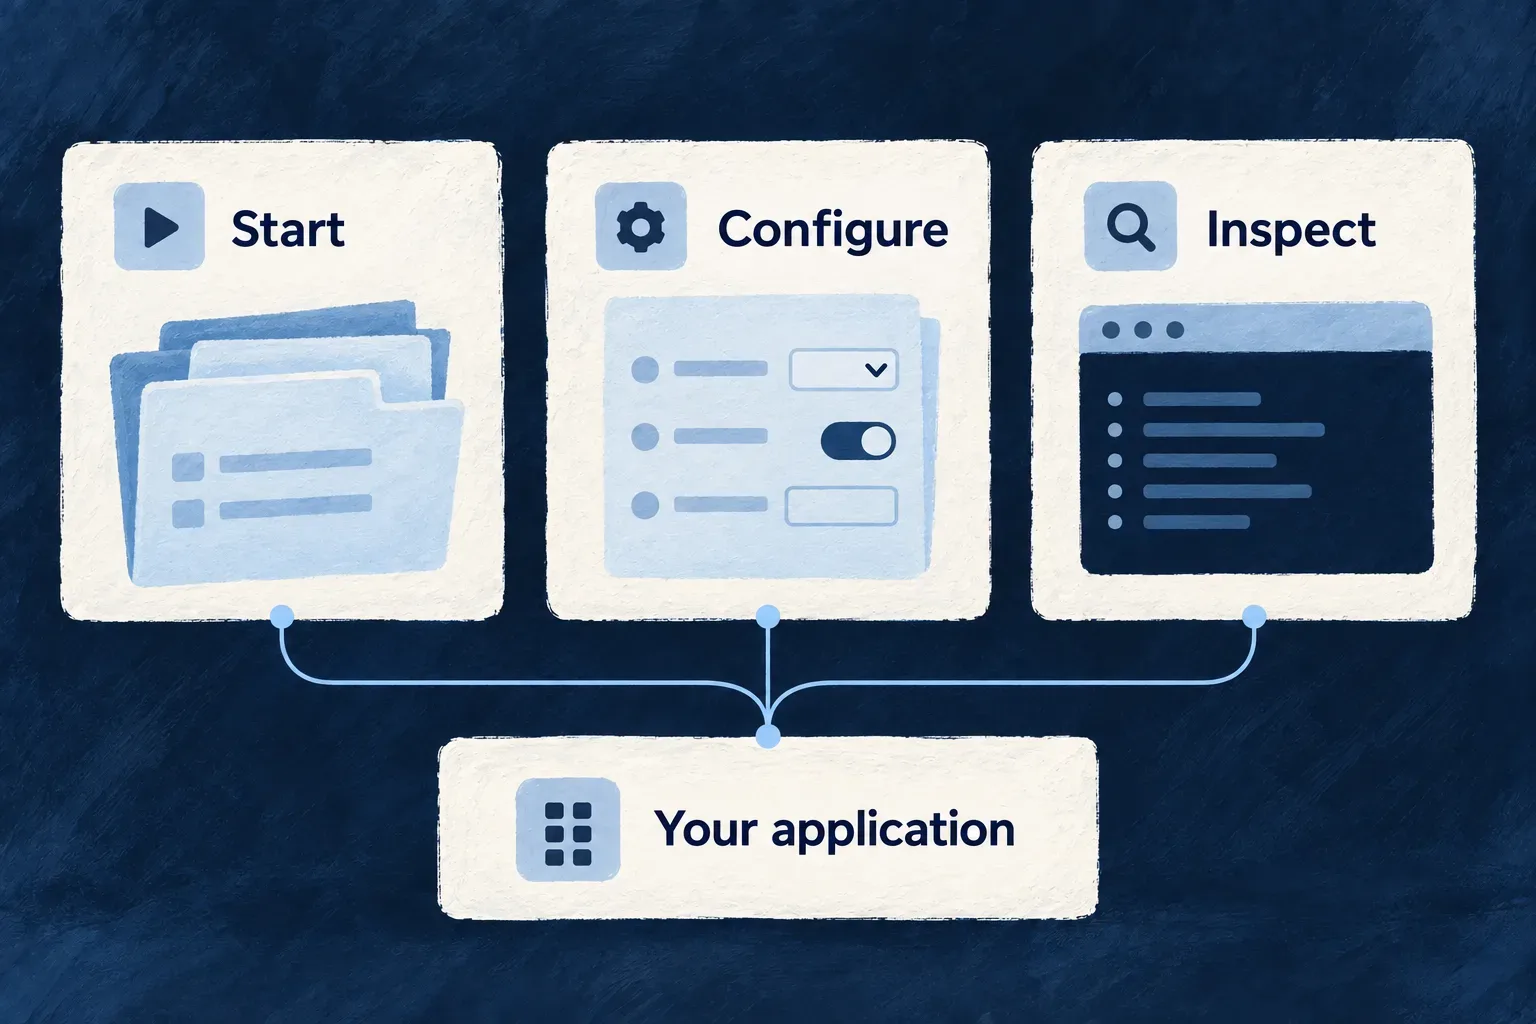
Starting, configuring and inspecting remain connected to the same application.

Know what each command changes

Review before adding source

Composition shows the files and registrations a scenario will add or edit. Review that plan before applying it to your application.

Choose the environment and outputs

Configuration commands select the environment and generated artifacts. Local lifecycle commands prepare and supervise development processes.

Read the result in context

Inspection commands name the companion, service and model being queried. Use that information to interpret the result before investigating the source.

Example: Change a module, then check the application

A team adds a module through composition or adopts one from the reusable module registry. After reviewing its source and registrations, it refreshes the affected configuration, runs development and inspects the resolved model. It then checks the new behavior through the application itself.

For engineers

Establish the application context

Run application commands inside the intended workspace. The CLI resolves that project’s configuration and environment; the companion serves its live development context. Registry discovery can happen before an application exists, but installing a module needs an application source tree to receive it.

The following is an illustrative inspection sequence after an integration change, using a local Docker Compose environment. The module’s files and required registrations have already been reviewed:

# Refresh derived files and check the configuration.
wildo config sync --env local
wildo config validate --env local

# Prepare infrastructure and start supervised development.
wildo local dev

# In another terminal, inspect the serving companion.
wildo context health
wildo context list
wildo context info resources-registry

The normal local sync selects configuration and environment-file generation. Choose additional output domains when needed. local dev prepares its supporting infrastructure, then supervises development processes; a context query needs the companion to be available. Use the live query menu for the behaviors supported by that application.

Choose creation, adoption or inspection deliberately

TaskToolResult to review
Create a new applicationwildo initWorkspace, declarations and delivered development knowledge
Add connected source structurewildo composePlanned new files and edits to existing registrations
Adopt published sourcewildo registry addInstalled module files, exact version and installation record
Refresh generated configurationwildo config syncSelected environment outputs
Run local developmentwildo local devInfrastructure readiness and supervised application processes
Inspect the applicationwildo context infoA selected behavior and service, with the companion’s reported provenance

Composition works from a scenario’s templates and edits. Registry adoption works from a published artifact and its declared paths. They support different reuse needs and do not replace one another.

Follow the changed inputs to their consumers

After adding source, verify its registrations and let the development tooling compile it. After changing configuration, regenerate the relevant outputs. After starting development, query the companion and exercise the affected behavior through its actual interface or API.

The companion reads compiled application exports for introspection and can reuse a held answer. Journey and coherence also use working-tree inputs. Check the query’s source line and let affected packages compile before treating an answer as evidence of your latest change.

These steps establish different facts. A generated configuration is not an applied release, and a listed resource is not a completed business flow. The capability guides below explain the command contracts and the evidence to inspect at each stage.

Create and extend the application

Start with a connected application workspace Tool

A new application needs more than empty folders. Its shared definitions, backend, interface and specifications must agree on how they fit together.

Wildo creates that starting structure with local environment configuration and development knowledge. You begin with the framework connected; your business objects, workflows and experience remain yours to build.

Example: Start a service-management application

Create a workspace for a service team, then add modules for customers and requests. The first command establishes the application’s shared structure; composition adds each business area as its purpose becomes clear.

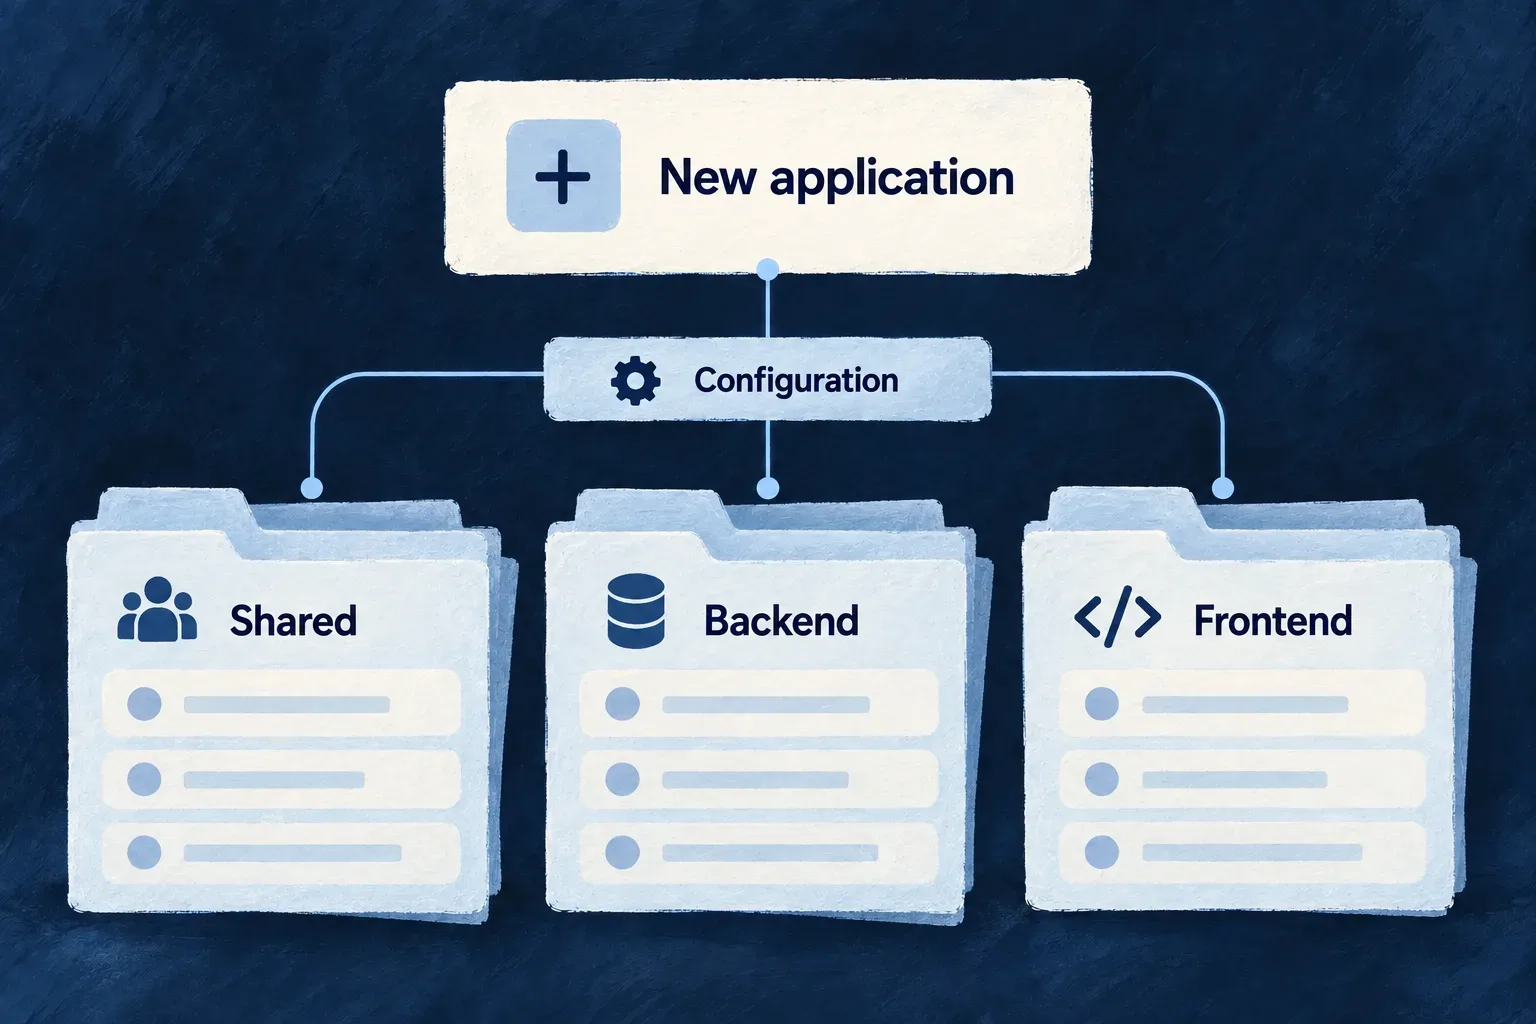
A new application workspace connects configuration with shared, backend and frontend source.
For engineers

From the empty directory that will become your application, this illustrative command sequence uses the shipped CLI flags. The administrator details are requested interactively; no credentials belong in the example or committed configuration.

wildo init --check
wildo init --name service-desk \
  --runtime docker-compose \
  --database postgresql

wildo align-deps --write
wildo assets sync
wildo config sync
wildo dev start

init --check verifies development tools without scaffolding. The ordinary init path renders files, installs dependencies and performs initial compilation unless --skip-install is selected. Follow the command’s reported next steps if installation or initial compilation needs attention. --config-only has a different purpose: it writes the application configuration rather than the complete skeleton.

Know which decisions the scaffold connects
Created elementIts role in the application
SpecificationsThe business and interface descriptions that guide implementation
Shared libraryResource definitions, relationships and shared contracts
Backend and frontendThe processes that consume those contracts
Infrastructure declarationsEnvironment and service choices used to derive process configuration
Workspace configurationPackage membership, TypeScript settings and dependency versions
Delivered framework knowledgeTemplates, references, skills and rules available to development tools

The generator derives dependency pins from framework metadata and development package lists from the workspace it actually creates. Framework-developer mode links to a checkout; application-creator mode uses published packages. The selected delivery mode changes dependency resolution, not the business role of each package.

Give each local application its own space

Initialization registers the local environment, provisions its secret material and allocates a port block by inspecting authored sibling application configurations under the framework checkout’s examples/ directory. --port-base supplies an explicit starting port when the workspace needs a deliberate allocation. It is still the operator’s responsibility to resolve unrelated processes already listening on a chosen port.

Administrator identity belongs to local initialization, not a reusable module. Optional --admin-email, --admin-first-name and --admin-last-name flags must be supplied together to bypass identity prompts. Keep passwords in the supported local secret flow; omit --admin-password to let initialization generate one.

Distinguish repair from regeneration

Re-running wildo init inside the application it created uses a repair path: it reuses administrator identity from usable saved secrets and backfills missing secret material without rotating existing credentials. If usable secrets are absent, it resolves the administrator identity again from supplied flags or interactive input. It does not overwrite your application with a fresh skeleton. Initial scaffolding refuses an unrelated non-empty target directory.

After a framework upgrade, dependency alignment and wildo assets sync refresh the delivered inputs. Configuration synchronization derives environment artifacts from your current declarations. A working platform registration is required for the deployment-related synchronization phase; it is separate from creating the local application structure.

Add a feature with its connections Mechanism

A module is useful when the application can discover and run it. Creating its files is only part of the work; its shared definitions, specifications and interface also need their registrations.

Composition scenarios describe these changes together. Preview the planned files and edits, apply them, then develop the new piece as application-owned code.

Example: Add a customer-support module

A support module starts with connected places for its shared definitions, business specifications, backend implementation and interface. The scenario registers that structure; you then add the request resources and the behavior your team needs.

A feature addition connects source code, module wiring and specifications.
For engineers

Run wildo compose inside an application to discover its available scenarios. The following is an illustrative add-module invocation using every required variable from the shipped manifest. Replace @service-desk/shared-lib with the actual shared-library package name.

wildo compose
wildo compose add-module \
  --var moduleId=customer-support \
  --var moduleCamel=customerSupport \
  --var modulePascal=CustomerSupport \
  --var 'purpose=Organize customer requests and their resolution' \
  --var 'businessCapability=Resolve customer requests' \
  --var businessDomain=customer-service \
  --var sharedLibPackage=@service-desk/shared-lib \
  --dry-run

The preview lists file writes, declared edits, already-present elements and conflicting files. It includes required engine peer declarations and applicable provider overrides, showing dependency names and values alongside the affected paths. Review that plan, then repeat the same invocation without --dry-run to apply it. Required variables and naming patterns are validated before planning the file changes.

Follow one module through the application

Example: the customer-support module produced by the command above, using the shipped skeleton layout with backend-api, frontend, shared-lib and specifications packages. The scenario creates a connected starting point. It does not implement a support feature: the initial resource, operation and view registries are empty.

You supply the module identity and business purpose. The scenario renders its descriptors and edits the host registrations below. The framework then consumes those registrations; your application code supplies the resources and behavior you add afterward.

Give the shared model one module identity

In shared-lib/src/modules/customer-support/index.ts, the generated descriptor connects the module’s field identifiers, resource configurations and relationships. The imports point to registries created alongside it:

import type { SharedSaaSModule } from '@wildo-ai/saas-models';

import { CustomerSupport_ResourceFieldIdentifier } from './resources/customer-support.resources-types';
import { moduleResourcesConfigurationsFactoryMap } from './resources/customer-support.resource-configs';
import { moduleResourcesRelationships } from './resources/customer-support.relationships';

const customerSupportModule: SharedSaaSModule = {
  moduleId: 'customer-support',
  kind: 'domain',
  resourceConfigurations: moduleResourcesConfigurationsFactoryMap,
  resourceFieldIdentifiers: CustomerSupport_ResourceFieldIdentifier,
  resourceRelationships: moduleResourcesRelationships,
};

export * from './resources';
export default customerSupportModule;

The identity is customer-support in every layer. Adding a resource later fills these registries; naming a module alone does not create an API or a form.

Keep the business meaning alongside the model

The specification declaration in specifications/src/modules/customer-support/index.ts explains the purpose behind the module. This selected declaration uses the variables supplied to the scenario:

import {
  type ModuleBusinessSemantics,
} from '@wildo-ai/saas-specifications';

export const customerSupportModuleBusinessSemantics: ModuleBusinessSemantics = {
  relatedModuleId: 'customer-support',
  purpose: 'Organize customer requests and their resolution',
  businessCapability: 'Resolve customer requests',
  businessDomain: 'customer-service',
  primaryActors: [
    'organization member',
    'organization admin',
  ],
  mainResources: [],
  supportingResources: [],
  integrationSurfaces: [],
};

The empty resource lists are intentional at this stage. As resources are added, the specifications explain which are central to the module and how they support its purpose.

Connect interface contributions and backend behavior

In frontend/src/modules/customer-support/index.ts, the generated frontend descriptor collects resource UI behavior, composite views and shell contributions:

import type { FrontendModule } from '@wildo-ai/saas-frontend-lib';

import moduleResourcesUIBehavior from './resources/index.js';
import moduleAppLevelViewsCompositeViews from './app-level-views/index.js';
import moduleAppShellModuleConfig from './app-shell.module.frontend.js';

const customerSupportFrontendModule: FrontendModule = {
  moduleId: 'customer-support',
  resourceUIBehavior: moduleResourcesUIBehavior,
  compositeViews: moduleAppLevelViewsCompositeViews,
  ...moduleAppShellModuleConfig,
};

export default customerSupportFrontendModule;

The shell contribution starts with an empty navigation group. Creating this descriptor does not add a customer-support screen; actual resources and view contributions provide the visible experience.

The backend has a different owner. backend-api/src/modules/customer-support/index.ts supplies the descriptor discovered by the existing backend directory scan:

import type { BackendOwnedModule } from '../../backend-owned-module.js';
import moduleResources from './resources/index.js';

const customerSupportBackendModule: BackendOwnedModule = {
  moduleId: 'customer-support',
  kind: 'domain',
  backendModule: moduleResources,
};

export default customerSupportBackendModule;

backendModule starts with the module’s empty resource-operation collection. Later additions supply implementations here; the module directory is the discovery boundary.

Register the module in the host that will use it

These are selected resulting declarations from separate files, not one file to paste over the application’s existing registries. The scenario adds the corresponding imports and preserves existing entries.

// shared-lib/src/modules-registry.shared.ts
export const applicationSharedModules: SharedSaaSModule[] = [
  customerSupportModule,
];

// specifications/src/module-registry.specification.ts
export const applicationModuleBusinessSemantics: ModuleBusinessSemantics[] = [
  customerSupportModuleBusinessSemantics,
];

// frontend/src/modules/index.ts
export const applicationFrontendModules: FrontendModule[] = [
  customerSupportFrontendModule,
];

// wildo.saas.config.ts — the service keys in this skeleton
export const applicationModules = {
  'customer-support': { services: ['backendApi', 'app'] },
};

The shared registry includes the module in the model, the specification registry includes its business meaning, and the frontend registry includes its interface contributions. The service binding declares which configured services use the module. Source registration and service selection answer different questions; both matter.

Backend discovery already exists in backend-api/src/modules/index.ts. This selected existing code scans child module exports and assembles their backend contributions; the scenario does not append a separate backend array entry:

const applicationBackendOwners = await scanSubdirDefaultExports<BackendOwnedModule>({
  importMetaUrl: import.meta.url,
});

const applicationBackendDomainModules: BackendDomainModule[] = applicationBackendOwners.flatMap((ownedModule) =>
  ownedModule.backendModule ? [ownedModule.backendModule] : []
);

const backendModules = mergeBackendDomainModules(...applicationBackendDomainModules);
Carry the registration into the companion’s observed model

The shared package’s existing companion-exports.ts already loads the assembled sharedModules. This loader stays unchanged when the scenario adds the module upstream:

async function loadSharedCompanionData() {
  return import('./modules-registry.shared.js');
}

export async function loadSharedModules(): Promise<SharedSaaSModule[]> {
  const { sharedModules } = await loadSharedCompanionData();
  return sharedModules;
}

The existing sharedCompanionExports object exposes loadSharedModules. The package’s ./companion entry points to the emitted companion surface. Let the application’s development watchers compile the changed packages, then synchronize changed configuration for the selected environment. The companion resolves the requested service and the targets required by that introspection behavior; it does not infer them from a newly created directory.

Use the running companion’s menu to choose a service key and an available behavior:

# Discover the actual serving surface and its supported queries.
wildo context health
wildo context list

# In this skeleton, backendApi is the backend service key.
wildo context info resources-registry --service backendApi
wildo context coherence

These are verification commands to run in your application, not captured output from a deployed support feature. A health response establishes availability. An empty new module contributes no resources to resources-registry, so the absence of a support resource is expected until one is declared. Once a resource and its behavior are added, check their presence in the resolved model and exercise the actual API or screen. A successful compilation or coherence report alone does not demonstrate that business flow.

Choose the right scenario boundary
InputWhat it controls
Scenario manifestRequired variables, generated file paths and edits to existing files
Template file treeInitial application-owned implementation files
Structured TypeScript editsImports, registrations, enum members and configuration entries
JSON and package editsWorkspace or dependency declarations needed by the new piece
Post-apply notesFollow-up steps, such as adding resources or allowing watchers to compile changes

Scenario selection is per reference: an application-delivered scenario takes precedence over the same reference in the framework checkout. References found only in the checkout remain available as a fallback. add-module supplies a connected empty shape; add-resource adds its business records afterwards.

Keep later edits under application ownership

Planning skips byte-identical generated files and edits whose required elements are already present. A generated target with different content becomes a collision, and apply refuses that plan before starting its writes. Reconcile deliberate application changes through version control rather than expecting a scenario to merge them.

This preflight protects against known conflicts; applying a plan performs filesystem writes sequentially. Keep the change reviewable in version control, including recovery from an interrupted write or a later post-apply failure. After a successful addition, let the development watchers compile the affected packages and synchronize configuration when runtime bindings change.

Configure and run development

One command line for application work Tool

Wildo brings application setup, configuration, local operation and inspection into one command line. Each command understands the workspace it operates on, so the application’s declared structure carries into everyday development work.

Developers and coding agents use the same commands. Built-in help exposes the available operations and their options; the application’s business code remains yours to write.

Example: Move from a configuration change to a running application

After changing an application’s configuration, a developer refreshes the generated files, checks the local environment and starts a development session. The same tool can then ask the running companion what the application exposes.

The wildo command line leads to creating, configuring and running an application.
For engineers

Start with the installed tool’s own help. The listing is derived from registered command metadata, including descriptions, arguments and flags.

# Discover commands and inspect a specific operation.
wildo help
wildo config sync --help

# Inspect the local and live-context command contracts.
wildo local dev --help
wildo local doctor --help
wildo context info --help

Command availability depends on workspace scope. Run application commands from that application’s workspace; framework-maintenance commands additionally require a framework checkout. A command unavailable in the current scope reports why instead of attempting to operate on an unrelated directory.

Keep the stages of application work distinct
WorkCommand familyWhat it operates on
Refresh derived configurationwildo configAuthored application and environment declarations
Run and inspect development infrastructurewildo localThe selected local environment and supervised application
Query application knowledgewildo contextCompanion-backed inspection, plus named local authority/configuration checks
Compose reusable partswildo composeApplication composition and its declarations
Work with reusable moduleswildo registryModule discovery, installation and publication

context health, list, info, coherence and journey query the companion. context jurisdictions and context assurance-basis inspect local configuration, specifications and installed authority definitions without it. Those local checks are separate commands, not fallbacks for a failed companion request.

These families share the CLI context, but their effects differ. A context query reads; configuration sync writes generated artifacts; a lifecycle command starts or stops processes. Consult the specific command’s help when automating it rather than assuming every family accepts the same flags.

Understand what the tool automates

Commands declare a phrase-shaped name such as config sync. The registry resolves the longest matching command name, which supports nested command families without a separate parser for each one. Discovery loads command files, and duplicate names fail instead of allowing one implementation to silently replace another.

The tool coordinates framework-owned operations. It does not turn artifact generation into a deployment: config sync produces deployment inputs. Generated workflows build images; the Kubernetes workflow also applies manifests, while Compose rollout requires your host-transfer and deployment steps. Application behavior, release review and the operating environment remain explicit decisions.

From a configuration change to an application query

Use one application workspace and its configured local Docker Compose environment. First inspect the command help, validate the declaration, synchronize derived files and read the diagnosis:

# Discover the flags supported by this installed command.
wildo config sync --help

# Check, regenerate, then diagnose the local environment.
wildo config validate --env local
wildo config sync --env local
wildo local doctor

Resolve reported failures before starting wildo local dev in that terminal. If a development session already owns the workspace, use it rather than creating a second owner. From a second terminal in the same application, run wildo context health, then wildo context journey to inspect eligibility and work in flight. Health establishes reachability; the specific query and compiled-output freshness establish what application information is available.

Keep delivered assets aligned with their source

wildo assets sync replaces the framework-owned template mirror under .wildo-saas/templates/; keep application customizations out of that replaceable mirror. Templates follow the CLI’s framework assets. Documentation, skills and rules instead come from the application’s installed @wildo-ai/framework-knowledge package.

If the command reports version skew, align the CLI installer with the application’s knowledge-package version using its reported --cli-version value, then run wildo assets sync again. Synchronizing assets does not upgrade the CLI. A missing knowledge package requires installation before its documentation and skills can be delivered.

Carry configuration changes into generated files Tool

One application definition feeds several working files: process settings, service connections, container manifests and deployment workflows. Wildo refreshes those outputs together, in the order their dependencies require.

Change the authored configuration, then synchronize it. This keeps generated files aligned without asking developers to repeat the same decision in each format.

Example: Change a service connection once

An application changes where a backing service runs. Synchronization reconciles the environment declaration, prepares required secret material and regenerates the affected connection settings and deployment artifacts.

Authored configuration feeds environment settings, service configuration and runtime files.
For engineers

Run these commands from an application workspace with its environment configured. The first command performs the normal sync for the local environment. The narrower command refreshes process environment files when that is the only output needed.

# Refresh the normal set of derived outputs.
wildo config sync --env local

# Or select a specific output domain.
wildo config sync --env local --domain env-files

# Check configuration and, for Kubernetes, rendered manifests.
wildo config validate --env local

The --env value is your configured environment name. Generated CI workflows build images. The Kubernetes workflow also applies manifests; the Compose workflow leaves host transfer and rollout to your deployment setup. Generating these files does not itself deploy the application.

Know which outputs are regenerated
Sync domainPurpose
env-filesPer-process environment files and their derived service connections
configEnvironment deployment artifacts, including runtime-specific configuration
manifestLocal Docker Compose or Kubernetes manifests; remote environments are skipped
cicdDeployment and configuration-validation workflows
secretsExplicit secret rotation, requiring separate authorization

The normal local selection is config and env-files. Select manifest or cicd explicitly when regenerating those outputs; CI adds workflow generation when an application root is available. Provider runtime artifacts are synchronized through the same application generation path.

Missing framework-managed material is provisioned additively before dependent generation; existing material is not rotated merely because new configuration needs another secret.

--force permits overwriting generated files without the normal confirmation. It does not authorize secret rotation: that requires --rotate-secrets. Changing the initialized platform’s database engine is also a separate decision, not a consequence silently authorized by --force.

Separate authored changes from regeneration

config sync projects declarations into generated outputs. config mutate changes supported existing values in the application declaration, with a dry-run option. These are the actual command forms for changing a service’s local port; use a service key present in your application:

# Preview a proposed declaration change.
wildo config mutate set-service-port --service main_backend_api --port 4302 --dry-run

# Apply that declaration change after reviewing it.
wildo config mutate set-service-port --service main_backend_api --port 4302

This is an illustrative port choice, not a required Wildo port. Mutations reject unknown paths and name the failing segment. Regenerate relevant outputs after changing the declaration. config reapply-declaration handles another job: refreshing declaration-managed application configuration stored on the platform, without recreating its credentials or data.

Read validation at the right level

Validation checks configuration coherence. For Kubernetes, the default manifest check renders infrastructure and platform manifests into a temporary sandbox and parses them. For other runtimes, it reports a successful skip; this is not a Docker Compose render/parse check.

For an environment configured to use Kubernetes, check the application’s deployment artifacts after generating them. The example uses an environment named local; choose the registered environment that owns your output:

# Inspect the application Kubernetes output already written by sync.
wildo config validate --env local --domain manifest --deployment-artifacts

This reads the generated application manifests and reports missing output rather than regenerating it. Neither validation mode applies anything to a cluster. Application deployment generation has its own platform and registration prerequisites; if sync reports that generation was skipped, a successful sandbox check does not establish that application workloads were produced.

In CI, --ci changes the credential source to the pipeline’s flat environment variables. It does not change the deployment output directory. Treat generated secret-bearing files as derived private output, not as a replacement for the authored configuration.

Keep local overrides outside generated files

The frontend’s .env and .env.example are both generated. Put deliberate frontend-only overrides in .env.local, which Vite reads with higher precedence and this generator leaves alone. Do not carry that filename rule over to unrelated backend or specialized outputs.

For the env-files domain, existing files require confirmation unless --force is given. Declining, or running non-interactively without force, can skip that environment successfully. Read the reported writes and skips; a successful exit does not mean every existing file was regenerated.

Recover from a failed synchronization

A synchronization can leave successful phase writes in place when another phase fails. Read the phase outcomes and the named error, fix its cause, then retry the needed domain. Exceptions or prerequisite failures may return before the final phase summary.

For example, after correcting an env-file problem, use wildo config sync --env local --domain env-files. This narrows the requested output, but can still perform prerequisite configuration reconciliation, missing-material provisioning and provider-runtime refresh. It is not a rollback or a promise to touch only one file. Inspect the result before restarting consumers.

Run and recover your local workspace Tool

Wildo coordinates the supporting services and application processes needed for local development. Startup checks the environment and waits for dependencies before launching the work that relies on them.

When something is wrong, inspection, repair and reset are separate actions. You can diagnose the workspace or repair its setup while keeping local data, and choose a fresh start deliberately.

Example: Resume work after an interrupted session

A developer checks the workspace after a machine restart, reads the diagnostic result and starts a new supervised session. If setup needs repairing, initialization restores the local environment without deleting backing-service data.

A local stack groups database, queue and storage services with start, status and stop controls.
For engineers

From the application workspace, use this supervised sequence with a local Docker Compose environment. The inspection commands are independent reads; run them in another terminal while the session remains active.

# Own the development session in this terminal.
wildo local dev

# In another terminal, inspect what is running.
wildo local status
wildo local doctor

local dev claims ownership before replacing stale root-scoped processes, checks startup prerequisites, prepares infrastructure and waits for readiness. Application runtimes start after their prerequisites. The supervised session is more than a command that launches several processes simultaneously.

local dev-status adds build, runtime-gate, supervisor and endpoint detail when a framework checkout and its diagnostic collector (local-dev-status.mjs) are available for the targeted application. It is not a prerequisite for ordinary status and doctor inspection. local status addresses infrastructure status. local doctor combines shared startup preconditions with runtime diagnostics, so a health problem can be located at the appropriate layer.

Choose the effect on processes and data
CommandIntended resultEffect on local data
wildo local upBring supporting infrastructure upRetains existing backing data
wildo local downStop local infrastructure and platform servicesRetains backing data
wildo local initInitialize or repair setup and registrationPreserves backing-service data
wildo local reinitRecreate the local setup in framework-developer modeWipes local data before rebuilding; unavailable in application-creator mode
wildo local resetStop and clear the local environmentWipes local data; leaves startup as the next step

Reset and reinitialization require destructive confirmation. They are not backup or restore operations. The shared data-wipe path is used for both supported local runtime lanes so removing containers or volume handles is not mistaken for removing their underlying host files.

Diagnose before changing the workspace
# Read the diagnosis, including structured output when needed.
wildo local doctor
wildo local doctor --json

# Read infrastructure logs; optionally name a service.
wildo local logs

The doctor reports findings; it does not kill orphaned watchers or repair stale files. Its checks distinguish prerequisites from observations that require a running stack. A stopped daemon can therefore be reported alongside another actionable environment problem.

If the intent is to stop the whole development stack, wildo dev stop-all combines development-process cleanup with infrastructure shutdown. wildo dev force-stop targets development processes, including orphaned root-scoped watchers. These are explicit mutation commands, separate from the diagnostic reads.

The lifecycle commands operate on local development. Remote environment deployment has its own generated artifacts and pipeline; a healthy local session is not evidence that a remote release has been applied.

Initialize without interrupting another owner

local up brings infrastructure up. local init also converges setup, application registration and generated runtime environment files, then checks the registered application’s managed configuration. Runtime targets are derived from the same prepared registration snapshot. This postcondition is narrower than proving every application process or business workflow healthy.

Full initialization can stop processes and refuses while a live development session owns the shared platform. Stop that owner first when full convergence is needed. If the platform is already running and only this application needs registration, use wildo local init --register-only; it reconciles the application without rebuilding the shared infrastructure. Preserving backing data does not mean preserving running processes.

Inspect the application you are changing

Inspect what the running application exposes Tool

Ask Wildo about the application’s resources, specifications and relationships from the terminal. The development companion answers from the application it serves, giving developers and coding agents a shared way to inspect its structure.

The available questions come from the running companion itself. Answers identify the companion they came from and report reused results when that information is available. Introspection reflects built application packages; recent source edits need to be compiled before they can appear.

Example: Check what a newly composed module exposes

After adding a resource, a developer queries the service expected to expose it. If the declaration is missing from the returned registry, they check the selected service, registration and compilation before debugging the resource’s business behavior.

The result narrows the investigation: a missing declaration and a declared operation that fails at runtime are different problems.

A terminal query reaches application resources, operations and relationships through the companion and returns an answer.
For engineers

Run from an application workspace whose development companion is running. These are actual command forms, not a simulated response:

# Check the companion and read its current query menu.
wildo context health
wildo context list

# Ask about the application's resolved resources and specifications.
wildo context info resources-registry
wildo context info specification-artifacts

# Inspect cross-family coherence.
wildo context coherence

context list fetches behavior identifiers, supported service kinds and service keys from the companion. It does not keep a second catalogue in the CLI. This matters when the installed command line and companion were built at different times.

Target a service and supply the behavior’s input

context info accepts --service to select a service key published by the menu. Without it, the CLI uses the companion’s reported default backend. If no backend is reported, the command asks for an explicit service instead of guessing.

For a parameterized behavior, --input supplies JSON. Select the behavior and its expected input from the live menu and the corresponding contract. Invalid JSON is rejected before the introspection request.

The client’s request is a selected excerpt from ContextInfoCommand, with its response type annotation omitted; input parsing and service selection happen before it:

const result = await CompanionClient.post(
  '/api/companion/_meta/introspect',
  { serviceKey, behavior, ...(input !== undefined ? { input } : {}) },
  options,
);

This POST asks for a derivation. The context family is read-only: it does not apply a configuration change or repair a reported inconsistency.

Read a concrete output without overstating it

This illustrative source line follows the CLI’s formatter. The address and service key are examples, not a captured run. The application-specific payload follows it:

source: dev-companion http://localhost:4302 · introspection resources-registry on backend · freshness: compiled application packages; companion reused a held derivation
Part of the answerWhat it tells the developerNext check
Companion addressWhich local process answeredConfirm it belongs to the intended application
resources-registry on backendWhich model and service were selectedCompare with the service that should expose the resource
Held derivationThis answer reused a successful derivationCheck compilation and reported freshness after an edit
Resource declaration in the payloadThat declaration is exposed in this modelExercise the operation with its real inputs and permissions

An absent resource calls for a service, registration and compilation check. A present resource shifts the investigation toward its configuration and actual behavior. Neither result is a substitute for running the feature.

Interpret the answer and its provenance

The CLI prints a source line identifying the companion address and queried surface, followed by plain text or pretty-printed JSON. Introspection materializes application packages through their compiled ./companion exports. A source edit must reach those emitted surfaces before an answer can reflect it; the terminal’s source label is not proof that an unbuilt change is already available.

For the connected module example, the new shared descriptor reaches the companion through the existing shared-registry loader. Its initial resource registry is empty: a resource query cannot prove or disprove that empty module’s registration merely by looking for a support resource. After adding a resource, check its resolved declaration and service context, then verify the behavior through the application.

The companion can reuse a successful held derivation or join an identical derivation already in flight. Its watcher observes emitted application files and injected framework bytes, triggering refresh when those inputs change. Without an active watcher, per-read observation provides the fallback. A query therefore need not spawn another subprocess to answer the same question. Journey and coherence reads combine specification exports with working-tree file and Git state. Their provenance therefore differs from a resource introspection result; neither header establishes that every source edit has compiled.

Introspection provenanceHow to read it
Reuse reportedThe companion explicitly marked the answer as a held derivation
Reuse not reportedThe response did not establish whether a held answer or a new derivation supplied it
Unverified after failureNo successful answer is available to use as application evidence

Use the reported service and behavior to identify what was inspected. A successful answer establishes that result, not the freshness of unrelated packages or the success of the business feature.

QuestionCommandInterpretation
Is the companion available?context healthCompanion health response
What can this companion answer?context listThe serving behavior catalogue
What does this application expose?context infoThe requested introspection result
Do related definitions remain coherent?context coherenceThe report, printed without condensing away findings
Where does the creation journey stand?context journeyEligibility counts and reasons, running work and interrupted count

The output includes provenance text as well as structured payloads; a consumer should not treat the entire stdout stream as a bare JSON document. Catalogue and journey reads have a bounded read timeout, while subprocess-based introspection has a longer one.

A companion failure is reported with a direction to context health; there is no fallback to a CLI-authored approximation of the application. Coherence reporting explains problems but does not itself block a release or mutate the definitions.

Less repeated setup. More attention to your application.

The CLI turns project declarations into practical development actions. The companion makes the application’s resolved model available to the tools working on it.

Their value is in the connection: create a piece, carry its configuration through, and inspect what the application now exposes. Your team owns the behavior and verifies the result.

Building a B2B product or an internal tool?

Wildo is not self-service yet. Tell us what you have in mind and we will say plainly whether it fits, and what happens next.